JasonPortwood
New member
I bought a few of those blow mold light covers. There around 10"-13" high and come in many flavors. Noel candle, Santa, Snowman, Nutcracker, etc... Basically mini versions of the bigger blow molds that fit on top of Toro or Malibu yard lights. I bought them because I like to use a line of lighted characters for the walk way but I always end up disappointed because they often break. I don't have those yard lights in my yard though so I have to make them work ala DIY ") .
.
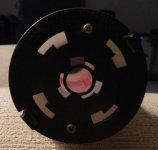
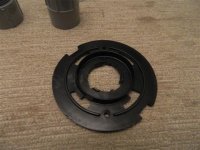
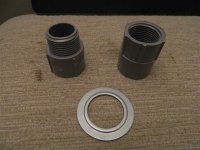
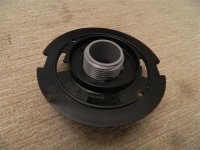
My plan is to get some PVC pipe for the base to lift them up off the ground. Then put a flange on top of that pipe to mount the blow bold to. I would go with white pipe and just paint it to brighten it up then add red tape on it for the candy cane look.
Now the question is lighting these.
I'd put a C9 or maybe a C7 LED inside each one. I tested a sun white LED C9 and it worked really well. C7 may work better because they are small.
For the cord I'm thinking I could go one of two ways:
Use white SPT wire. Drill holes in the PVC pipe near the tops and just thread through each pipe and loop wire up into the blow mold for the socket. I would fix it so the flange can have the blowmold be adjustable so I can line them up since the wire would dictate the facing because of the holes and the cable aligning to the direction.
The wire would then span between each character of the ground. I could put red tape on the wire but that may not be too noticable. Just a thought on that.
OR
Use green SPT wire. Run a line along the run on the ground for each post and put in a female tap for each one on that line. Then make a short cable with just a socket on it (along with the proper ends) for each post with a hold near the bottom of the PVC pipe for the cord to come out. I don't like the idea of using all the connectors but it would work and be way more modular.
I think my second way is better and less work but is there another way I haven't thought of?
Or would there be a way to use less connectors that's safe on the second way? I would probably want to keep the taps but maybe just put end caps instead of using another female vampire end inside the pipes where it would never be used.
Thanks
Jason
.My plan is to get some PVC pipe for the base to lift them up off the ground. Then put a flange on top of that pipe to mount the blow bold to. I would go with white pipe and just paint it to brighten it up then add red tape on it for the candy cane look.
Now the question is lighting these.
I'd put a C9 or maybe a C7 LED inside each one. I tested a sun white LED C9 and it worked really well. C7 may work better because they are small.
For the cord I'm thinking I could go one of two ways:
Use white SPT wire. Drill holes in the PVC pipe near the tops and just thread through each pipe and loop wire up into the blow mold for the socket. I would fix it so the flange can have the blowmold be adjustable so I can line them up since the wire would dictate the facing because of the holes and the cable aligning to the direction.
The wire would then span between each character of the ground. I could put red tape on the wire but that may not be too noticable. Just a thought on that.
OR
Use green SPT wire. Run a line along the run on the ground for each post and put in a female tap for each one on that line. Then make a short cable with just a socket on it (along with the proper ends) for each post with a hold near the bottom of the PVC pipe for the cord to come out. I don't like the idea of using all the connectors but it would work and be way more modular.
I think my second way is better and less work but is there another way I haven't thought of?
Or would there be a way to use less connectors that's safe on the second way? I would probably want to keep the taps but maybe just put end caps instead of using another female vampire end inside the pipes where it would never be used.
Thanks
Jason


.JPG")
.JPG")
.JPG")
.JPG")