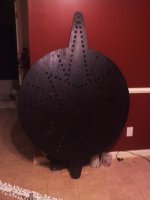
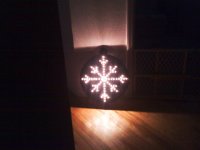
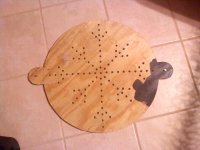
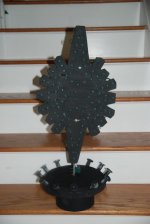
Was wanting to make a cut-out star to go on top of our chimney for the display. I am wanting to use mini-lights for this project. I was originally wanting to use 1/4" plywood to cut out of and just drill hundred of small holes for the lights (lots of work I know....). We then had the idea to use pegboard as the starting point and possible even drilling additional holes within the board. I'd like to have 3-4 100count mini-light strands and be able to 'sparkle' the star with the four channels.
I have attached a few different designs that I drew up. I like the Bethlehem star look the best. My question: has anybody tried a similar project such as this using mini lights? Suggestions? Comments?


I have attached a few different designs that I drew up. I like the Bethlehem star look the best. My question: has anybody tried a similar project such as this using mini lights? Suggestions? Comments?
")