7' Singing Snowman
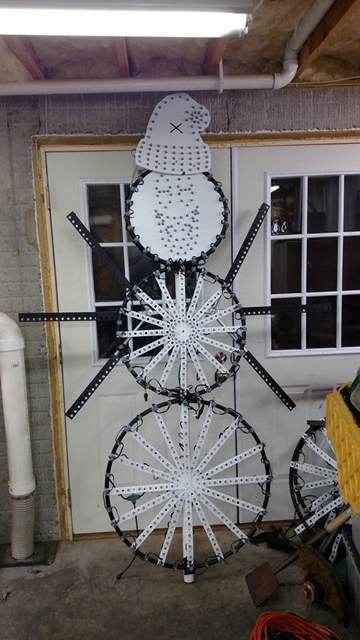
Building on the method I used for the StarFlake Spinner, I am adding two 7' Singing Snowmen to my Display.
Bill of Materials
ADS Polyethylene Coil 3/4" 100 PSI pipe - (approx 20 Feet)
3/4-in Dia Coupling Plastic Coil Fitting (3)
2" Sched 40 PVC Pipe - (10 Feet)
2-in x 1-1/2-in dia PVC Schedule 40 Double Sanitary Tee Fitting - (1)
2" dia PVC Cap Fitting - (1)
2" to 3/4" PVC adapter - (2)
ProConnex 3/4-in EMT Connectors - (2)
Metallic 3/4" Emt 10-ft Conduit - (2)
Boscoyo Pixel Strips - (approximately 6)
Boscoyo ChromaTrim - (4)
Zip Ties - 4" - hundreds, 8" - a lot, 11" - more than you might think
Boscoyo ChromaFace - (1)
Boscoyo ChromaHatMatrix Small - (1)
I started my design by creating a Custom Coro face and hat, I worked with Boscoyo Studios to have these produced. They now have both available on their website the ChromaFace [1] and ChromaHatMatrix Small [2].
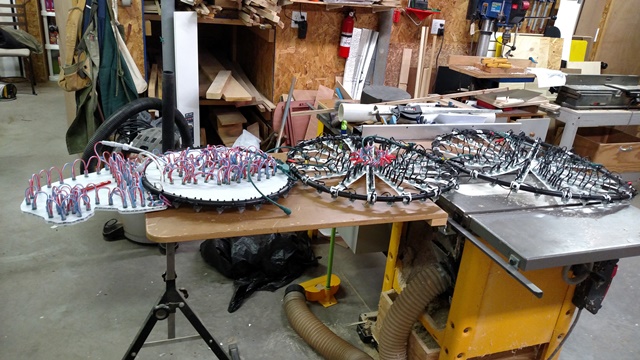
I then built the head and two spinners using 3/4" ADS plastic water pipe 100 PSI, and Boscoyo Pixel Strips. The head was designed to have an 18" opening to fit the ChromaFace, spinner 1 (middle section of the body) to be 24", and Spinner 2 (lower body) to be 30" in diameter each. When you are calculating the circumference for each section of pipe keep in mind the formula C=π*d calculates to the center of the pipe. If you want the opening to be 18" exactly, you need to calculate for a circle of 18 + dia of pipe, or in this case 18.75", 24.75", 30.75". This requires the ADS to be cut to 59", 77.75", and 94.25" approx. Each length of the tube is joined into a circle with the Coil Pipe Coupler. I found it easier to heat the ADS with my heat-shrink gun to expand it slightly and ease installation of the fitting, however, care needs to be taken not to overheat the pipe and have it lose its shape and strength. Once the hoops are formed install the ChromaFace in the smallest hoop. I simply drilled 1/8" holes in 4 places around the section of pipe and in the CoroFace and fastened them together with Zip-ties.
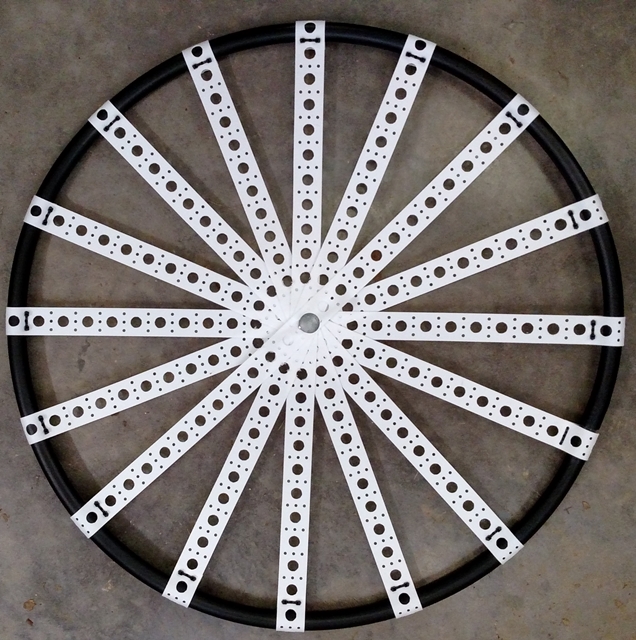
For the Spinners make sure the hoop is close to round. Layout a section of Pixel Strip with one hole centered in the hoop and enough strip to wrap around the pipe on both sides, this will be your cut length for the rest of the pixel strips for that spinner, cut 7 more strips to this length for a total of 8. I found it best to find the center of all 8 pixel strips and insert a bolt through them all with a nut to hold it in place. This simplifies the process of mounting the strips on the hoops by keeping everything aligned and held together.
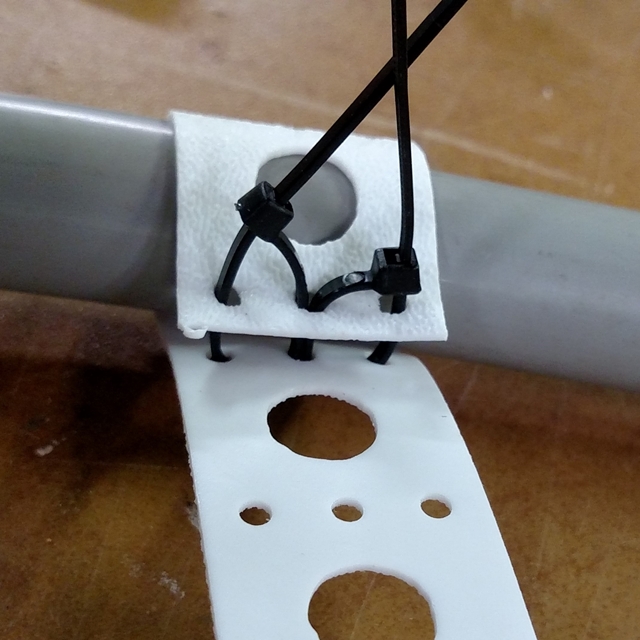
Zip Tie the strips to themselves around the hoop on each end. Care must be taken to NOT OVER TIGHTEN the strips on the hoop, or you risk deforming the hoop out of a flat plane. I also drilled 1/8" holes through the ADS pipe and Pixel Strips to create any anchor holes that I needed. I found it best to loosely attach ALL the pixel strips until everything was attached, then to work my way around the circle tightening being careful not to overtighten.
Both the Pixel Strips and ADS Pipe held their strength and shape nicely when being drilled multiple times in the same region, do not be afraid to drill either of these materials to create anchor points.
Once the Spinners and Face are constructed it is time to install the pixels in each section; Hat, Face, Spinner1, Spinner2. Each section had its own challenges.
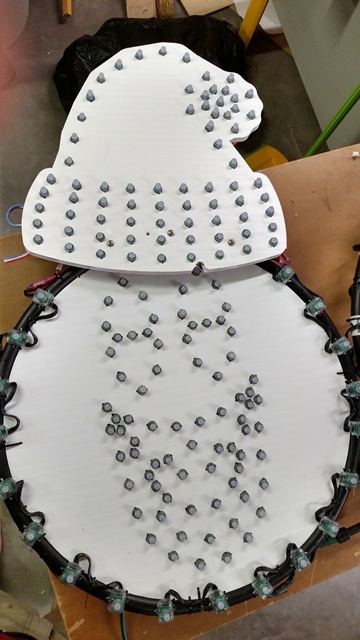
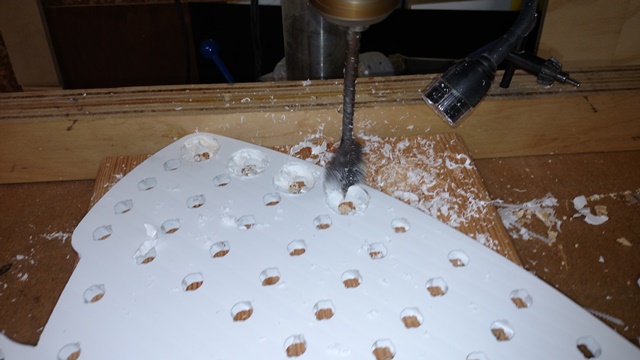
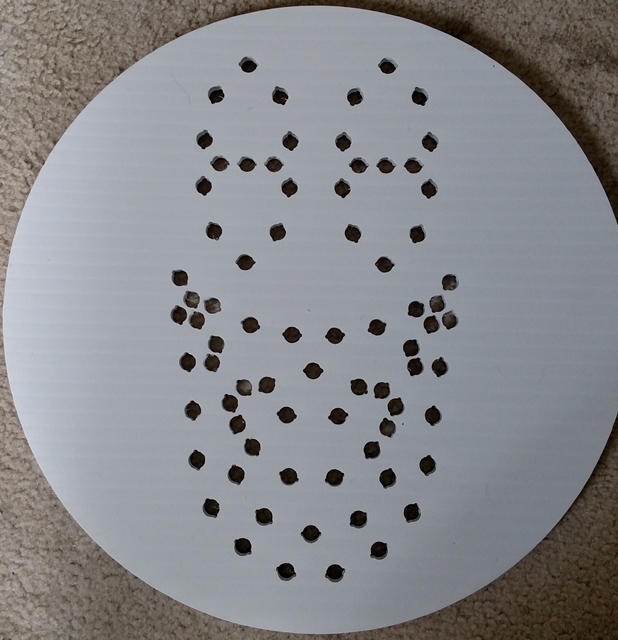
I planned on laying the Hat over the top of the Face, but the hat was drilled for bullet pixels and I wanted to use square pixels to minimize their profile on the back, so I got out my spade bit and drilled out the back to work. I also ended up using a sharp chisel to clean up the back side of the coro. Not wanting to drill out the entire Hat, I switched to bullet pixels after the 1st two rows.
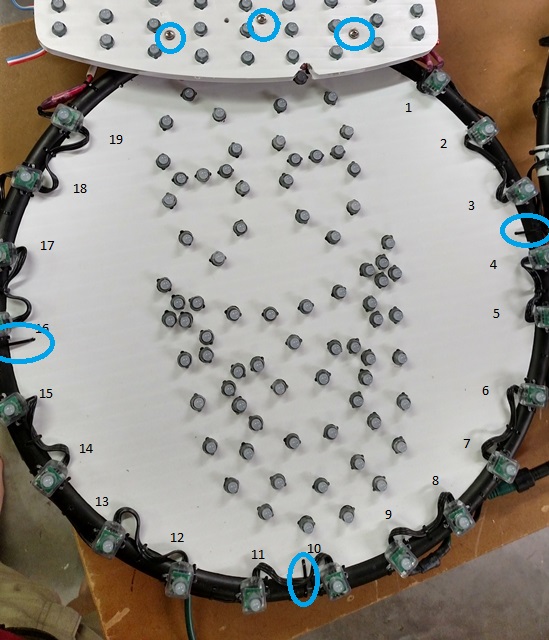
The Face had the pre-drilled holes for the mouth and eyes, but I also wanted a circle outline. I decided on a base of 24 evenly placed lights around the ADS hoop surrounding the Face. I then eliminated the top 5 pixels, as that was where the Hat was going to be attached. So I had a circle of 19 pixels going from approx 1 O'clock to 11 O'clock on the hoop. I used bullet pixels in the coro for the mouth and eyes and switched to square pixels again for the outline due to the lower profile. After populating both the hat and face with pixels, I drilled holes through the Coro of the Hat and the ADS pipe of the Face and connected the two together using stainless steel bolts and nuts. This joint is further reinforced when the Spine is added to the Prop. If I were to do this project again, I would rework the Face & Hat with Boscoyo to be 1 piece and include the pixel outline around the face.
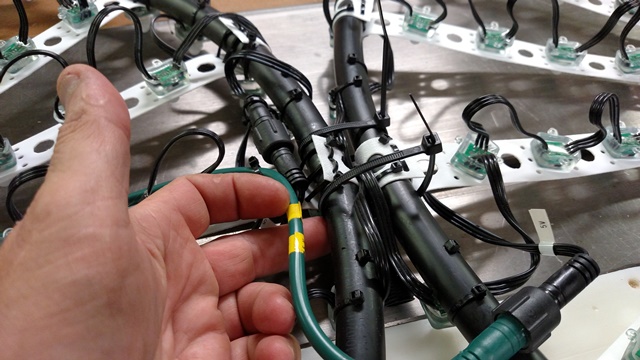
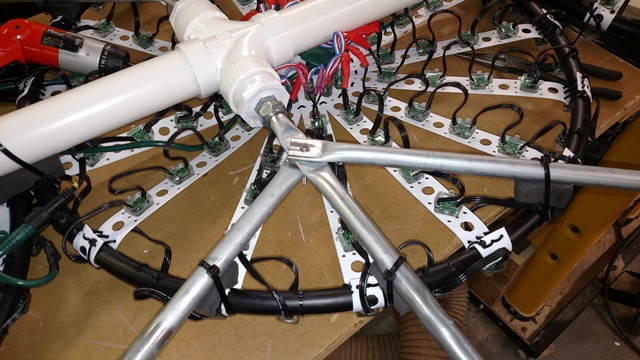
Wiring the two spinners as shown above eliminated the need for me to splice lengths of wire between pixels at the wide end of the Rays. Since I was mounting pixels directly to the ADS pipe I again went with square pixels, but when I got to the center ring that I was using, the Square Pixels were to tight together to fit. I ended up splicing in a couple of bullet pixels for the center ring so everything would fit.
Of course, also wire the connectors for Power Injection connections at the appropriate spots. Since I am using 5V for these snowmen, I have done PI at the beginning and end of each component, Hat, Face, Spinner1, Spinner 2. They are all 100 pixels +/- and I am not running all pixels on Full White. Spinner2 I did my PI point about 25 pixels from the end and then spliced on the 50 pixels used for the various arm positions.
Once each individual component is completed and checked out, it is time to begin Assembly.
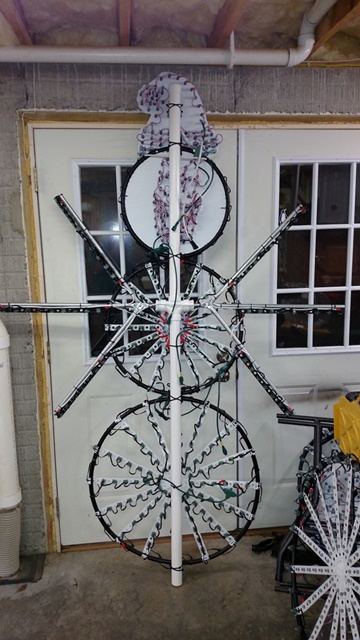
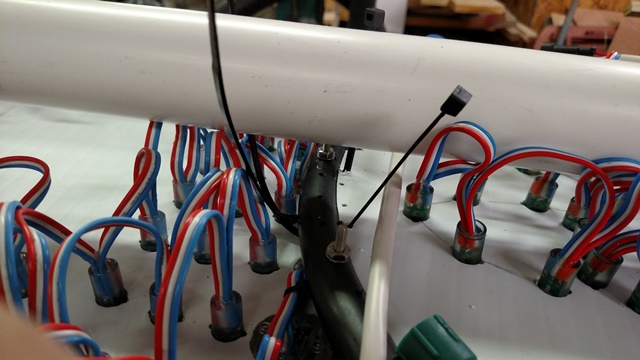
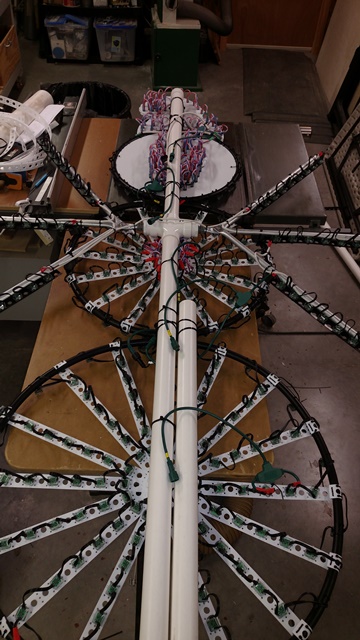
I started by joining the hoops between the Head and Spinner1, and Spinner1 and Spinner2 using 8 inch zip ties for strength. I laid the components out with their basic connections on a flat surface to get ready for the Spine. The Spine consists of a length of 2" PVC pipe cut into 3 sections (48", 34", and 38"). The 48 and 34" pieces are joined together using the Double Sanitary Tee Fitting and topped with a cap, this fitting creates the Shoulders for the attachment of the arms.
The EMT Connectors are screwed into the 2" to 3/4" PVC adapters which are glued into each side of the Double Tee Fitting. The Arms will be assembled and installed shortly. Once this basic Spine is assembled lay it down the center of the back of the Snowman.
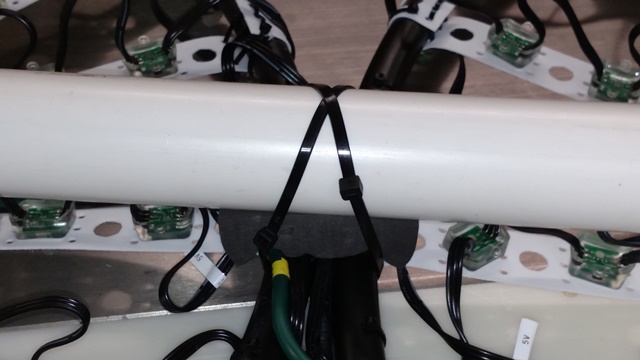
Zip ties were used to fasten the hoops to the Spine at every point the Hoops and Spine crossed. Since I was laying on a lot of wiring for the pixels I cut some blocks of Closed Cell Foam I had for spacers between the spine and hoop, I am sure a wooden block would work as well.
Cinch each zip tie tight and drill 4 holes in the hat to accommodate two crossed zip ties at the top of the Spine. Once the Hat, Head, and Spinners are securely fastened to the spine, take the remaining piece of 2" PVC and attach to the base of the spine and Spinner 2, this is help keep the Snowman from twisting too much in the wind.
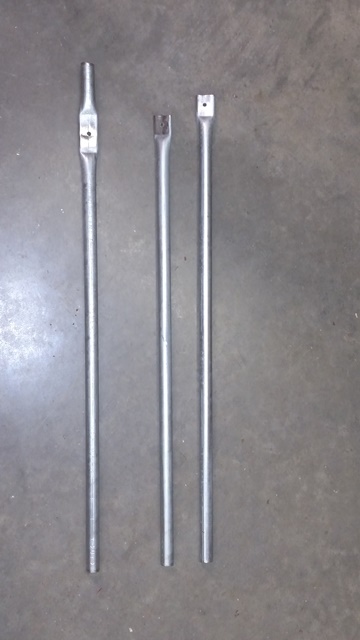
Each arm consists of three pieces of 1/2" metallic EMT conduit 27", 25", 24" long. Flatten the ends of the upper and lower arms as well as the attachment point on the middle arm using a metal vice,It can be done with a Hammer if needed., and drill a hole for a stainless steel bolt and nut to join the arm segments. Insert the middle arm into the shoulder connector and tighten. Then zip tie the hoop to each arm where they meet, again I used a small piece of foam as a spacer between the hoops and arms to protect my wiring. Once the arms are attached cut the Chromatrim to length, insert your pixels and splice them together.
When completed there are 458 pixels total in this design as built: Hat 73, Face 95, Spinner1 112, Spinner2 128, Arms 50. At the standard power rating of .06A per pixel for Full White, this potentially can pull up to 27.5A max, realistically a lot less.
The Spine was designed to fit over a typical "T" style metal fence post, the second piece of 2" PVC in the base is to go over a piece of rebar inserted in the ground next to the fence post to prevent twisting in the wind.
Contact me on the forum if you have any questions, TomL8345
