Fill Effects
Jump to navigation
Jump to search
Fill Effects "fill in" empty space with effect that "extends" the pre-existing effect. You can fill from specific directions to achieve the effect you want.
- Note: Fill Effects and Fill Channels are NOT the same thing. Fill Channels are used in conjunction with custom effects or pixel plane effects to fill in areas where the custom effect or pixel plane effect are off. Fill Effects are used in the same channel with your other effects to "fill in" the gaps.

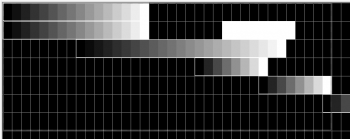
- Figure 5-20 shows various ramp ups applied to some channels. A selection box has been drawn around a number of the effects.

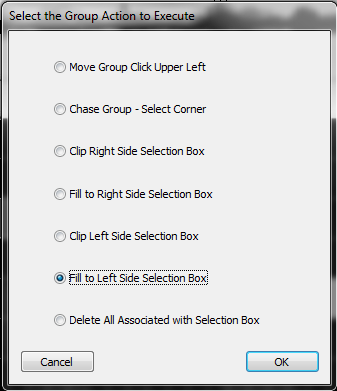
- Right-click inside the selection box and choose Perform action on selected group (See Figure 5-21).
- Click Fill to Left Side or Fill to Right Side, further explained below.

- Fill effects to the LEFT of the selection box will "stretch" all of the selected effects to the left until it reaches the left-most edge of the selection box. The empty spaces to the right will not be affected. See the result in figure 5-22.

- Fill effects to the RIGHT of the selection box will "stretch" all of the selected effects to the right until they reach the right-most edge of the selection box. The empty spaces to the left will not be affected. See the result in figure 5-23.
- Tip: Note that in the second row, the Fill to Right command picked up on the Right-most effect contained in the selection box to fill. If your selection box contains more than one effect in a row, it will always fill using the one closet to the "fill edge."
| HLS User Manual and Reference Guide | ||
|---|---|---|
| Previous Page | Current Chapter | Next Page |
| Mirroring Effects | Chapter 5: Sequencing Channels and Adding Effects | Submaster Lighting Channels |