Solid State Relays
Overview
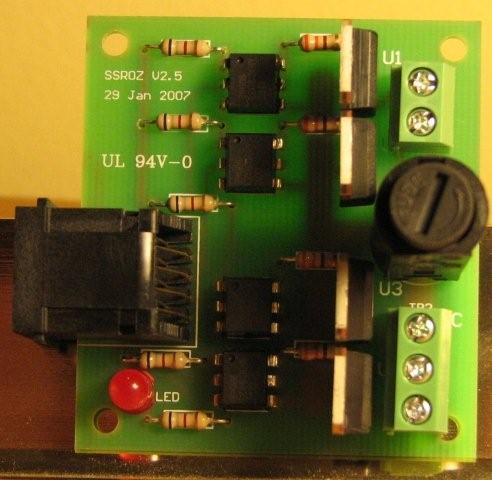
A Solid State Relay, or SSR, is an electronic device that uses low voltage input to switch high voltage on or off. It is used in Christmas displays to allow the controller to switch the lights on and off. This article will show one who is not familiar with the device a basic overview of how it works.
There are two types of SSRs, AC SSRs (the most common) and DC SSRs. As most Xmas lights are AC powered (110VAC or 24 VAC), DIYC members will use a AC Power SSR to switch or dimm the lights.
For specific requirements (Low Voltage LED MR16 spots and halloween devices) a DC SSR is recommended.
Circuit Diagram
A generic SSR circuit diagram is available for download. The SSR depicted in the above schematic is good for controlling resistive loads (lights, resistors). The SSR design for controlling inductive loads (motors, solenoids, etc) is more complicated, and can be found at other sites on the Internet.
Components
There are a few basic components that make up a Solid State Relay.
Triac
A Triac is a semiconductor device which perfoms the actual switching of the High Voltage current. It is usually in a TO-220 package with three pins.
Optocoupler
The Optocoupler is a device that helps to keep high voltages out of the control board and computer. It consists of a small LED that is optically coupled to an sensor circuit. The controller powers the LED, which causes the sensor circuit to send power to the Triac. Because there is no electrical path from the controller to the High Voltage, the risk of damage is significantly reduced.
Fuse
The fuse is another safety device used in many designs to limit the flow of current through the board. It will blow out if an unsafe amount of current passes through it, preventing damage to the board or a fire.
Resistors
Solid State Relays also have resistors to limit the flow of current through certain components. The value of the resistor can be determined based on the instructions at SimpleIO
Wiki Links
4 Channel SSR Parts List Sean Bowf Coop Board
4 Channel SSROZ Assembly Instructions
