Sequence Output:
Sequence Output
Preparing Channels for Output
When you are ready to output your channels to controllers, you begin using the Output tab in the main HLS window. The first step is to setup your HLS channels for output, which consists of setting the DMX Universe(s), setting output order, and assigning output numbers to the HLS channels.
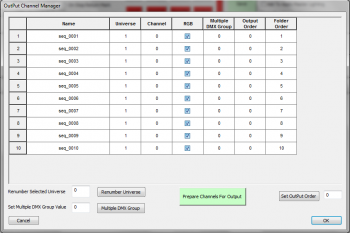
- Click Output -> Prepare Channels for Output.
- Figure 9-1 will appear.
Set DMX Universe:
- If you have not already done so, you need to assign your HLS channels to appropriate DMX Universe(s).
- Standard DMX Universes can contain 512 single channels, or up to 170 Pixel channels (because pixels use three channels each, for a total of 510 (2 channels go unused)).
- Highlight the channels you wish to assign to a DMX Universe.
- Type the DMX Universe number in the Renumber Selected Universe field and click Renumber Universe.
- Tip:If you are numbering single channels only, you can highlight more than one DMX Universe and HLS will automatically restart numbering with the next highest universe number once it reaches 512.
- RGB Channels will have to be assigned manually every 170 pixels.
- Quick Universe Start Points: 1=1, 2=171, 3=341, 4=511, 5=681, 6=851, 7=1021, 8=1191, 9=1361, 10=1531
Set Output Order:
- Highlight the channels you wish to order.
- Type the starting order number and click Set Output Order.
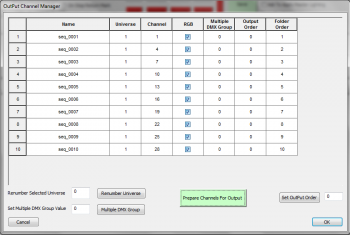
Prepare Channels for Output:
- This last step will actually assign output channel numbers to your HLS channels.
- These assigned channels will be the physical channel assignments set on your controllers.
- Click Prepare Channels for Output to assign channel numbers. (See Figure 9-2.)
- Your channels are now prepared for output.
Hardware Configuration
Introduction
To output your sequence data to your light controllers, there are specific components that must be defined in HLS output settings:
- Physical Hardware Settings
- This is where you setup COM ports or Ethernet/Wireless connections to get the sequence information "out" to your controllers.
- Universe Assignment
- HLS then has to know where the sequence data for a universe of channels should go (either a COM port or network connection previously setup).
- Output Protocol
- Finally, HLS has to know what "language" (output protocol) your controller speaks (Renard, DMX, sACN(DMX over Ethernet), or straight RS485)
Physical Hardware Settings
Setting Up Com Ports
The first thing you will need to do is determine what port numbers are assigned to your com device(s). For Windows, you can follow this guide.
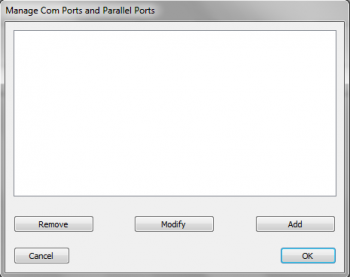
- After determining port numbers, click Output -> Setup COM Ports in the HLS main menu (see Figure 9-3).
- To add a new COM port, click Add.
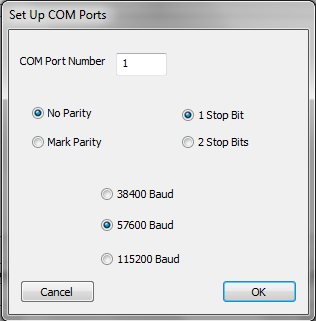
- In the window that opens, enter the appropriate COM number, then click OK (see Figure 9-4).
- Note: Other settings are correct by default and most likely need not be adjusted.
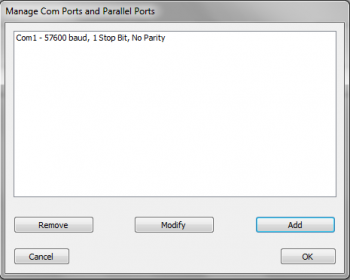
- Once your port(s) have been added, they will appear in the COM Port Manager (see Figure9-5).
- If you need to modify or remove a port, select it and click the appropriate button.
- Once done adding and modifying COM ports, click OK.
Setting up a Network
- Network card determination: Plug cable, remove cable.
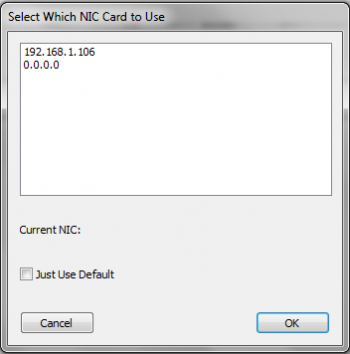
- To setup the use of a network card, click Output -> Select Specific NIC Card (see Figure 9-6).
- Select the appropriate IP address for the network card you wish to use.
- Note:' This can be a physical connection or a wireless connection.
- If you check Just Use Default, HLS will send out network data on whichever network connection you have set to default and active at that time.
- Once you have selected your network connection, click OK.
Universe Assignment
Once the physical hardware connections have been defined, HLS needs to know where to send each universe of channel data.
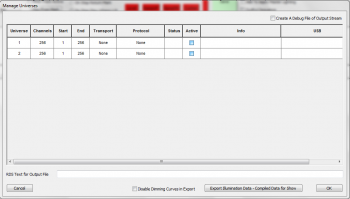
- Click Output -> select Output Method and Compile for Show.
- Each of your created universes will appear. (See Figure 9-7.)
- Three things must be configured for each Universe:
- Transport: What port to use for output (COM or Ethernet).
- Protocol: What "language" to speak to the controllers (Renard, DMX, sACN DMX).
- Active: Checking this box makes the universe Active for output.
Transport
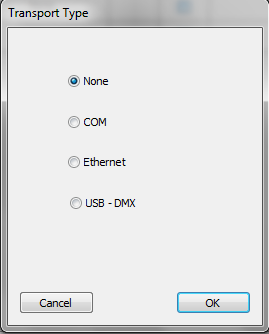
- Click the Transport column to choose the method of output.
- These were previously setup in the Physical Hardware Settings.
- Select your type of transport for the universe selected, then click OK.
Protocol
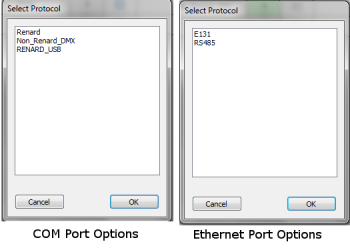
- Choose the protocol you wish to use (see Figure 9-9).
- For COM ports, you can choose Renard, DMX, or Renard_USB.
- For Ethernet ports, you can choose E1.31 or RS485.
Active

- Once you have assigned the protocol and transport, Status will be green or read 1 if everything is setup properly (see Figure 9-10).
- Check active to make that universe active for output.
- When finished assigning universes to outputs, click OK.
Output Sequence

- In manage Universes, verify the Active checkbox is checked.
- In the main sequence window, click Output Sequence next to the save button (see figure).
- Click Play to run the sequence and output lights to the controller(s).
Hardware Tests
Testing hardware.
Selecting the Output Method
Content needed
- Select Output Method and Compile for Show
- Duplicate Channel Warnings
Working with Playlists
Playlists are a list of exported illumination data from sequences that you can place in a play order. You can then add playlists into a schedule.
Exporting Illumination Data

- Before a song can be added to a playlist, the illumination data must be exported.
- Click Output -> Select Output Method and Compile for Show.
- Verify all universes are assigned to hardware appropriately.
- In the bottom right, click the Export Illumination Data button (see Figure 9-12).
- Check the Disable Dimming Curves box if you want to ignore any applied dimming curves.
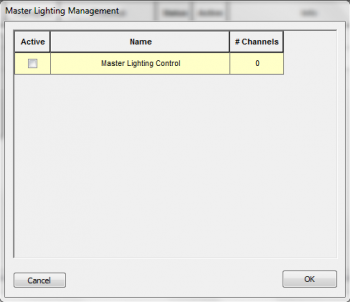
- A window will open listing any master/submaster lighting channels (see Figure 9-13).
- If you wish these lighting channels to be applied to the export, click the Active box.
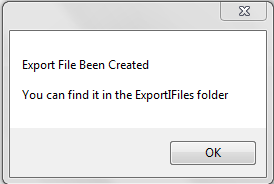
- Once all options have been completed, the export completion confirmation will show (see Figure 9-14).
- Repeat these steps for ALL sequences you wish to use in your playlist.
Adding Exported Songs to a Playlist
- Close down and reopen HLS without opening a sequence.
- To create your playlist, click Output -> Create a Playlist.
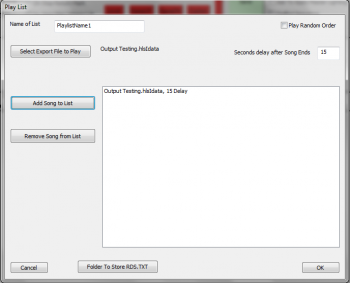
- The Playlist Window will open (see Figure 9-15).
- Type in a name for your new playlist.
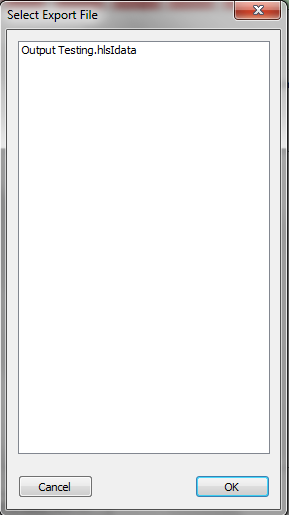
- Click Select Export File to Play.
- This will list all of the sequences with exported illumination data (see Figure 9-16).
- Select the desired file and click ok.
- The selected file will now be listed next to the Export button (see Figure 9-15).
- Adjust the Seconds Delay after Song Ends field to the desired time delay.
- Click Add Song to List to add the song to your playlist with the specified delay.
- Continue doing this until all songs are added to your playlist.
- If you wish the songs to play randomly, click the Random checkbox.
- When complete, click OK.
Modifying an Existing Playlist
- To modify an existing playlist, click Output -> Modify Existing Playlist.
- Select the playlist you wish to modify and click OK.
- The playlist window will open, allowing you to make changes.
Playing a Selected Playlist
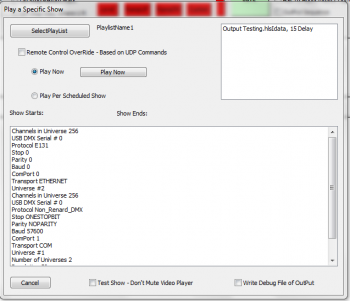
- To play a selected playlist, click Output -> Play Specific Playlist (see Figure 9-17).
- Note: You cannot have a sequence open to perform this action.
- Click Select Playlist and select the desired playlist.
- Select Play Now and click the Play Now button.
Creating and Running a Schedule
Introduction
Schedules are used to automatically run specific playlists at desired times and days during a week.
To Create a Show Schedule:
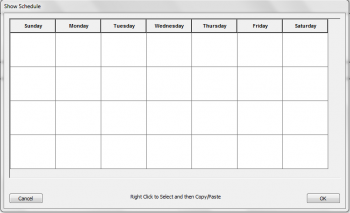
- Click Output -> Create/Modify Show Schedule (see Figure 9-18).
- Left-click on a blank space for the day you wish to schedule.
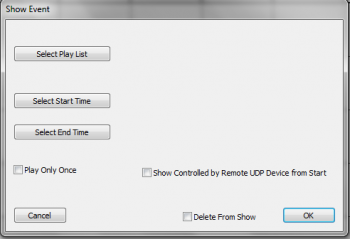
- The Show Event window will open (see Figure 9-19).
- Select Playlist and choose desired playlist from list and click ok.
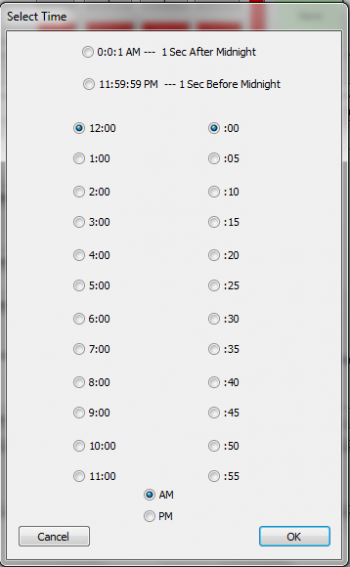
- Click Select Start/End Time (see Figure 9-20).
- Select any additional options, then click ok.
- When your schedule is complete, click OK.
To Copy/Paste:
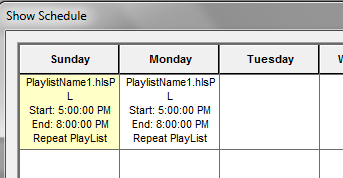
- To copy a configured show from one day to another, right click on the cell you wish to copy.
- The selected cell will turn "yellow".
- Right-click in the new cell that you want to copy the show into.
- The copied show will now be in the new cell.
To Delete/Modify:
- Left-click on the cell with the schedule you wish to delete or modify.
- This opens the Show Event window (see Figure 9-19). From here, you can make any changes you need.
- To Delete from that selected cell, check the Delete from Show button and click ok.
To Run a Scheduled Show:
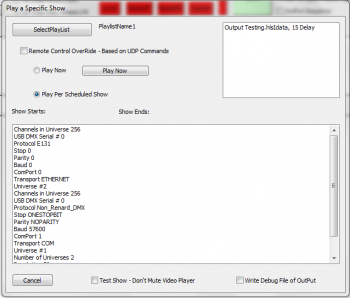
- Click Output -> Play Show Schedule.
- Select the playlist you wish to play.
- Ensure Play per Scheduled Show radio button is selected.