Creating a Preview: Difference between revisions
No edit summary |
No edit summary |
||
| Line 3: | Line 3: | ||
''This tutorial is based on version 11V.'' | ''This tutorial is based on version 11V.'' | ||
''This page is under significant revision. Skip to the " | ''This page is under significant revision. Many spots are "placeholders" until information can be generated. Skip to the "Original Preview" section for the information on using the older preview in HLS.'' | ||
====Preparing Channels for Preview==== | ====Preparing Channels for Preview==== | ||
*'''Ensure that channels are properly added to the sequence, rgb channels are identified, and colors are setup in the Channel Manager.''' | |||
**See [[Setting up Channels]] for more detailed instructions.<br /><br /> | |||
*'''Assigning Channels to Preview Groups and Preview Numbers:'''<br /><br /> | |||
**Open the Channel Manager. The last two columns in the channel listing are ''Preview Group'' and ''Preview Number''. These two numbers allow you to form multiple ''Preview Objects'', such as MegaTree, RoofLine, Window, Arch, etc. and assign a pair of numbers (Group and Number) to them. They can range from 1-1000. Anything set as '''0''' will not be displayed. | |||
***Preview Group: This number groups channels together into one ''Preview Object''. For example, an arch can have 8 segments with each segment assigned to ''Preview Group 3''. | |||
***Preview Number: This corresponds to each channel in a ''Preview Group''.<br /><br /> | |||
**Assign ''Preview Groups'' and ''Preview Numbers'' for each of your channels. (This can be done manually by left-clicking into the fields and entering numbers, but there are ways to do it quicker.) | |||
***Using the left mouse button, click in the first item of a ''Preview Object'' and select down the channel cells until reaching the last channel of the object. | |||
***In the ''Set PreviewGroup'' field, enter the Preview Group value and click Preview Group button. This will set that value for all items in the ''Preview Object''. | |||
***To set the PreviewNumber values from 1 to the highest selected cell, make sure ''Set PreviewNumber'' is set to one, then click the Preview Number button. | |||
***To set Preview Groups and Preview Numbers for large sets of channels that contain the same number of components (for example, pixels): | |||
****Determine the number of components in the set of channels (for example, 42 pixels in a string, a total of 16 strings). | |||
****Select all channels to be grouped. | |||
****In the ''Start Group G cycle'' field, enter: '''1,42'''. This would start with group 1, and number 42 components. Then, would move to group 2, etc, all the way to group 16, preview-number 42.<br /><br /> | |||
**The image shows an example of an arch with 8 segments that has been selected and then assigned a Preview Group and Preview Numbers. It is assigned Preview Group '''4''' since the previous display element (a mini tree) was assigned group 3. Groups do not have to be in sequential order.<br /><br /> | |||
[[File:PreviewGroups.png]]<br /><br /> | |||
*'''Setting up "mega-strings" as a single display item:''' | |||
**Mega-strings are up to four strands of single-color lights that operate as one, such as a window outlined in R,G,B,W). | |||
**Assign colors as normal. Place all colors into the same ''Preview Group'' and assign ''Preview Numbers''. | |||
**TODO: Link to later section on how to draw those as one in the preview window. | |||
**Joe's video on mega-strings: [http://doityourselfchristmas.com/forums/showthread.php?25001-HLS-Preview-Using-Custom-Display-Objects|here] | |||
====Selecting Active Display Group==== | ====Selecting Active Display Group==== | ||
| Line 21: | Line 44: | ||
#Any global shortcuts to naming/identifying | #Any global shortcuts to naming/identifying | ||
#General keyboard shortcuts/presses used during drawing | #General keyboard shortcuts/presses used during drawing | ||
#Handling superstrings | |||
====Drawing Line Elements==== | ====Drawing Line Elements==== | ||
#Elements consisting of lines | #Elements consisting of lines | ||
#Rooflines, RGB details | |||
#Keyboard and mouse commands | |||
====Drawing Triangle Elements==== | ====Drawing Triangle Elements==== | ||
| Line 29: | Line 55: | ||
====Drawing Arch Elements==== | ====Drawing Arch Elements==== | ||
#Drawing arches | #Drawing arches with the Arch element | ||
#Drawing rgb arches | |||
====Drawing Tree Elements==== | ====Drawing Tree Elements==== | ||
# | #Specifics with pixel trees | ||
#General display/physical string arrangement details: Start 9 o'clock position and work CCW. | |||
#How to handle trees that are 180, 270, etc. | |||
#Link to excellent video tutorial | #Link to excellent video tutorial | ||
| Line 41: | Line 71: | ||
#Keeping the display preview for many sequences | #Keeping the display preview for many sequences | ||
=== | ===Original Preview=== | ||
Next we will create a sequence preview (simulator). Select the '''Manage Channels''' tab at the top and then the Edit Sequence Paint selection. The screen should then look like the one in Figure 1-29. Note the channels (outputs) are shown on the left in their configured color. Also note the asterisks to the left of the first channel. The asterisks show that channel 1 is the active channel for drawing now. The arrow up and arrow down keys on the keyboard can be used to switch channels for drawing. '''If the up or down arrow key does not seem to switch channels for drawing hit the ESC key.''' | Next we will create a sequence preview (simulator). Select the '''Manage Channels''' tab at the top and then the Edit Sequence Paint selection. The screen should then look like the one in Figure 1-29. Note the channels (outputs) are shown on the left in their configured color. Also note the asterisks to the left of the first channel. The asterisks show that channel 1 is the active channel for drawing now. The arrow up and arrow down keys on the keyboard can be used to switch channels for drawing. '''If the up or down arrow key does not seem to switch channels for drawing hit the ESC key.''' | ||
Figure 1-29.<br /> | Figure 1-29.<br /> | ||
Revision as of 00:34, 23 January 2013
Back to: HLS Getting Started Manual
This tutorial is based on version 11V.
This page is under significant revision. Many spots are "placeholders" until information can be generated. Skip to the "Original Preview" section for the information on using the older preview in HLS.
Preparing Channels for Preview
- Ensure that channels are properly added to the sequence, rgb channels are identified, and colors are setup in the Channel Manager.
- See Setting up Channels for more detailed instructions.
- See Setting up Channels for more detailed instructions.
- Assigning Channels to Preview Groups and Preview Numbers:
- Open the Channel Manager. The last two columns in the channel listing are Preview Group and Preview Number. These two numbers allow you to form multiple Preview Objects, such as MegaTree, RoofLine, Window, Arch, etc. and assign a pair of numbers (Group and Number) to them. They can range from 1-1000. Anything set as 0 will not be displayed.
- Preview Group: This number groups channels together into one Preview Object. For example, an arch can have 8 segments with each segment assigned to Preview Group 3.
- Preview Number: This corresponds to each channel in a Preview Group.
- Open the Channel Manager. The last two columns in the channel listing are Preview Group and Preview Number. These two numbers allow you to form multiple Preview Objects, such as MegaTree, RoofLine, Window, Arch, etc. and assign a pair of numbers (Group and Number) to them. They can range from 1-1000. Anything set as 0 will not be displayed.
- Assign Preview Groups and Preview Numbers for each of your channels. (This can be done manually by left-clicking into the fields and entering numbers, but there are ways to do it quicker.)
- Using the left mouse button, click in the first item of a Preview Object and select down the channel cells until reaching the last channel of the object.
- In the Set PreviewGroup field, enter the Preview Group value and click Preview Group button. This will set that value for all items in the Preview Object.
- To set the PreviewNumber values from 1 to the highest selected cell, make sure Set PreviewNumber is set to one, then click the Preview Number button.
- To set Preview Groups and Preview Numbers for large sets of channels that contain the same number of components (for example, pixels):
- Determine the number of components in the set of channels (for example, 42 pixels in a string, a total of 16 strings).
- Select all channels to be grouped.
- In the Start Group G cycle field, enter: 1,42. This would start with group 1, and number 42 components. Then, would move to group 2, etc, all the way to group 16, preview-number 42.
- Assign Preview Groups and Preview Numbers for each of your channels. (This can be done manually by left-clicking into the fields and entering numbers, but there are ways to do it quicker.)
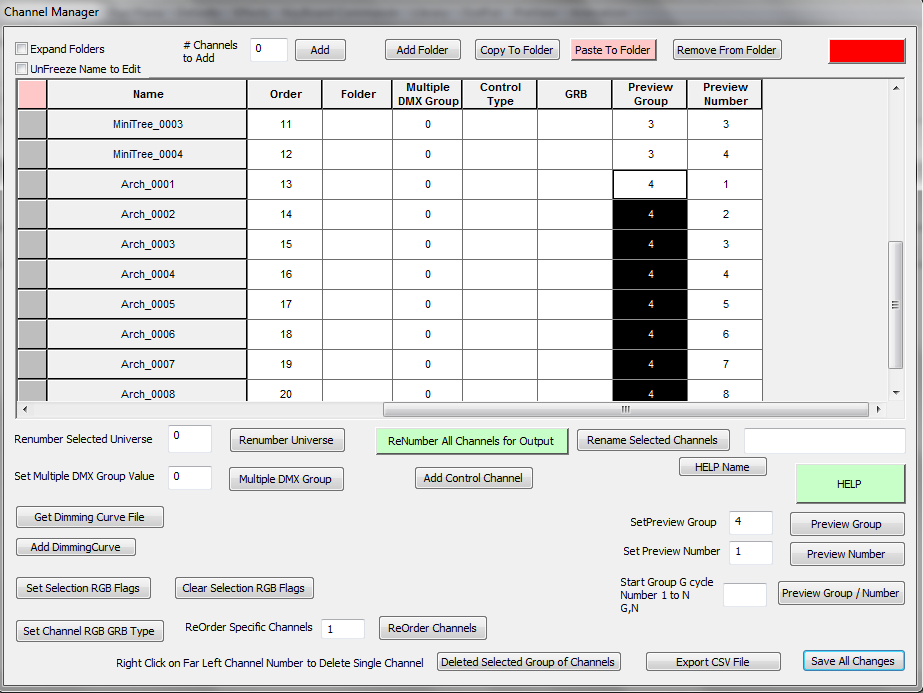
- The image shows an example of an arch with 8 segments that has been selected and then assigned a Preview Group and Preview Numbers. It is assigned Preview Group 4 since the previous display element (a mini tree) was assigned group 3. Groups do not have to be in sequential order.
- The image shows an example of an arch with 8 segments that has been selected and then assigned a Preview Group and Preview Numbers. It is assigned Preview Group 4 since the previous display element (a mini tree) was assigned group 3. Groups do not have to be in sequential order.
- Setting up "mega-strings" as a single display item:
- Mega-strings are up to four strands of single-color lights that operate as one, such as a window outlined in R,G,B,W).
- Assign colors as normal. Place all colors into the same Preview Group and assign Preview Numbers.
- TODO: Link to later section on how to draw those as one in the preview window.
- Joe's video on mega-strings: [1]
Selecting Active Display Group
- Selecting the active display group
Creating the Preview Window
- Creating a new preview window
- Setting background image and bmp conversion
- Warnings on resolution size and limitations
Placing channels onto the Preview window
- Overview of draw first-identify later
- Any global shortcuts to naming/identifying
- General keyboard shortcuts/presses used during drawing
- Handling superstrings
Drawing Line Elements
- Elements consisting of lines
- Rooflines, RGB details
- Keyboard and mouse commands
Drawing Triangle Elements
- Elements consisting of triangles
Drawing Arch Elements
- Drawing arches with the Arch element
- Drawing rgb arches
Drawing Tree Elements
- Specifics with pixel trees
- General display/physical string arrangement details: Start 9 o'clock position and work CCW.
- How to handle trees that are 180, 270, etc.
- Link to excellent video tutorial
Drawing Custom Elements
?
How to "Draw Once, Use Everywhere"
- Keeping the display preview for many sequences
Original Preview
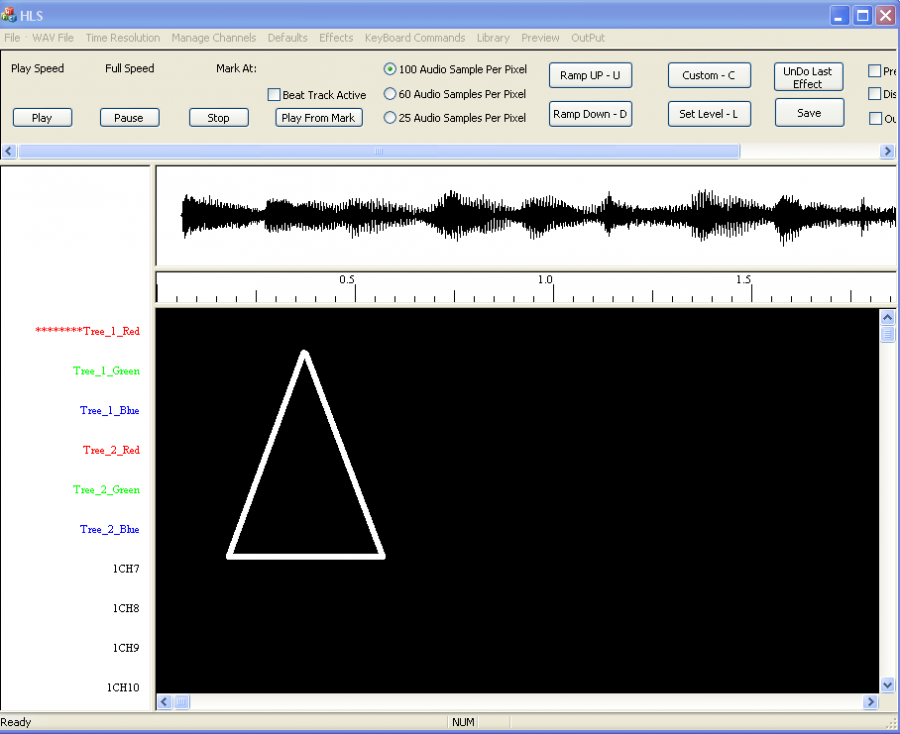
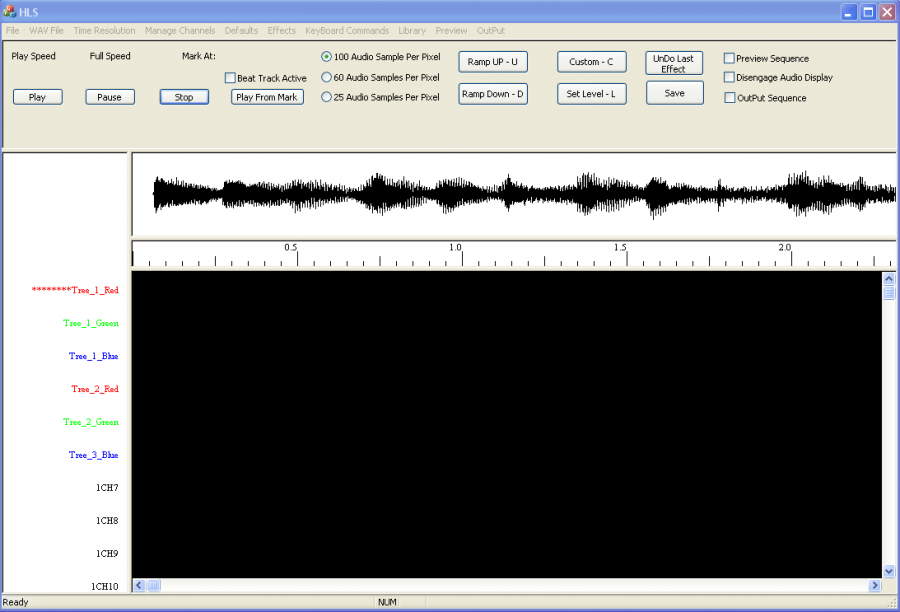
Next we will create a sequence preview (simulator). Select the Manage Channels tab at the top and then the Edit Sequence Paint selection. The screen should then look like the one in Figure 1-29. Note the channels (outputs) are shown on the left in their configured color. Also note the asterisks to the left of the first channel. The asterisks show that channel 1 is the active channel for drawing now. The arrow up and arrow down keys on the keyboard can be used to switch channels for drawing. If the up or down arrow key does not seem to switch channels for drawing hit the ESC key.
Figure 1-29.
You can draw the lighting elements on the screen at this point. Lines or points can be drawn. A triangle to represent output channel 1 was drawn to represent a tree (see Figure 1-30). This would be drawn as three lines. To draw a line, depress the left mouse button, keep at depressed and move the mouse until you are at the endpoint, then release the left button
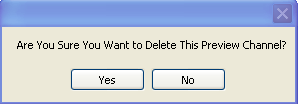
If you make a mistake and want to erase the work you have done on the tool, hit the delete button on the keyboard. You will be prompted as to whether you want to delete this preview channel (see Figure 1-31). Note that it will only delete the graphics for the current tool.
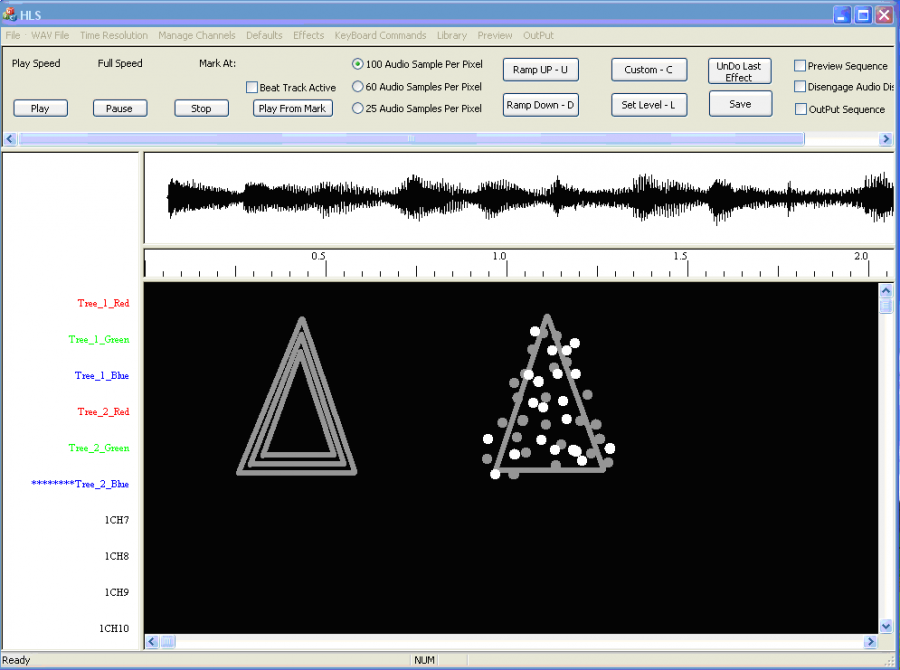
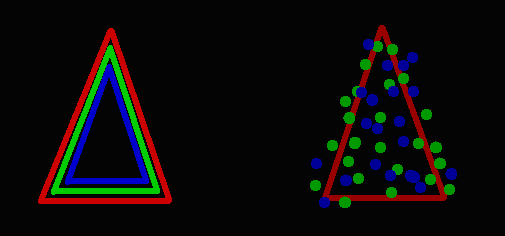
Figure 1-32 shows the completed sequence simulator. In the left tree each channel was drawn as a triangle. In the right tree Channel 4 was drawn as a triangle and 5 and 6 were drawn as dots. Note that line width and dot size can be changed (before they are drawn) under the preview tab on the top right.
Figure 1-33 shows what the simulator would look like if all channels were on.
To run the simulation, the preview (simulation) screen must be showing. Next you must put a checkmark in the Preview Sequence check box on the upper right of the screen. Then choose the play button on the upper left of HLS and your sequence should run and the simulator should show your outputs working. Remember that we did not program many effects in this example yet.
Note: you may change the speed at which the WAV file is played under the WAV file tab at the top of HLS. You may choose ¼, ½, ¾ or full speed.
Adding a BMP to the Preview
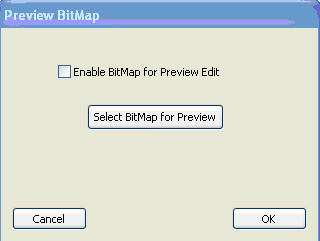
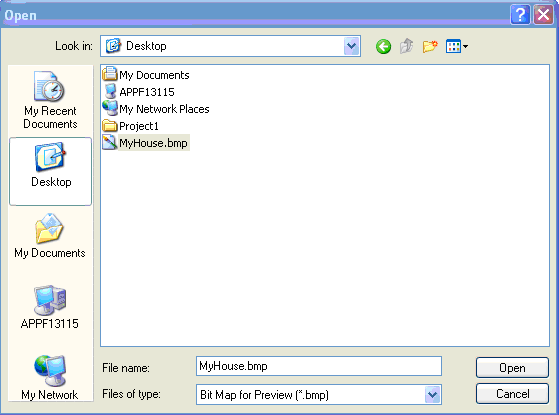
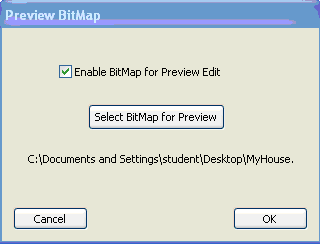
It might be helpful to add a bitmap image (bmp) of your house and yard to your preview (simulator). To do this, choose the Manage Channels tab and then select Manage Bitmap of Preview. The screen shown in Figure 1-34 will appear.
Figure 1-34.
Figure 1-35.
Figure 1-36.
The Bitmap will be scaled to fit the HLS pane and will be converted to Black & White. You should make your Bitmap as dark as possible since the preview vectors are drawn in White.
Next: Adding a Beat Track
