Braveit1
Supporting Member
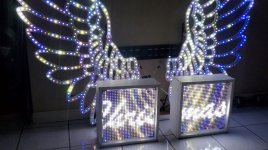
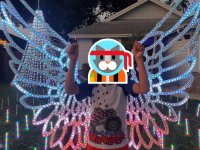
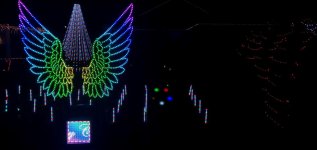
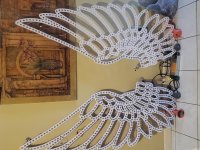
I decided to include the pixel selfie wings into my display this year. I don't have a big yard and had to pick a location for the wings that wouldn't block the show. I need to move my car daily, so the driveway was off limits. A big coroplast wing set would block much of the viewing area. I decided to design a see thru wing using the ELF wings as a guide. There were 4 parts to the process. Design/Print the wings, design a mount, build a support structure, program the wings.
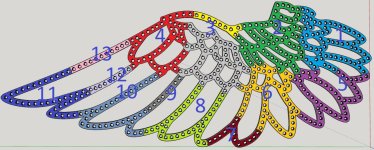
1. Design/Print the wings: Using Sketchup, I drew a wing and broke it down to 13 parts to fit on a 300x300 print bed. The wings took over 200 hours in draft mode to print all 26 pieces at 10% infill and 4 walls. Then "I glued" the parts together using a heat gun and a pair of pliers. This worked much better than any CA or superglue since each part fit together like a puzzle piece. I used 496 LEDs per wing (mostly because I miss counted holes when designing as I was aiming for 500). The two wings took just over 3 and a half spools of PLA+ filament.
2. Design a mount: To hang the wings, I designed a 3d printed spacer and used some aluminum angle brackets and a Walmart TV wall mount. The Tv mount was functional because it also allows a quick release (after removing a few locking screws I added) to dismantle the wings. The spacers were 2 identical parts that sandwich a pixel over the 3D printed wing with a bolt exiting the support. There are groves for the wires to exit the sides. Two (or four) bolts hold the spacers around the wing and led. The bolt is then attached to the aluminum L channel and TV mount. In retrospect, it probably would have been easier to add a mounting hole to the wings when designing them, but I wasn't exactly sure how and where I was going to mount them at the time. This method allows me to put the spacers almost anywhere on the wing.
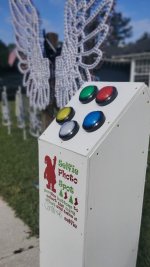
3. Build the support structure: I think this was the easiest part. I had recently replaced my backyard fence and had a few old posts that where usable and in decent condition. Using the posts and some scrap 2x4s I built a simple structure that basically resembles an old stockage (the kind you put your head and hands into for silly amusement part photos) with the TV wall mount between the posts. I also used about 5 bags of topsoil I had to keep the structure from falling forward if anyone decided to tug on the wing for some reason. (Safety first!)
4. Program the wings: I used a photo of the wings and the custom xLights model builder from LightShowHub.com to design a model (mirror and duplicate for the opposite side.) The process was fairly simple since I had already decided on a path for the LED pixel strings. Once the model was created, I started a new show directory in xLights and imported the model. After designing half a dozen animations, I then uploaded the sequences to a Raspberry Pi Zero W 2 with a WS2811 Pi hat and an Import Extender. The Import Extender was attached to 5 Big buttons and Falcon Pi Player (installed on the Pi) was configured to kick off one of the animations when a big button was pressed.


Last edited:


