Holiday Coro Singing Pumpkin

dirknerkle

Supporting Member
This animated pumpkin is a new product at Holiday Coro this year (www.holidaycoro.com) and what got me off the fence to buy it was that it came with 3 Vixen sequences (or LOR/LSP) and sample music: Monster Mash, Ghostbusters and Thriller. To use the music legally you have to actually own a copy of it, but who doesn't have a copy of those three anyway?!?!? But if you don't, you can always pick them up for peanuts from iTunes... or Amazon.

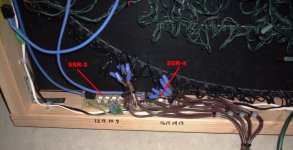
This turned out to be a fun, 1-day project. Of course, I made it wireless :mrgreen: so I can put it anywhere outside where nobody will trip on the wires... The box measures 46" square by about 4 inches deep, so it's a pretty sizeable item. I had some old 4-channel SSRs that had been sitting in a box for at least a couple years; they're driven by a prototype Ren816XB controller I invented last year but have never used. The pumpkin takes 8 channels but the music is sequenced for 16 channels with the thought that you might also light 8 smaller singing pumpkins out in front of or near the big one. I purchased 8 plastic pumpkin-size treat buckets at Target for $1 each and plan to light them instead of carve the real things, so you'll see 8 extension cords coming out of the bottom back -- one for each of the "choir of pumpkins."

I've only run a couple tests on it and while it works fine, the project allowed me to reuse some otherwise unused equipment as well as some old lights. Some of the lights need a little replacement color, so that's next on my agenda -- recoloring some of the mini-lights. All totalled, the pumpkin takes 561 lights, and of course, some sections need odd numbers of lights so you end up with some extras but I just left them inside the box. There's no need to black them out as the pumpkin face is opaque black coro and they won't be seen anyway.

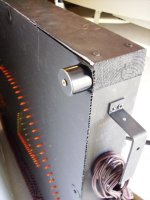
Observation: Holiday Coro makes it very easy to build one of these. Their build manual is first-rate. But don't for a minute think you can put this together in 1-hour though -- I spent the entire day on it and I still haven't painted the sides black so the box won't be so visible from the side. And, of course, the 8 singing pumpkins are yet to be wired. This would be a fantastic father-son project, but being that my "kids" are 26 and 28, they opted to let me handle it alone... :lol: I'm a bit concerned about storage because with all those lights sticking out like that, it's pretty fragile. Right now I have it in the garage leaning against my boat. but I fabricated handles for each side and I may be able to suspend it from the ceiling -- that would certainly be out of the way!

When it's done and I have the pumpkin choir ready, I'll shoot a little video and add a link. Until then, these pictures will have to do...

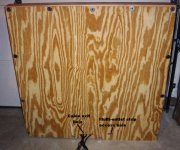
front.JPGback.JPGcontroller_side.jpgpower.JPGfinished_back.JPG
 
Last edited:
Very nice. I'm working on the quartet now as well. I did start this before the quartet was available so my main Pumpkin is the 8ft X 8ft version plus the standard 46x46 along with the skull and frankenstien (thats what I call monster #3)
 
I'm a bit concerned about storage because with all those lights sticking out like that, it's pretty fragile. Right now I have it in the garage leaning against my boat. but I fabricated handles for each side and I may be able to suspend it from the ceiling -- that would certainly be out of the way!

What was the order turn around time when an order is placed? I am going to order some today, if they will arrive in time for me to build....I all ready have permission.

Based on the website ..... "Our animated characters each are designed with additional borders around the edge, typically 1.5", to allow for an inexpensive 2"x4" frame to be built for support ".....It seems you could just build the frame then for storage, use a plywood (or similar material) cover, screwed to the front and back. Of course you will need some 1x1 or similar for spacing on the front.
 
Last edited:
I placed my order in the morning, paid my invoice after noon, and had them show up at my door the next day! Of course it helps that I live in the same state. They also have a set of 8 smaller pumpkins (about 19 inches across) that take a bit under 200 lights each. The coro looks great, and I'm looking forward to assembling them. This is my first year and I'm using Halloween as my "dry run" for Christmas :)
 
David here with HolidayCoro.com -

I must say that is the most professional assembly of our Singing Pumpkin I've seen to date. That should make display setup fairly quick. Excellent job!

What was the order turn around time when an order is placed? I am going to order some today, if they will arrive in time for me to build....I all ready have permission.
At this time in the season, we generally stock most common items and they ship the same or next day after payment. Delivery is usually via FedEx ground with the following delivery times:

ShippingTimeChart.jpg


Based on the website ..... "Our animated characters each are designed with additional borders around the edge, typically 1.5", to allow for an inexpensive 2"x4" frame to be built for support ".....It seems you could just build the frame then for storage, use a plywood (or similar material) cover, screwed to the front and back. Of course you will need some 1x1 or similar for spacing on the front.

That's a really good idea to but a cleat on the front - not only would it provide more "clamping" of the coro but it also solves the issue if you are storing it laying down. If you have a variety of of our items which are usually 46"x46" outside dimensions, you can just stack one inside the other.
 
Project update....

I cut four, 1" long sections of PVC and mounted them on the front of the pumpkin as standoffs. Now I can at least push the bulb side against a wall and the bulbs will be secure. (I love PVC!!!) (Not shown - I screwed a couple pipe brackets onto each vertical side of the big pumpkin frame. For mounting in the yard, I'll just drive a couple sections of rebar into the ground and slide it down over them.)

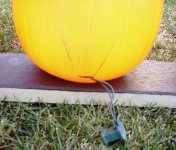
Here are the small pumpkins. These are actually plastic treat buckets I bought at Target for $1 each. But because they didn't have a top, I bought some plastic orange plates, cut the rims off and with a few dollops of silicone glue they fit perfectly on top. For pumpkin stumps, I cut a short 3/4" section of PVC that was painted green and glued it to the tops.

I used a fender washer and 1" sheetrock screw through the bottom and mounted them on two sections of lumber I'd painted black. This will make them easy to store and especially easy to set out. And they're not likely to blow around, either.

With my Dremel and a diamond saw I cut a V-shaped flap in the back/bottom of each for wiring access and placed a string of 20 mini-lights in each.

This completes this project for me... great fun. I wonder what life will be like when I grow up??? :lol:

DSCI0059.jpgDSCI0062.JPGDSCI0060.JPGDSCI0063.JPGDSCI0064.JPG
 
Last edited:
Hey Dirk - how far apart are the lights around the perimeter. I am making some coro cutouts for Christmas and trying to figure out how far apart to drill the holes and still get a nice look.
 
Hey Dirk - how far apart are the lights around the perimeter. I am making some coro cutouts for Christmas and trying to figure out how far apart to drill the holes and still get a nice look.

I'd say they're slightly less than 3/4" apart, and it's the same distance whether it's an eye, part of the mouth, or whatever. In cases where lines overlap/intersect, they are closer than that, of course.

Having said that, I want to say that buying the piece from Holiday Coro made it so easy -- well worth the money, I feel. The board is opaque black so nothing shows through, the holes are already there for you, someone has already traced on the back of the board to show which sets of holes are for what, and you get three sequences (and MP3 files) along with it, ready to go -- the time that saved alone was worth the $$ to me! But on top of all that, the board comes folded and shipped inside -- what else -- MORE CORO! So you get not only the pumpkin, the sequences and music, but you get a 4' square piece of regular coro (white translucent) to boot that you can use later on for something else!

So you might consider buying one instead -- the holes are uniform and perfectly sized for mini-lights (or M5 LEDs), you get all the other stuff -- it's a steal at the price!
 
Hey Dirk - how far apart are the lights around the perimeter. I am making some coro cutouts for Christmas and trying to figure out how far apart to drill the holes and still get a nice look.

Spacing is a tricky thing - for some areas you need to have them fairly tight, such as where you have lots of curves or jagged angles and you can space them out where the eye can "interpolate" between the lights such as long separate lines. Some places like on mouths, eyes you'll also need them close. I would *highly* recommend drawing out the vectors on transparency, then using another transparency laid over the vectors, layout the dots where you have bulbs so you can workout the spacing. You'll need these anyway when you do the projector. Ideally this is done in CAD where it's trivial to test many different spacings.

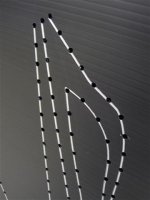
Be sure to flip your design when you trace it to the back side so it comes out correctly. Here is what you'd be looking for when you are done:

bulb-tracing.JPG
 
Last edited:
Having said that, I want to say that buying the piece from Holiday Coro made it so easy -- well worth the money, I feel. The board is opaque black so nothing shows through, the holes are already there for you, someone has already traced on the back of the board to show which sets of holes are for what, and you get three sequences (and MP3 files) along with it, ready to go -- the time that saved alone was worth the $$ to me!

I am with Dirk on this one. I had been on the fence for a while on weather or not to buy the coro. The addition of the files put me over the edge, especially after building some coro's my 4th of July show.
 
Thanks guys for all of the input. Very helpful!

I do agree that purchasing pre-made would be much easier, but I am working on some cutouts of my own design. So, wish me luck on all of the hole drilling/punching.

Rob
 
Well again you have inspired me Dave. Made a trip to WalMart today and 6 for .97 each. Now to put it together. Where did you get the plates?

Rick
 
Back
Top