Soldering Basics: Difference between revisions
| (42 intermediate revisions by the same user not shown) | |||
| Line 1: | Line 1: | ||
[[File:Tools Header Joints.jpg]] | |||
==Intro== | ==Intro== | ||
Soldering is easy! Many new members come to DIYC having never soldered a board before. Most people learn to solder and quickly are building their own controllers and spending the money they saved on more lights. There are numerous videos and tips listed below to help you learn to solder. | [http://doityourselfchristmas.com/forums/attachment.php?attachmentid=10887&d=1313008228 Soldering is easy!] Many new members come to DIYC having never soldered a board before. Most people learn to solder and quickly are building their own controllers and spending the money they saved on more lights. There are numerous videos and tips listed below to help you learn to solder. | ||
Soldering is joining two metal surfaces together using another metal that is melted and cooled to connect the two metal surfaces mechanically and electrically. In electronics you are joining the copper traces on the printed circuit board to the metal legs of the various electronic parts using special lead/tin solder. | Soldering is joining two metal surfaces together using another metal that is melted and cooled to connect the two metal surfaces mechanically and electrically. In electronics you are joining the copper traces on the printed circuit board to the metal legs of the various electronic parts using special lead/tin solder. | ||
| Line 18: | Line 19: | ||
A good solder like Kester 44 (use 63/37 with flux core and 0.032" diameter 1/2lb spool for starters) along with a good temperature controlled soldering like the [http://www.circuitspecialists.com/csi-station1a.html CSI 1A], [http://www.circuitspecialists.com/soldering-station-60-watt-3dlf.html CSI 3DLF] or the [http://www.mcmelectronics.com/product/TENMA-21-10115-/21-10115 Tenma 21-10115] will result in good solder joints. | A good solder like Kester 44 (use 63/37 with flux core and 0.032" diameter 1/2lb spool for starters) along with a good temperature controlled soldering like the [http://www.circuitspecialists.com/csi-station1a.html CSI 1A], [http://www.circuitspecialists.com/soldering-station-60-watt-3dlf.html CSI 3DLF] or the [http://www.mcmelectronics.com/product/TENMA-21-10115-/21-10115 Tenma 21-10115] will result in good solder joints. | ||
It is common to set the iron temperature to 650 - 750 °F for a good joint. | It is common to set the iron temperature to 650 - 750 °F for a good solder joint. | ||
For under $10 you can buy a lot of spare parts and pcbs to practice on [[Soldering_Basics#Soldering_Practice|listed below]] | For under $10 you can buy a lot of spare parts and pcbs to practice on [[Soldering_Basics#Soldering_Practice|listed below]] | ||
You do not have to clean most flux residue from a soldered joint, but it can help to clean them to see if there are bad joints. | You do not have to clean most flux residue from a soldered joint, but it can help to clean them to see if there are bad joints. | ||
'''Do not attempt to solder circuits that are connected to live power.''' | |||
'''Be very careful, soldering irons are very hot, they can burn you or start a fire it you are careless.''' | |||
|} | |} | ||
| Line 33: | Line 38: | ||
* Lead-free solder | * Lead-free solder | ||
IT IS STRONGLY RECOMMENDED THAT YOU ONLY USE LEAD/TIN SOLDER FOR BEST RESULTS!! | '''IT IS STRONGLY RECOMMENDED THAT YOU ONLY USE LEAD/TIN SOLDER FOR BEST RESULTS!!''' | ||
====Lead/Tin==== | ====Lead/Tin==== | ||
| Line 52: | Line 57: | ||
====Lead Free Solder==== | ====Lead Free Solder==== | ||
:Lead free solder became popular in Europe on July 1, 2006 due to environmental laws associated with eliminating lead. It is generally not recommended for printed circuit board soldering by hobbyists. It is harder to get a good solder joint and is only used by manufacturers using special tools and processes. | :'''BEGINNERS AND CASUAL USERS SHOULD AVOID LEAD FREE SOLDER.''' Lead free solder became popular in Europe on July 1, 2006 due to environmental laws associated with eliminating lead. It is generally not recommended for printed circuit board soldering by hobbyists. It is harder to get a good solder joint and is only used by manufacturers using special tools and processes. It requires greater heat and is noticeably harder to get a good hand soldered joint compared to lead/tin solder. Lead Free solder is often sold right next to regular lead/tin solder in stores, so be careful when you buy your solder. If it is the only solder available, it can be used with caution. For tips on using lead free solder read this [http://www.kester.com/kester-content/uploads/2013/06/Lead-free-Handsoldering.Final_.4.19.06.pdf article]. For tips on repair and rework with lead free solde look [http://www.chemtronics.com/descriptions/document/2005V4N3TheTechniciansPerspective.pdf here]. It generally comes in two compounds Tin/Copper called SnCu or Tin/Silver/Copper (96.5% Tin, 3.0% Silver, 0.5% Copper) called [http://en.wikipedia.org/wiki/Tin-silver-copper SAC]. | ||
===Solder Forms=== | ===Solder Forms=== | ||
| Line 58: | Line 63: | ||
====Solder Wire==== | ====Solder Wire==== | ||
Solder wire typically comes on spools. A 1 lb. spool will last a long time for hard core builder and 1/2lb spools are generally a good choice for most users. | [[File:Solder.jpg|300px]] | ||
Solder wire typically comes on spools. A 1 lb. spool will last a long time for hard core builder and 1/2lb spools are generally a good choice for most users. A 1/2lb spool should be enough for over 20K solder joints. | |||
Solder wire comes in different diameters. The most common ones are: | Solder wire comes in different diameters. The most common ones are: | ||
| Line 70: | Line 77: | ||
====Solder Paste==== | ====Solder Paste==== | ||
[[File:Solder paste.jpg|300px]] | |||
Solder paste is a gel that is a mixture of lead/tin solder and flux in a paste form. It is commonly used when attaching a surface mount device (SMD) to a printed circuit board. It is usually dispensed through a syringe with a needle tip. Solder paste has a relatively short shelf life of [http://www.kester.com/kester-content/uploads/2013/02/Shelf_Life_Policy.pdf 4-8 months], and should be stored in a refrigerator when not being used. It is typically smeared across the fine copper traces and the part placed on top of it. When the paste is heated up using either hot air or a soldering iron, the paste melts and is drawn to the metal legs and traces. | Solder paste is a gel that is a mixture of lead/tin solder and flux in a paste form. It is commonly used when attaching a surface mount device (SMD) to a printed circuit board. It is usually dispensed through a syringe with a needle tip. Solder paste has a relatively short shelf life of [http://www.kester.com/kester-content/uploads/2013/02/Shelf_Life_Policy.pdf 4-8 months], and should be stored in a refrigerator when not being used. It is typically smeared across the fine copper traces and the part placed on top of it. When the paste is heated up using either hot air or a soldering iron, the paste melts and is drawn to the metal legs and traces. | ||
===Bad Solder=== | ===Bad Solder (DO NOT USE)=== | ||
There are several types of solder that are commonly available, but should not be used for assembling printed circuit boards. | There are several types of solder that are commonly available, but should not be used for assembling printed circuit boards. | ||
====Pipe Solder (Commonly called Acid Core)==== | ====Pipe Solder (Commonly called Acid Core)==== | ||
Pipe solder is commonly used to "sweat" copper pipes together for home water systems. It often has a different type of flux inside of it that is corrosive and can damage delicate electronic components. Even if you find non acid core pipe solder, it is often very large diameter (0.050 - 0.060") and is hard to melt and get a good joint. It is usually found in the plumbing department at home improvement stores. '''DO NOT USE PIPE SOLDER TO ASSEMBLE YOUR BOARDS!!''' | Pipe solder is commonly used to "sweat" copper pipes together for home water systems. It often has a different type of flux inside of it that is corrosive and can damage delicate electronic components. Even if you find non acid core pipe solder, it is often very large diameter (0.050 - 0.060") and is hard to melt and get a good joint. It is usually found in the plumbing department at home improvement stores. '''DO NOT USE PIPE SOLDER TO ASSEMBLE YOUR BOARDS!!''' | ||
====Stained Glass Solder==== | ====Stained Glass Solder==== | ||
| Line 85: | Line 91: | ||
==Flux== | ==Flux== | ||
Flux is a chemical available in either a liquid or gel form used to help make better | [[File:Flux paste.jpg|300px]] | ||
[http://en.wikipedia.org/wiki/Flux_(metallurgy) Flux] is a chemical available in either a liquid or gel form used to help make better solder joint. Flux works by reacting with any dirt or oxide corrosion on the electronic part or copper trace on the printed circuit board. It both cleans and allows the molten solder to better "wet" and flow and bond to the surfaces. Flux is commonly found in the center of solder wire and is activated by the heat of the soldering iron and becomes active and begins it's chemical process. As the liquid flux flows along the surface it activates the surfaces and allows a better bond to occur with the solder. Flux can also be used separately and can be applies as a liquid from a dispensing pen or with a brush. | |||
While flux can deal with minor corrosion , it can not clean highly corroded parts. It is recommend that you use a fine emory cloth to buff surfaces of components or printed circuit boards that are fairly old. If the surfaces are corroded , the solder will likely not stick to the metal. It is common to brush on flux onto wires before tinning the ends of wire to ensure a better bond. It also helps to add some flux to desolder braid to help it wick the solder away from the component you are desoldering. | |||
There are three basic types of flux used with electronic soldering. | |||
* '''Organic Acid Water Soluble Flux''' - This flux should be avoided since it's residues are hygroscopic. The residue attracts water and forms an acid that can attack the components if it is not very carefully cleaned off the printed circuit board. They are not recommended for hobbyist use. | |||
* '''"No Clean" Flux''' - "No Clean" just refers to the fact that the residues are in theory non reactive and can be left on the printed circuit board without worrying about corrosion. However some residue can trap water on it's surface and cause issues for lighting controllers that are outside and subject to condensation due to moisture and heating and cooling of the enclosure they are in. | |||
* '''Rosin Flux''' - This flux is made from sap from Pine trees and has different levels of additives mixed in to increase it reactivity with the oxides on the metals. The common RMA flux like found in popular solders like [http://www.kester.com/download/44%20Flux-Cored%20Wire%20Data%20Sheet.pdf Kester 44] type solder leaves a residue that is non reactive and does not need to be cleaned unless the circuit will be exposed to high temperatures (>65 C). | |||
'''While not mandatory, it is strongly recommended that when you are finished soldering and before you install integrated circuits in their sockets, that you clean all soldered joints.''' This allows you to better identify poorly soldered joints and eliminated potential issues with conductivity and shorts due to condensation. | |||
===Flux Remover=== | |||
When you are finished soldering a board it is common and advised that you [http://www.tequipment.net/assets/1/26/Documents/Hakko/tn00000030.pdf cleang Flux residue ]off the printed circuit board. It is often seen as either a clear deposit, or sometimes a more burned brown stain around and on the solder joint. This is done using various solvents to help dissolve and wash away the flux residue. It is best done outdoors with good ventilation. The solvents are toxic and flammable and should be done away from flame or spark. Many people use a glass pyrex baking dish to soak the boards in and scrub with either a toothbrush or [http://www.circuitspecialists.com/852.html hog hair brush] to clean the stubborn deposits. The flux remover comes in either liquid form or in a spray can. | |||
There are various mixtures of solvents that are available to remove flux residue. One common one is sold by McMaster Carr and is a [http://www.mcmaster.com/#7655a12 12oz spray can]. There are also various options from [http://www.chemtronics.com/c-263-flux-removers.aspx Chemtronics] and [http://www.mgchemicals.com/products/solder/flux-removers/ MG Chemicals]. Some care must be used when choosing solvents for cleaning, some aggressive solvents can attack plastic parts on your printed circuit boards. | |||
[[File:Alcohol16ozfs.jpg|200px]] | |||
Many people use high quality Isopropyl Alcohol available from your local drugstore. Use the 90+% concentration to avoid a milky haze that can come from the lower concentration alcohol. Here is a [http://www.chemtronics.com/descriptions/document/2006V5N5IPAasAUniversalCleaner.pdf technical article] discussing using isopropyl alcohol to clean electronics. | |||
'''Always wear proper personal protective gear including gloves and goggles when cleaning flux residue off of printed circuit boards.''' | |||
There are several threads in the forums about cleaning flux residue like [http://doityourselfchristmas.com/forums/showthread.php?16343-Flux-Cleaner here], [http://doityourselfchristmas.com/forums/showthread.php?15740-Flux-Remover here] or [http://doityourselfchristmas.com/forums/showthread.php?12085-Cleaning-PCB here]. | |||
==Soldering Irons== | ==Soldering Irons== | ||
[http://store.curiousinventor.com/guides/how_to_solder/select_iron/ How to select an iron] | [http://store.curiousinventor.com/guides/how_to_solder/select_iron/ How to select an iron] | ||
===Temperature Controlled=== | ===Temperature Controlled=== | ||
====Analog==== | |||
[http://www.circuitspecialists.com/csi-station1a.html CSI 1A] | |||
[http://www.hakko.com/english/products/hakko_fx888d.html Hakko FX888D] | |||
[http://www.mcmelectronics.com/product/WELLER-WES51-/96-1760 Weller WES51] | |||
====Digital==== | |||
[[File:Csi 3dlf.jpg|300px]] | |||
[http://www.circuitspecialists.com/soldering-station-60-watt-3dlf.html CSI 3DLF] | |||
[http://www.mcmelectronics.com/product/TENMA-21-10115-/21-10115 Tenma 21-10115] | |||
===Low Cost Uncontrolled=== | ===Low Cost Uncontrolled=== | ||
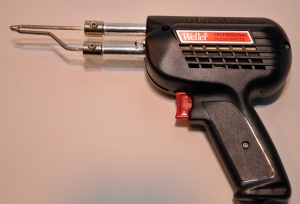
===Soldering Guns=== | ===Soldering Guns=== | ||
[[File:Solder gun.jpg|300px]] | |||
[http://en.wikipedia.org/wiki/Soldering_gun Soldering Guns] | [http://en.wikipedia.org/wiki/Soldering_gun Soldering Guns] | ||
=== | ==How to Solder== | ||
===Soldering Hints=== | |||
# When soldering ic sockets, solder two opposite corners in first. Then with a gentle pressure press the socket against the board and reflow the two pins to get it to seat flat against the pcb. | |||
# When soldering 3 pin devices like [http://en.wikipedia.org/wiki/MOSFET MOSFETS] and [http://en.wikipedia.org/wiki/TRIAC TRIACS], solder the center pin in first, then with a slight pressure, straighten the device and reflow the one pin to help straighten the device out. | |||
# When soldering TRIACS to the SS Series of controllers like the [[Renard_SS24_Controller_Board|SS24]], first attach all of the TRIACS to the heatsink loosely and solder the two end TRIACS in place first getting the entire row of devices straight and properly aligned. | |||
===Preparation=== | |||
====Clean the PCB and part from heavy dirt / oxidation==== | |||
====Secure the board and attach the part==== | |||
====Preheat the soldering iron==== | |||
====Clean the soldering iron tip==== | |||
[http://store.curiousinventor.com/guides/how_to_solder/cleantip Clean Tip Hints] | |||
====Tin the soldering iron tip==== | |||
===Iron Temperature=== | |||
===Soldering technique=== | |||
"5 Second Rule" | |||
====Apply heat to pcb and part==== | |||
====Add solder to joint==== | |||
=== | ====Remove Iron and Inspect==== | ||
=== | ====Trim excess lead==== | ||
=== | ===How To Solder Videos=== | ||
[https://vimeo.com/7952625 Soldering Renard Boards] WayneJ's Video Instructions for soldering a Renard PCB | |||
[http://curiousinventor.com/guides/How_To_Solder Curious Inventor's Soldering Basics] Video tutorial that contains useful guidance on soldering, soldering tip hygiene and technique. | |||
[http://www.curiousinventor.com/guides/Surface_Mount_Soldering Curious Inventor's SMT Soldering Tutorial] Video tutorial that contains guidance on SMT soldering techniques. | |||
[http://www.sparkfun.com/datasheets/Prototyping/General/SolderingBasics.pdf SparkFun SMT soldering tutorial] PDF tutorial show techniques and methods for SMT soldering. | |||
= | [http://www.youtube.com/watch?v=J5Sb21qbpEQ EEVblog #180 - Soldering Tutorial Part 1 - Tools] | ||
= | [http://www.youtube.com/watch?v=fYz5nIHH0iY EEVblog #183 - Soldering Tutorial Part 2] | ||
[http://youtu.be/b9FC9fAlfQE EEVblog #186 - Soldering Tutorial Part 3 - Surface Mount] | |||
[http:// | ===How To Solder Guides=== | ||
[http://doityourselfchristmas.com/forums/attachment.php?attachmentid=10887&d=1313008228 Soldering is Easy]: Comic book format beginners guide to soldering | |||
[https://docs.google.com/open?id=0B1Q2XTPf2Q8xRjNiU3hGeVhER0E SMT Soldering] Comic book beginners guide to soldering Surface Mount Devices SMT | |||
===Common Soldering Problems=== | |||
[[File:Tools Header Joints.jpg|400px]] | |||
[https://learn.adafruit.com/adafruit-guide-excellent-soldering/common-problems Good Guide to soldering problems] | |||
==How to Desolder== | ==How to Desolder== | ||
| Line 146: | Line 216: | ||
[http://store.curiousinventor.com/guides/how_to_solder/desoldering Desoldering Hints] | [http://store.curiousinventor.com/guides/how_to_solder/desoldering Desoldering Hints] | ||
[http://www.youtube.com/watch?v= | [http://www.youtube.com/watch?v=Z38WsZFmq8E Desoldering demonstration video] | ||
| Line 157: | Line 227: | ||
===Solder Sucker=== | ===Solder Sucker=== | ||
[[ | [[File:Solder sucker.jpg|300px]] | ||
[http://www.edsyn.com/index.php?Mode=DesolderingTools Desoldering Pump "SOLDAPULLT"] | |||
[http://www.radioshack.com/product/index.jsp?productId=2062742 Radio Shack Desoldering Bulb] | [http://www.radioshack.com/product/index.jsp?productId=2062742 Radio Shack Desoldering Bulb] | ||
| Line 163: | Line 235: | ||
[http://www.radioshack.com/product/index.jsp?productId=2062745 Radio Shack Spring loaded] | [http://www.radioshack.com/product/index.jsp?productId=2062745 Radio Shack Spring loaded] | ||
[http://www.youtube.com/watch?v=Aw4lZGk90i4 Video] | [http://www.youtube.com/watch?v=Aw4lZGk90i4 Video] | ||
| Line 171: | Line 243: | ||
[https://www.hakko.com/english/products/hakko_808.html Hakko 808 Desoldering gun] | [https://www.hakko.com/english/products/hakko_808.html Hakko 808 Desoldering gun] | ||
[[File:Csi 474a.jpg|300px]] | |||
[http://www.circuitspecialists.com/csi474a.html Circuit Specialists 474A Desoldering station] | [http://www.circuitspecialists.com/csi474a.html Circuit Specialists 474A Desoldering station] | ||
== | ===Chipquick=== | ||
[http://www.chipquik.com/ Chipquick] is a special alloy that you add to existing solder on a board that lowers the melting point of the solder and allows an easier removal of high pin count surface mount devices. | |||
[http://www.youtube.com/watch?v=UmD7F0--7Lc Demo video] | |||
==Soldering Tools== | |||
===Soldering Iron Tips=== | |||
[[File:Tip.jpg|300px]] | |||
[http://www.hakko.com/english/tip_selection/selection_1.html How to select a soldering iron tip] | |||
[ | ===Wire Cutters=== | ||
[[File:Side cutters.jpg|300px]] | |||
===Holders=== | |||
[ | ====3rd Hand==== | ||
[[File:Third hand.jpg|300px]] | |||
[ | ====Board Holders==== | ||
[[File:Board holder.jpg|300px]] | |||
====Tweezers==== | |||
====Painters Tape==== | |||
[ | ===Magnifying Glass=== | ||
[[File:Desk lamp.jpg|300px]] | |||
[[File:Magnifying glass.jpg|300px]] | |||
[ | ===Tip Cleaner=== | ||
[[File:Tip cleaner.jpg|300px]] | |||
===Soldering Iron Stand/ Holder=== | |||
== | ===Electrostatic Discharge (ESD) Mat=== | ||
[ | [[File:Antistatic mat.jpg|300px]] | ||
[ | ===Hand Tools=== | ||
[[File:Solder tools.jpg|300px]] | |||
== | ===Fume Extractor=== | ||
[ | [[File:Smoke extractor.jpg|300px]] | ||
[http:// | [http://m.instructables.com/id/EKN6871P3FEP287LND/ Build your own fume extractor] | ||
==Vendors== | ==Vendors== | ||
| Line 218: | Line 310: | ||
[http://www.taydaelectronics.com Tayda] sells low cost spare components and pcbs to practice on. | [http://www.taydaelectronics.com Tayda] sells low cost spare components and pcbs to practice on. | ||
==Soldering | ==How to Practice Soldering == | ||
For less than $10 you can buy a large collection of parts and blank printed circuit boards from many vendors to practice on. One vendor, [http://www.taydaelectronics Tayda] has a good selection of low cost parts and inexpensive shipping. They usually deliver in 5-10 days. An example of the parts you can buy for under $9 including shipping is: | After you buy your Soldering iron and some solder, it is helpful to practice on some noncritical parts before you build your lighting controllers.By practicing on spare parts and boards you can improve your skills and learn how to solder different parts to a pcb. | ||
===Through Hole Soldering Parts=== | |||
For less than $10 you can buy a large collection of parts and blank printed circuit boards from many vendors to practice on. One vendor, [http://www.taydaelectronics.com Tayda] has a good selection of low cost parts and inexpensive shipping. They usually deliver in 5-10 days. An example of the parts you can buy for under $9 including shipping is: | |||
{| class="wikitable" | {| class="wikitable" | ||
| Line 239: | Line 335: | ||
|680 OHM 1/4W 5% Carbon Film Resistor||A-2075||20 | |680 OHM 1/4W 5% Carbon Film Resistor||A-2075||20 | ||
|- | |- | ||
|1K OHM 1/4W 5% Carbon Film Resistor||A- | |1K OHM 1/4W 5% Carbon Film Resistor||A-2123||20 | ||
|- | |- | ||
|0.1uF 50V Multilayer Monolithic Ceramic Capacitor||A-214||5 | |0.1uF 50V Multilayer Monolithic Ceramic Capacitor||A-214||5 | ||
| Line 262: | Line 358: | ||
This would give you 78 electronic components, 4 printed circuit boards and 285 solder joints you could practice on..... | This would give you 78 electronic components, 4 printed circuit boards and 285 solder joints you could practice on..... | ||
==Threads== | ===Surface Mount Devices (SMD) Practice Kit=== | ||
[http://store.curiousinventor.com/smd-soldering-practice-kit.html Practice Kit] | |||
[http://www.dx.com/p/smd-soldering-practice-pcb-board-kit-green-149752#.U0MHd_ldV8E Another Practice Kit] | |||
==Other Information== | |||
===DIYC Forum Threads=== | |||
[http://doityourselfchristmas.com/forums/showthread.php?454-Soldering-Irons Soldering Irons] | [http://doityourselfchristmas.com/forums/showthread.php?454-Soldering-Irons Soldering Irons] | ||
| Line 270: | Line 374: | ||
[http://doityourselfchristmas.com/forums/showthread.php?13872-Desoldering-advice&highlight=desoldering Desolder braid] | [http://doityourselfchristmas.com/forums/showthread.php?13872-Desoldering-advice&highlight=desoldering Desolder braid] | ||
===Solder and soldering Related Articles=== | |||
[http://store.curiousinventor.com/guides/how_to_solder/kind_of_solder/ Types of solder] | |||
[http://store.curiousinventor.com/guides/how_to_solder/select_iron Choosing a soldering iron] | |||
[http://www.apexhandtools.com/brands/cf_files/download.cfm?type=Technical_Specifications&file=Solder_Safety_Warnings.pdf Soldering Safety Warnings by Weller] | |||
Latest revision as of 15:22, 7 April 2015
Intro
Soldering is easy! Many new members come to DIYC having never soldered a board before. Most people learn to solder and quickly are building their own controllers and spending the money they saved on more lights. There are numerous videos and tips listed below to help you learn to solder.
Soldering is joining two metal surfaces together using another metal that is melted and cooled to connect the two metal surfaces mechanically and electrically. In electronics you are joining the copper traces on the printed circuit board to the metal legs of the various electronic parts using special lead/tin solder.
The basic concept is to firmly attach the electronic part through the proper hole in the printed circuit board and then heat the joint up with a soldering iron. When both the copper trace and the component leg are properly heated, you then apply the solder wire to the joint and it will melt and flow around the copper and attach itself to the component leg. You then remove the soldering iron and the solder will cool and the liquid solder will freeze into a solid connection.
Disclaimers
The standard disclaimers pertaining to the information contained on this wiki page are listed here.
THIS WIKI PAGE IS NOT COMPLETE YET AND HAS NOT BEEN CHECKED FOR ERRORS.
Soldering quick tips
| The best solder joints come from a combination of good solder, good tools and practice.
A good solder like Kester 44 (use 63/37 with flux core and 0.032" diameter 1/2lb spool for starters) along with a good temperature controlled soldering like the CSI 1A, CSI 3DLF or the Tenma 21-10115 will result in good solder joints. It is common to set the iron temperature to 650 - 750 °F for a good solder joint. For under $10 you can buy a lot of spare parts and pcbs to practice on listed below You do not have to clean most flux residue from a soldered joint, but it can help to clean them to see if there are bad joints. Do not attempt to solder circuits that are connected to live power. Be very careful, soldering irons are very hot, they can burn you or start a fire it you are careless. |
Solder Types
There are many kinds of solder available, but it is important that you choose the correct solder to use on your electronics. You should only use lead/tin solder designed for circuit boards. Use of the wrong solder could damage your components and result in a board that does not operate correctly.
Electronic Solder
There are several types of electronic solder available. The most common types are:
- Lead/Tin solder
- "Silver" solder
- Lead-free solder
IT IS STRONGLY RECOMMENDED THAT YOU ONLY USE LEAD/TIN SOLDER FOR BEST RESULTS!!
Lead/Tin
The most common and proper solder to use is Lead/Tin. It is generally available locally from electronic part stores like Radio Shack or online from numerous vendors listed below.
- Lead/Tin solder is available in different mixtures of the two metals. There are two popular mixtures available:
- *63/37 (Called a eutectic mixture) It contains 63% Tin and 37% Lead and melts exactly at 183 °C (361 °F)
- *60/40 Is a common solder that contains 60% Tin and 40% Lead and melts over a range of 183–190 °C (361–374 °F)
- They both work fine for electronic work. It is a personal choice as to which you use. The main difference is how they both cool. The 60/40 when cooling goes through a "slushy" phase and does not always result in a bright shiny joint. The 63/37 eutectic solder cools quickly and does not go through the slushy phase. Many people prefer the 63/37 solder, but will use whatever is available when they have it!
- Care should be used when handling Lead based solders, you should always wash your hands when you are finished soldering and before eating. In practice there are very low levels of lead and decomposition products from the flux in the smoke from soldering, so it is a good idea to not inhale the smoke. You should also not put the solder in your mouth or chew on it....
"Silver" Solder
- Silver solder is similar to Lead/Tin solder, but has a small amount of silver (2-4%) added to it. It is more expensive and is not commonly used for printed circuit board work. It is a specialty solder sometimes used for parts that are already silver plated. The common silver solder eutectic mixture that is 62% Tin/36% Lead/2% Silver melts at 179 °C (354 °F). There is also a "Hard Silver Solder" that has 80%Silver in it and it is used for soldering jewelry and not electronics.
Lead Free Solder
- BEGINNERS AND CASUAL USERS SHOULD AVOID LEAD FREE SOLDER. Lead free solder became popular in Europe on July 1, 2006 due to environmental laws associated with eliminating lead. It is generally not recommended for printed circuit board soldering by hobbyists. It is harder to get a good solder joint and is only used by manufacturers using special tools and processes. It requires greater heat and is noticeably harder to get a good hand soldered joint compared to lead/tin solder. Lead Free solder is often sold right next to regular lead/tin solder in stores, so be careful when you buy your solder. If it is the only solder available, it can be used with caution. For tips on using lead free solder read this article. For tips on repair and rework with lead free solde look here. It generally comes in two compounds Tin/Copper called SnCu or Tin/Silver/Copper (96.5% Tin, 3.0% Silver, 0.5% Copper) called SAC.
Solder Forms
Solder comes in different shapes and forms depending on the type of soldering you are doing. The most common form is shaped like wire.
Solder Wire
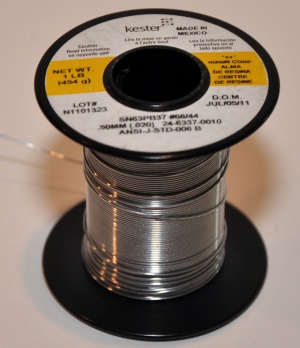
Solder wire typically comes on spools. A 1 lb. spool will last a long time for hard core builder and 1/2lb spools are generally a good choice for most users. A 1/2lb spool should be enough for over 20K solder joints.
Solder wire comes in different diameters. The most common ones are:
- 0.020” popular for fine work and hand soldering Surface mount devices
- 0.030” used for general soldering of through hole devices
- 0.040" used for soldering large connectors or very large components like fuse holders
The difference is a matter of personal choice, most people use 0.030" solder as a good overall compromise of speed and amount of solder they need for a joint. The larger solder often takes more heat and time to get a good joint. The smaller solder requires you to feed the solder in faster to get the proper amount of solder to make the joint. You are less likely to end up with excess solder on a joint with the smaller solder. For a good photo of the different sizes of solder compared to a integrated circuit chip, look here
Solder wire also comes with or without a flux core. Flux is a chemical that is in the middle of the solder that quickly melts and flows over the metal surfaces and cleans and wets the surfaces as you solder. It generally results in a better joint, but will often leave a harmless residue on the board.
Solder Paste
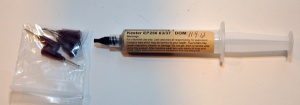
Solder paste is a gel that is a mixture of lead/tin solder and flux in a paste form. It is commonly used when attaching a surface mount device (SMD) to a printed circuit board. It is usually dispensed through a syringe with a needle tip. Solder paste has a relatively short shelf life of 4-8 months, and should be stored in a refrigerator when not being used. It is typically smeared across the fine copper traces and the part placed on top of it. When the paste is heated up using either hot air or a soldering iron, the paste melts and is drawn to the metal legs and traces.
Bad Solder (DO NOT USE)
There are several types of solder that are commonly available, but should not be used for assembling printed circuit boards.
Pipe Solder (Commonly called Acid Core)
Pipe solder is commonly used to "sweat" copper pipes together for home water systems. It often has a different type of flux inside of it that is corrosive and can damage delicate electronic components. Even if you find non acid core pipe solder, it is often very large diameter (0.050 - 0.060") and is hard to melt and get a good joint. It is usually found in the plumbing department at home improvement stores. DO NOT USE PIPE SOLDER TO ASSEMBLE YOUR BOARDS!!
Stained Glass Solder
Solder used for stained glass manufacture is often available in large diameter wire (0.050 - 0.075") and in strips. It is generally used with a very large soldering iron specially designed to heat the large pieces together. It should not be used for electronic work.
Flux
Flux is a chemical available in either a liquid or gel form used to help make better solder joint. Flux works by reacting with any dirt or oxide corrosion on the electronic part or copper trace on the printed circuit board. It both cleans and allows the molten solder to better "wet" and flow and bond to the surfaces. Flux is commonly found in the center of solder wire and is activated by the heat of the soldering iron and becomes active and begins it's chemical process. As the liquid flux flows along the surface it activates the surfaces and allows a better bond to occur with the solder. Flux can also be used separately and can be applies as a liquid from a dispensing pen or with a brush.
While flux can deal with minor corrosion , it can not clean highly corroded parts. It is recommend that you use a fine emory cloth to buff surfaces of components or printed circuit boards that are fairly old. If the surfaces are corroded , the solder will likely not stick to the metal. It is common to brush on flux onto wires before tinning the ends of wire to ensure a better bond. It also helps to add some flux to desolder braid to help it wick the solder away from the component you are desoldering.
There are three basic types of flux used with electronic soldering.
- Organic Acid Water Soluble Flux - This flux should be avoided since it's residues are hygroscopic. The residue attracts water and forms an acid that can attack the components if it is not very carefully cleaned off the printed circuit board. They are not recommended for hobbyist use.
- "No Clean" Flux - "No Clean" just refers to the fact that the residues are in theory non reactive and can be left on the printed circuit board without worrying about corrosion. However some residue can trap water on it's surface and cause issues for lighting controllers that are outside and subject to condensation due to moisture and heating and cooling of the enclosure they are in.
- Rosin Flux - This flux is made from sap from Pine trees and has different levels of additives mixed in to increase it reactivity with the oxides on the metals. The common RMA flux like found in popular solders like Kester 44 type solder leaves a residue that is non reactive and does not need to be cleaned unless the circuit will be exposed to high temperatures (>65 C).
While not mandatory, it is strongly recommended that when you are finished soldering and before you install integrated circuits in their sockets, that you clean all soldered joints. This allows you to better identify poorly soldered joints and eliminated potential issues with conductivity and shorts due to condensation.
Flux Remover
When you are finished soldering a board it is common and advised that you cleang Flux residue off the printed circuit board. It is often seen as either a clear deposit, or sometimes a more burned brown stain around and on the solder joint. This is done using various solvents to help dissolve and wash away the flux residue. It is best done outdoors with good ventilation. The solvents are toxic and flammable and should be done away from flame or spark. Many people use a glass pyrex baking dish to soak the boards in and scrub with either a toothbrush or hog hair brush to clean the stubborn deposits. The flux remover comes in either liquid form or in a spray can.
There are various mixtures of solvents that are available to remove flux residue. One common one is sold by McMaster Carr and is a 12oz spray can. There are also various options from Chemtronics and MG Chemicals. Some care must be used when choosing solvents for cleaning, some aggressive solvents can attack plastic parts on your printed circuit boards.
Many people use high quality Isopropyl Alcohol available from your local drugstore. Use the 90+% concentration to avoid a milky haze that can come from the lower concentration alcohol. Here is a technical article discussing using isopropyl alcohol to clean electronics.
Always wear proper personal protective gear including gloves and goggles when cleaning flux residue off of printed circuit boards.
There are several threads in the forums about cleaning flux residue like here, here or here.
Soldering Irons
Temperature Controlled
Analog
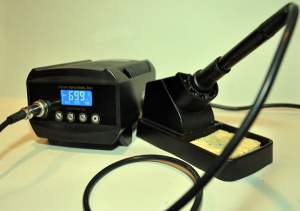
Digital
Low Cost Uncontrolled
Soldering Guns
How to Solder
Soldering Hints
- When soldering ic sockets, solder two opposite corners in first. Then with a gentle pressure press the socket against the board and reflow the two pins to get it to seat flat against the pcb.
- When soldering 3 pin devices like MOSFETS and TRIACS, solder the center pin in first, then with a slight pressure, straighten the device and reflow the one pin to help straighten the device out.
- When soldering TRIACS to the SS Series of controllers like the SS24, first attach all of the TRIACS to the heatsink loosely and solder the two end TRIACS in place first getting the entire row of devices straight and properly aligned.
Preparation
Clean the PCB and part from heavy dirt / oxidation
Secure the board and attach the part
Preheat the soldering iron
Clean the soldering iron tip
Tin the soldering iron tip
Iron Temperature
Soldering technique
"5 Second Rule"
Apply heat to pcb and part
Add solder to joint
Remove Iron and Inspect
Trim excess lead
How To Solder Videos
Soldering Renard Boards WayneJ's Video Instructions for soldering a Renard PCB
Curious Inventor's Soldering Basics Video tutorial that contains useful guidance on soldering, soldering tip hygiene and technique.
Curious Inventor's SMT Soldering Tutorial Video tutorial that contains guidance on SMT soldering techniques.
SparkFun SMT soldering tutorial PDF tutorial show techniques and methods for SMT soldering.
EEVblog #180 - Soldering Tutorial Part 1 - Tools
EEVblog #183 - Soldering Tutorial Part 2
EEVblog #186 - Soldering Tutorial Part 3 - Surface Mount
How To Solder Guides
Soldering is Easy: Comic book format beginners guide to soldering
SMT Soldering Comic book beginners guide to soldering Surface Mount Devices SMT
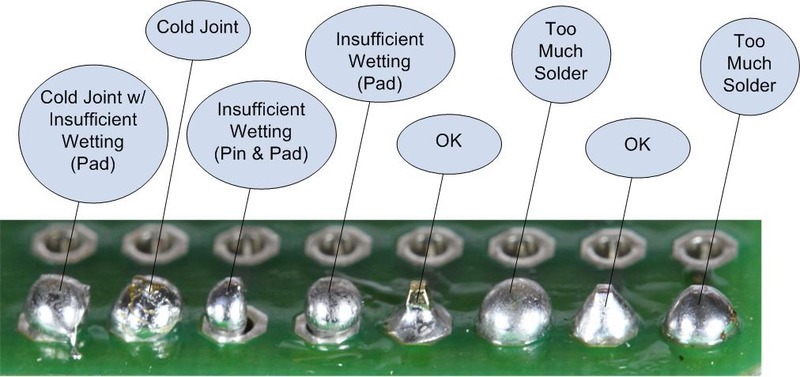
Common Soldering Problems
Good Guide to soldering problems
How to Desolder
Desoldering demonstration video
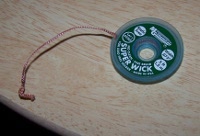
Desolder Braid
http://www.chemtronics.com/descriptions/document/SIZINGGUIDE_LR.pdf
Solder Sucker
Desoldering Iron
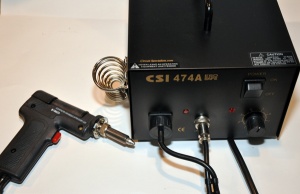
Circuit Specialists 474A Desoldering station
Chipquick
Chipquick is a special alloy that you add to existing solder on a board that lowers the melting point of the solder and allows an easier removal of high pin count surface mount devices.
Soldering Tools
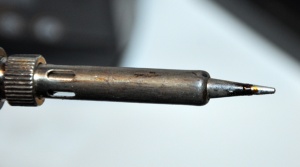
Soldering Iron Tips
How to select a soldering iron tip
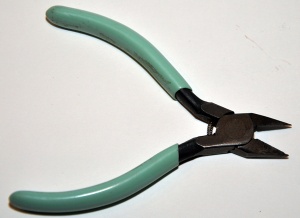
Wire Cutters
Holders
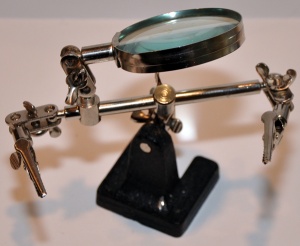
3rd Hand
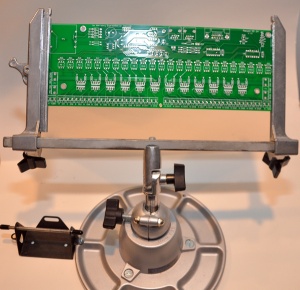
Board Holders
Tweezers
Painters Tape
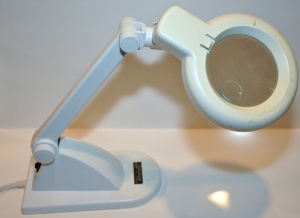
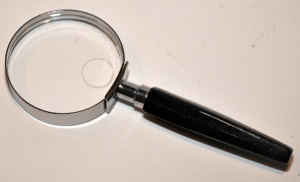
Magnifying Glass
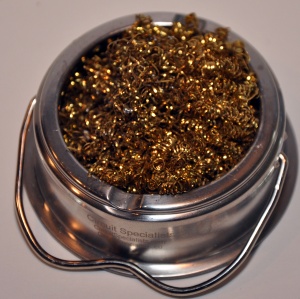
Tip Cleaner
Soldering Iron Stand/ Holder
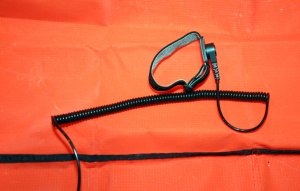
Electrostatic Discharge (ESD) Mat
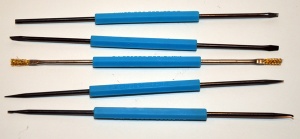
Hand Tools
Fume Extractor
Vendors
Circuit Specialists Soldering irons, solder and tools
MCM Electronics Soldering irons, solder and tools
All Spec Soldering irons, solder and tools
Radio ShackSoldering irons, solder and tools
Hobby KingSoldering irons
Kester Solder Solder
Tayda sells low cost spare components and pcbs to practice on.
How to Practice Soldering
After you buy your Soldering iron and some solder, it is helpful to practice on some noncritical parts before you build your lighting controllers.By practicing on spare parts and boards you can improve your skills and learn how to solder different parts to a pcb.
Through Hole Soldering Parts
For less than $10 you can buy a large collection of parts and blank printed circuit boards from many vendors to practice on. One vendor, Tayda has a good selection of low cost parts and inexpensive shipping. They usually deliver in 5-10 days. An example of the parts you can buy for under $9 including shipping is:
| Description | SKU | Quantity |
|---|---|---|
| Small StripBoard 94x53mm (Copper) | A-5031 | 2 |
| Big StripBoard 110x93mm (Copper) | A-2384 | 1 |
| Prototyping Board 142x74mm | A-5052 | 1 |
| 8 pin DIP IC Socket Adaptor Solder Type | A-001 | 4 |
| 14 pin DIP IC Socket Adaptor Solder Type | A-004 | 4 |
| 6 pin DIP IC Socket Adaptor Solder Type | A-624 | 4 |
| 680 OHM 1/4W 5% Carbon Film Resistor | A-2075 | 20 |
| 1K OHM 1/4W 5% Carbon Film Resistor | A-2123 | 20 |
| 0.1uF 50V Multilayer Monolithic Ceramic Capacitor | A-214 | 5 |
| LED 5mm Red Super Bright | A-1554 | 5 |
| BTA06-600C BTA06-600 Triac 600V 6A | BTA06-600C | 1 |
| 1N4004 Diode 1A 400V | A-156 | 4 |
| DG301 Screw Terminal Block 2 Positions 5mm | A-668 | 3 |
| IRLU024 MOSFET 65 mOhm 17A 55V N-channel I-PAK-3 IRLU024NPBF | A-1453 | 1 |
| LM7805 L7805 7805 Voltage Regulator IC 5V 1.5A | A-179 | 1 |
| 40 Pin 2.54mm Single Row Pin Header Strip | A-197 | 1 |
| 47uF 16V 105C Radial Electrolytic Capacitor 5x11mm | A-4522 | 5 |
This would give you 78 electronic components, 4 printed circuit boards and 285 solder joints you could practice on.....
