VUmeter: Difference between revisions
Rlbrinkman (talk | contribs) |
Rlbrinkman (talk | contribs) |
||
| Line 12: | Line 12: | ||
<li style="display: inline-block;"> [[image:VUmeter front view.jpg|frame|none|<center>Front view</center>]] </li> | <li style="display: inline-block;"> [[image:VUmeter front view.jpg|frame|none|<center>Front view</center>]] </li> | ||
<li style="display: inline-block;"> [[image:VUmeter back view.jpg|frame|none|<center>Back view</center>]] </li> | <li style="display: inline-block;"> [[image:VUmeter back view.jpg|frame|none|<center>Back view</center>]] </li> | ||
<li style="display: inline-block;"> [[image:VUmeter installed.jpg|frame|none|<center>VUmeter assembly mounted into a | <li style="display: inline-block;"> [[image:VUmeter installed.jpg|frame|none|<center>VUmeter assembly mounted into a [[Sleeves|sleeve]]</center>]] </li> | ||
</ul></div> | </ul></div> | ||
In the future I will try to provide a link to a short video of the VUmeter in action. | In the future I will try to provide a link to a short video of the VUmeter in action. | ||
A final thing I will offer is a very technical description of the | A final thing I will offer is a very technical description of the [[:file:VUMeter Analysis.pdf|VUmeter circuit implementation]]. It it unlikely that you will be able to <u>directly</u> use any of this information since my display is a very customized Arduino-based implementation. However you may be able to benefit from some of the general discussion of the approach used, in particular the audio smoothing discussion and circuit. | ||
Revision as of 06:56, 27 March 2020
Introduction
Some songs in your display may be enhanced by a digital VUmeter (Volume Unit meter) display. The display adds nice visual activity to your display and can be synced to music or speaking parts.
You can make the VUmeter as large as you like, have as many segments as you like, use different colors for different volume levels, and arrange in either a vertical or horizontal format.
You could also arrange the segments of your VUmeter in a semicircle, such that when the segments light in sequence they give a rotational effect, mimicking the needle of an old-fashioned mechanical VUmeter.
My Implementation
My VUmeter display is 6 feet tall by 16 inches wide and composed of 16 red LED segments. I just happened to have 16 199x Thunderbird car tail light segments that each have an array of 22 red LEDs that operate on 12V, that I repurposed for the VUmeter display. Here's the result:
-
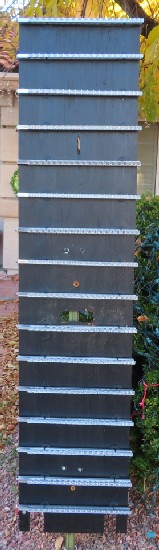
Front view -

Back view -
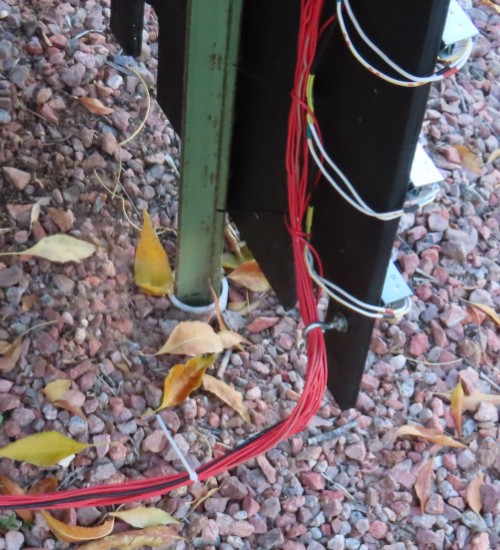
VUmeter assembly mounted into a sleeve


In the future I will try to provide a link to a short video of the VUmeter in action.
A final thing I will offer is a very technical description of the VUmeter circuit implementation. It it unlikely that you will be able to directly use any of this information since my display is a very customized Arduino-based implementation. However you may be able to benefit from some of the general discussion of the approach used, in particular the audio smoothing discussion and circuit.