RGB Channels: Difference between revisions
No edit summary |
No edit summary |
||
| Line 1: | Line 1: | ||
Copied from HLS Getting Started Guide. | Copied from HLS Getting Started Guide. | ||
Needs extensive | Needs extensive revisions | ||
====Introduction to RGB==== | |||
---- | |||
RGB lighting, both dumb and smart pixels, have added a large amount of complexity and channel counts in displays. HLS is very advanced in handling RGB channels. This section of the wiki will discuss setting up channels, converting multiple channels into one, and how to use the RGB features for other display items. | |||
<br /> | |||
====Adding RGB Channels==== | |||
---- | |||
[[File:HLS_AddRGBChannels_11V.png|thumb|Figure 3-24]] | |||
To add RGB channels, first, open the Channel Manager (Manage Channels -> Manage Raw Channels). | |||
*Add the number of RGB channels that you will need. | |||
*'''Note:''' Add the number of RGB "whole" channels you need, not the individual channel numbers. HLS will recognize that RGB channels contain 3 real channels automatically. So, if you have 50 pixels, add 50 channels, NOT 150 channels. | |||
*Select the channels that will be RGB by clicking and highlighting them. | |||
*Click the ''Set Selection RGB Flags'' to convert the channels to RGB. (See Figure 3-24) | |||
*Assign the channels to a universe that is greater than zero. | |||
*Click ''Renumber All Channels for Output'' to reconfigure the channel usage (i.e., 3 channels per RGB channel). | |||
*If your channels have a GRB order, click the ''Set Channel RGB GRB Type'' button. | |||
<br clear=all> | |||
Converting 3 Red, Green, and Blue Channels to one RGB Channel | ====Converting 3 Red, Green, and Blue Channels to one RGB Channel==== | ||
---- | |||
3 to 1 channel conversion process. | |||
<br /> | |||
====Using RGB Channels to Reduce Multi-Color Channels by 2/3==== | |||
---- | |||
Channel Reduction | |||
<br /> | |||
====Previous Page Version==== | |||
---- | |||
Let’s create a simple sequence with 8 RGB channels. | Let’s create a simple sequence with 8 RGB channels. | ||
Revision as of 06:16, 30 January 2013
Copied from HLS Getting Started Guide.
Needs extensive revisions
Introduction to RGB
RGB lighting, both dumb and smart pixels, have added a large amount of complexity and channel counts in displays. HLS is very advanced in handling RGB channels. This section of the wiki will discuss setting up channels, converting multiple channels into one, and how to use the RGB features for other display items.
Adding RGB Channels

To add RGB channels, first, open the Channel Manager (Manage Channels -> Manage Raw Channels).
- Add the number of RGB channels that you will need.
- Note: Add the number of RGB "whole" channels you need, not the individual channel numbers. HLS will recognize that RGB channels contain 3 real channels automatically. So, if you have 50 pixels, add 50 channels, NOT 150 channels.
- Select the channels that will be RGB by clicking and highlighting them.
- Click the Set Selection RGB Flags to convert the channels to RGB. (See Figure 3-24)
- Assign the channels to a universe that is greater than zero.
- Click Renumber All Channels for Output to reconfigure the channel usage (i.e., 3 channels per RGB channel).
- If your channels have a GRB order, click the Set Channel RGB GRB Type button.
Converting 3 Red, Green, and Blue Channels to one RGB Channel
3 to 1 channel conversion process.
Using RGB Channels to Reduce Multi-Color Channels by 2/3
Channel Reduction
Previous Page Version
Let’s create a simple sequence with 8 RGB channels. Start the sequence as usual and add a WAV file for the music. Choose the Manage Channels tab and select Manage Raw Channels. For this example we will create a special RGB arch. 8 outputs will be red, 8 will be green, and 8 will be blue. Because we are using RGB outputs, we will only need to add 8 output channels to our HLS sequence. Each RGB channel will control 3 outputs- 1 red, 1 green, and 1 blue.
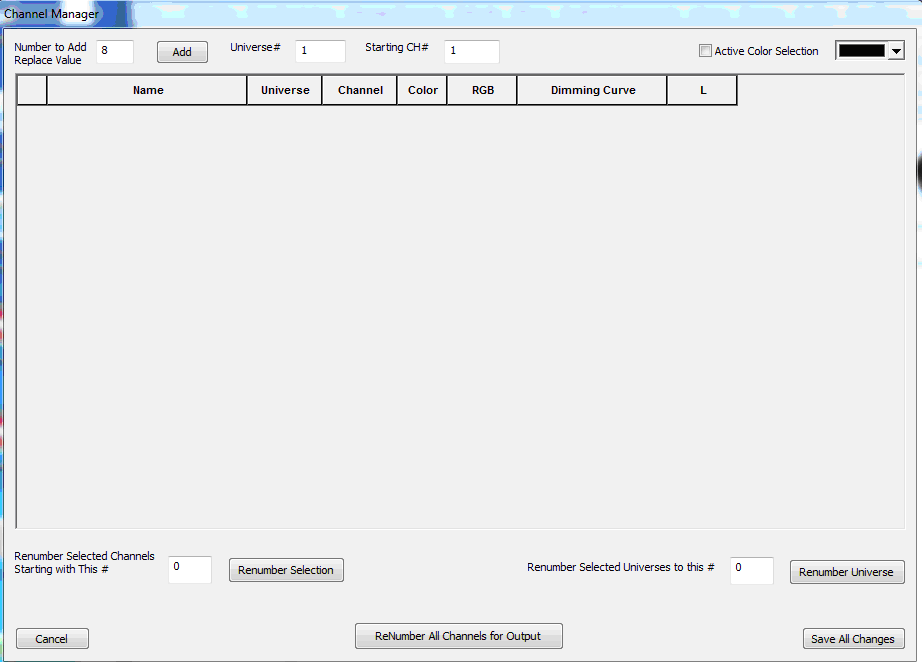
In Figure 1-92, 8 was entered for the number of channels. The universe was changed to 1 and channel numbering was set to begin at 1.
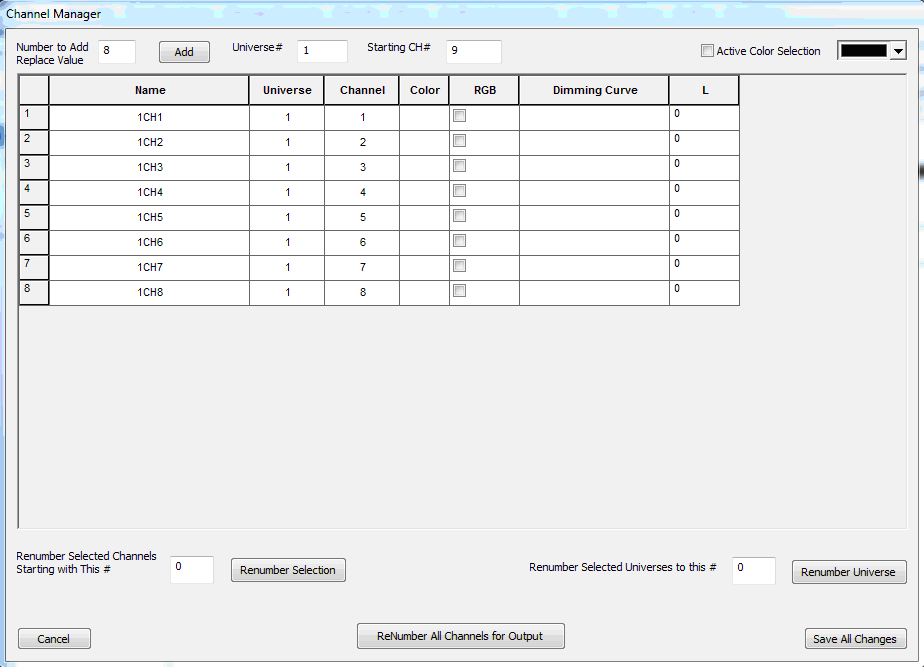
Next the Add button was clicked at the top of HLS and the screen shown in Figure 1-94 appeared. Note that the channels were added. Note the column labeled RGB. In HLS an RGB channel will use 3 outputs. So if we make channel 1 an RGB channel it will use outputs 1, 2, and 3.
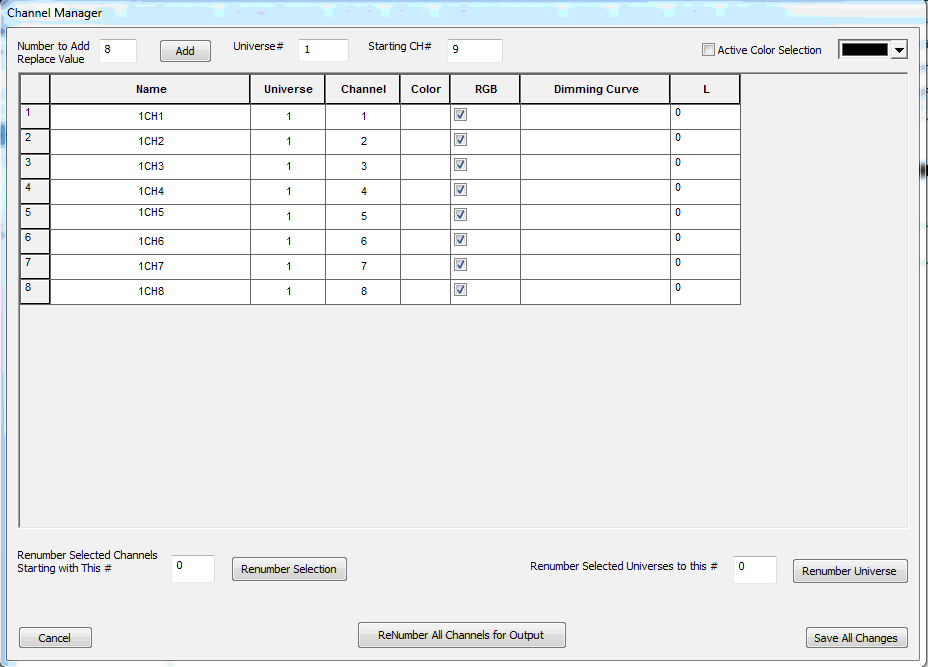
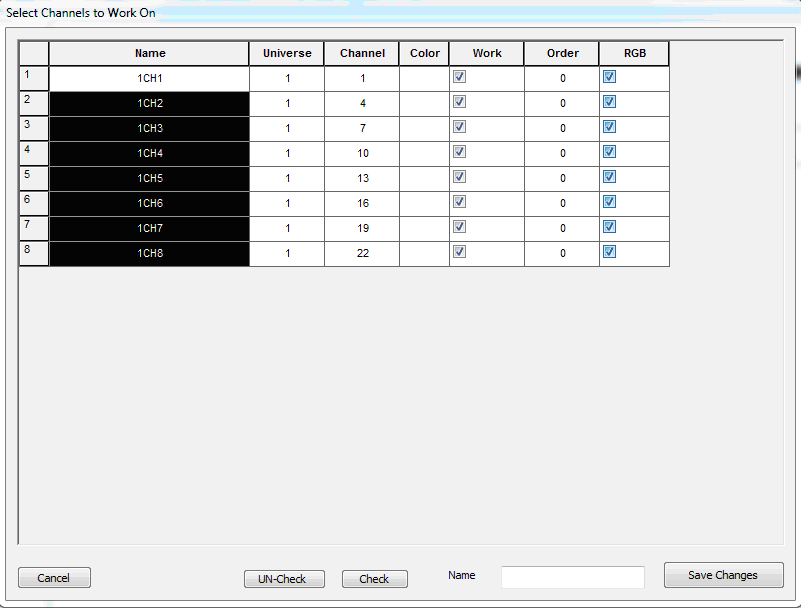
We need 8 RGB channels (8*3=24 outputs). Figure 1-95 shows that the RGB box was checked for the 8 outputs. Note that the channels that are visible on the screen are still named as output channels 1-8. Note also that the names of the channels were not changed for this example they are still 1CH1 through 1CH8.
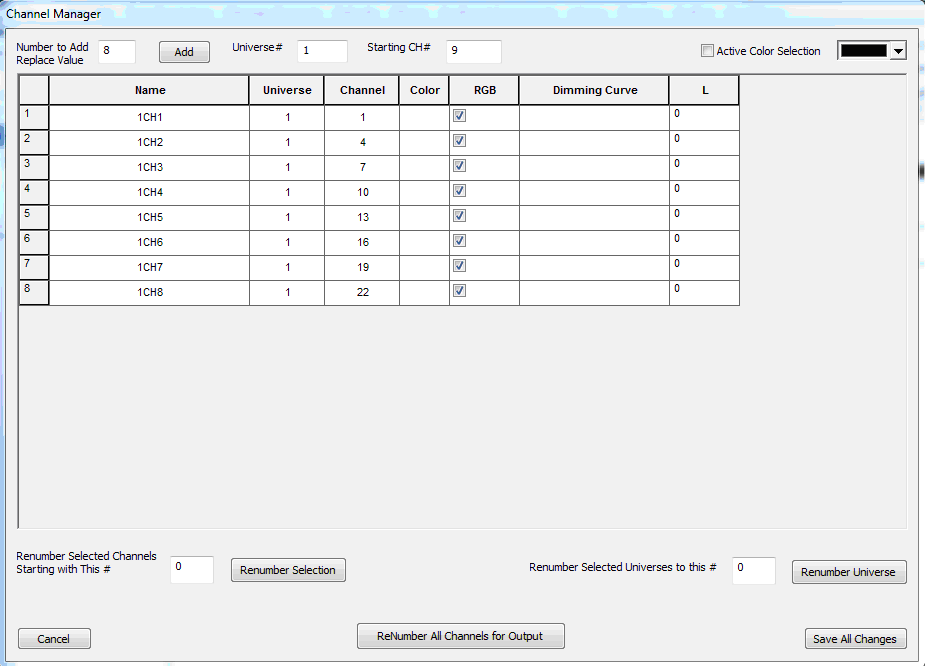
Click on the button labeled ReNumber All Channels for Output button and the screen shown in Figure 1-96 will show that the RGB channels were renumbered to take into account that each RGB channel controls 3 outputs. Note in Figure 1-83 that the first RGB output is now 1 (1, 2, and 3) and the second RGB output begins at 4 (4, 5, and 6). The last of our 8 RGB outputs begin at output 22 (22, 23, and 24).
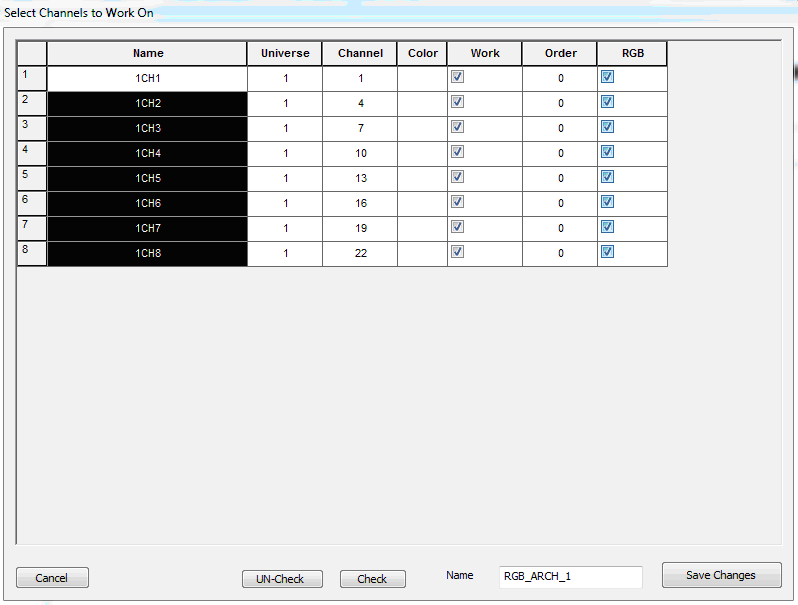
Next we will save our changes and create a group for the RGB arch. Form the Channel Manager tab the Select Channels and Assign to Group was selected (see Figure 1-97). The 8 RGB channels were selected and the Check button was clicked to put checks in the work box next to each channel in the group.
Next a name was entered for the group RGB_ARCH_1 (see Figure 1-98) and the Save Changes button was clicked.
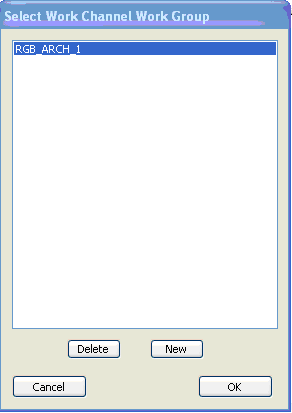
Next the Manage Channels tab was chosen and Select Group to Work on was selected (se Figure 1-99). RGB_ARCH_1 Was selected and the OK button was clicked.
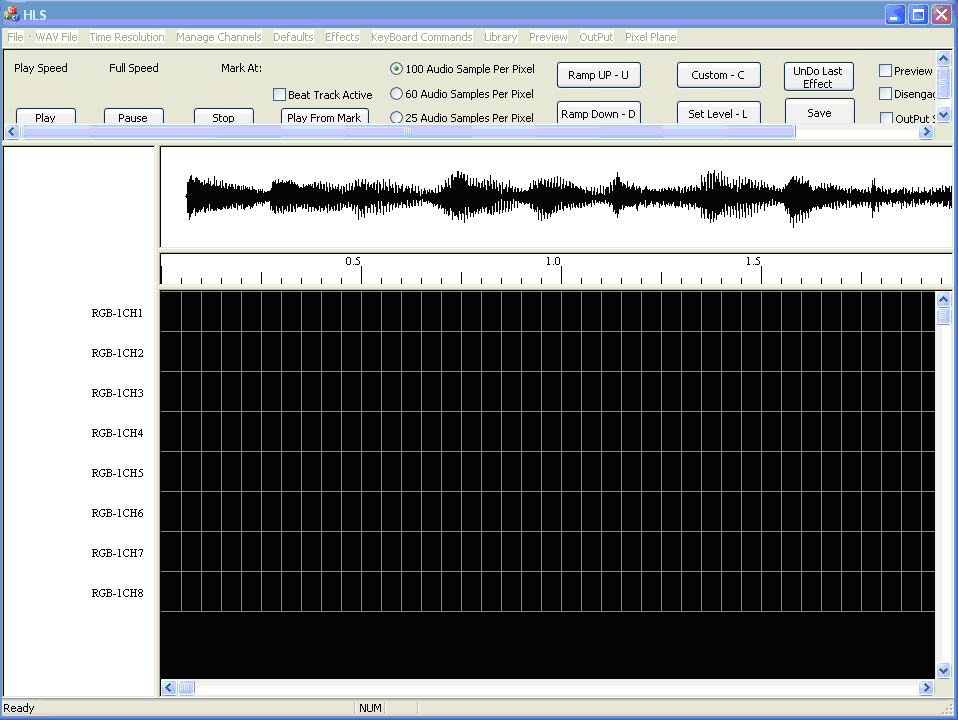
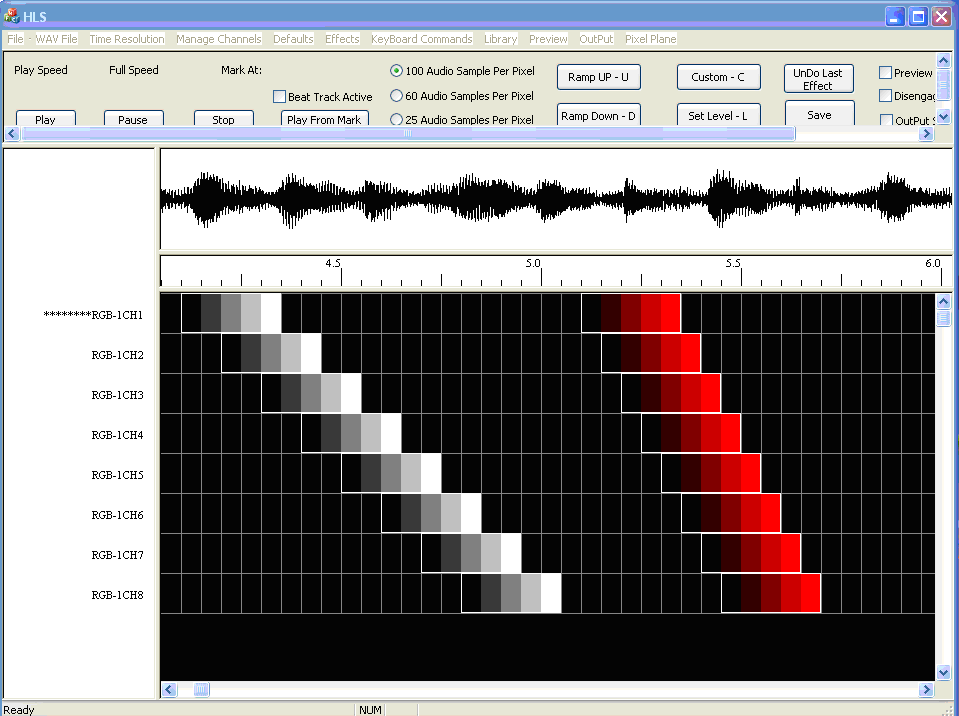
Figure 1-100 shows the normal sequence programing screen. Note that the channels are labeled RGB-1CH1 through RGB-1CH8. Also note that each RGB channel now controls 3 outputs. So channel 1 is actually three outputs (output 1-red, output 2-green, and output 3-blue). Here is the fun part. If red is chosen for the color of the 8 RGB outputs and a chase effect is programmed, only the red outputs will do the chase. If I choose blue, only the blue will do the chase effect, and likewise for green. If white is chosen for the color- all of the outputs (red, green, and blue) will do the chase. If a different color is chosen the RGB will control each of the 3 channels at different levels to create the effect in that color. The default color for RGB is white.
Two chase effects were created in Figure 1-101. The first one was done with the default RGB color of white. This would make all red, green, and blue lights turn on and chase on the arch. Then the programmer right clicked on the white effect for each channel individually and selected the Change RGB Color button and chose red. The programmer then created the second chase. The second one would just use the red channel for the chase effect. Note that if a different color than white, red, green, or blue is chosen, HLS will vary the output level of the red, green and blue to produce that color.
NOTE: you must change the RGB color for the effect before you create the next effect. In the example in Figure 1-100 the white chase was created and then the RGB color was changed to red before creating the second red chase effect.
RGB can also be used to program non-RGB lights to reduce the number of channels by 2/3. For example, imagine a Mega tree with 16 strings red, white and blue lights (48 strings total). Each RGB channel could represent 3 outputs, red, white, and blue. When programming, if red is chosen for the effect the red lights would be on. When green is chosen for the effect the white string would be on, when Blue is chosen blue would be on. If white is chosen for the effect color, all three would be on.
