SPT Wire and Vampire Plugs


Disclaimers
The standard disclaimers pertaining to the information contained on this wiki page are listed here.
THIS PAGE IS UNDER CONSTRUCTION AND IS NOT COMPLETE AND HAS NOT BEEN CHECKED FOR ERRORS YET!!
SPT Wire ( SPT-1 SPT-2 )
SPT stands for Stranded, Parallel, Thermoplastic wire. SPT is frequently known as Zip cord or Lamp Cord. SPT IS NOT SPEAKER WIRE OR LOW VOLTAGE LANDSCAPE WIRE!!
SPT is commonly used by Christmas lighting enthusiasts to create low cost custom length power cords utilizing Vampire Plugs and Sockets. SPT is commonly sold on spools of 250, 500 and 1000ft. SPT Wire comes in different wire gauges, 18awg is the most common. A common 18awg SPT-2 wire from one vendor has a rating of 10A.
SPT comes with different insulation thicknesses, the higher the number the thicker the insulation. SPT-2 has thicker insulation then SPT-1. The SPT rating is related to the thickness of the insulation that surrounds the copper wires. SPT-1 wire has an insulation thickness of .030″ and SPT-2 has insulation that is .045″ thick.
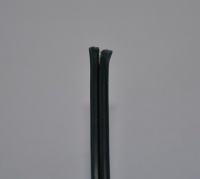
SPT wire is polarized and generally comes with two different wire textures on the wire pair to help identify the polarity when you hook it up. One wire is smooth, it is generally used for the Hot or Line wire.
The other wire is usually ribbed, it is generally used for the neutral wire.
IMPORTANT: IT IS CRITICAL THAT YOU CONNECT THE CORRECT CORRECT TERMINAL TO THE CORRECT WIRE ON BOTH ENDS! ALL PLUGS AND SOCKETS ON THE WIRE SHOULD BE WIRED WITH THE NEUTRAL TERMINAL CONNECTED TO THE RIBBED WIRE AND THE HOT (LINE) WIRE CONNECTED TO THE SMOOTH WIRE.
Vampire Plugs and Sockets
Vampire plugs get their name from the insulation piercing teeth that they have. They are designed to be used on SPT wire and allow a fast and easy way to terminate a wire. Vampire Plugs come in different shapes and functions. They come in three basic colors, Black, Green and White. The common Male Plug and Female Socket made by Zing Ear are rated for 8A @ 125VAC. Confirm the ratings and wire size by reading the printing on the item or asking your vendor.
IMPORTANT: IT IS CRITICAL THAT YOU USE THE CORRECT VAMPIRE PLUG OR SOCKET THAT MATCHES YOUR WIRE TYPE! PLUGS AND SOCKETS ARE MADE FOR SPECIFIC WIRES TYPES, THEY ARE NOT UNIVERSAL. SPT-1 SOCKETS AND PLUGS SHOULD NOT BE USED WITH SPT-2 WIRE AND SPT-2 SOCKETS AND PLUGS SHOULD NOT BE USED WITH SPT-1 WIRE.
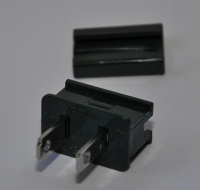
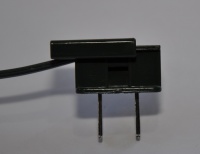
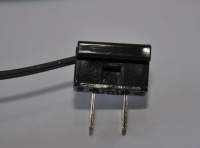
Male Plug
Male plugs are designed to go on the end of a SPT wire of the correct matching size. Male plugs are polarized and it is important that you install the wire correctly to match the polarity of the wire and plug. The two vampire teeth are designed to each pierce one wire when they are installed. You should look at the plug to identify which tooth is which.
- One plug blade is wider (and may be marked "White") this is the neutral blade. Generally it is attached to the ribbed wire on the SPT wire.
- The narrower blade is hot (or Line) blade. It is generally attached to the smooth wire on the SPT wire.


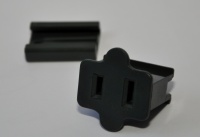
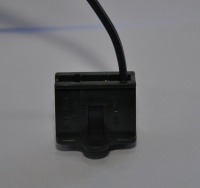
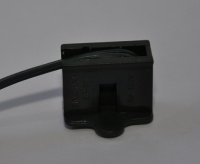
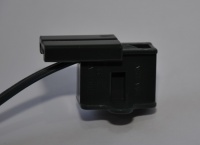
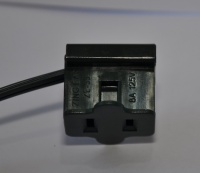
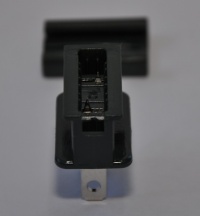
Female Plug
Female sockets are designed to go on the end of a SPT wire of the correct matching size. Female sockets are polarized and it is important that you install the wire correctly to match the polarity of the wire and plug. The two vampire teeth are designed to each pierce one wire when they are installed. You should look at the socket to identify which tooth is which.
- One Socket hole is wider this is the neutral hole. Generally it is attached to the ribbed wire on the SPT wire.
- The narrower socket hole is hot (or Line) hole. It is generally attached to the smooth wire on the SPT wire.


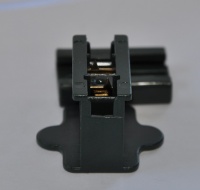
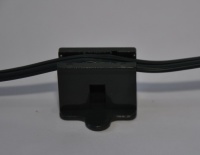
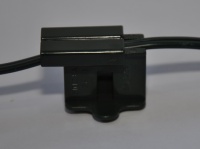
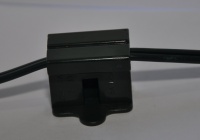
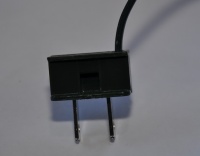
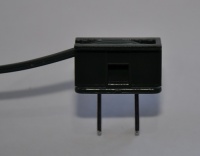
Female Inline Plug
Female inline sockets are designed to go in the middle of a SPT wire of the correct matching size. Female sockets are polarized and it is important that you install the wire correctly to match the polarity of the wire and plug. The two vampire teeth are designed to each pierce one wire when they are installed. You should look at the socket to identify which tooth is which.
- One Socket hole is wider this is the neutral hole. Generally it is attached to the ribbed wire on the SPT wire.
- The narrower socket hole is hot (or Line) hole. It is generally attached to the smooth wire on the SPT wire.

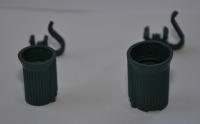
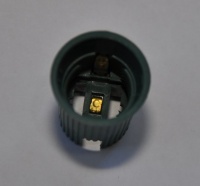
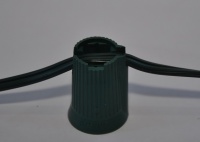
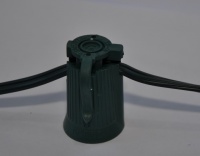
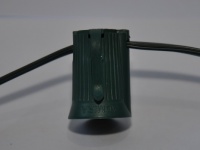
C7 Socket and C9 Socket
C7 or C9 sockets are designed to go in the middle of a SPT wire of the correct matching size. C7 or C9 sockets are polarized and it is important that you install the wire correctly to match the polarity of the wire and plug. The two vampire teeth are designed to each pierce one wire when they are installed. You should look at the socket to identify which tooth is which.
- One vampire tooth will connect to the terminal on the side wall of the socket, this is teh neutral terminal. Generally it is attached to the ribbed wire on the SPT wire.
- One vampire tooth will connect to the bottom contact in the socket, this is hot (or Line) terminal. It is generally attached to the smooth wire on the SPT wire.


Installing Vampire Plugs / Sockets
Female Vampire
- Inspect Plug for cracks, damage, bent teeth or "Evil Vampires" (both pins on the same side). Inspect the end of the wire and remove any stray wires. Confirm that the vampire is made for the wire type (SPT-1 or SPT-2) that you are using.
- Cut the SPT to the desired length. REMOVE ANY STRAY STRANDS OF WIRE PAST THE END OF THE INSULATION. Make a small cut to separate the ends of the wire slightly. Identify the neutral wire (usually ridged). IMPORTANT: IT IS CRITICAL THAT YOU CONNECT THE CORRECT CORRECT TERMINAL TO THE CORRECT WIRE ON BOTH ENDS! ALL PLUGS AND SOCKETS ON THE WIRE SHOULD BE WIRED WITH THE NEUTRAL TERMINAL CONNECTED TO THE RIBBED WIRE AND THE HOT (LINE) WIRE CONNECTED TO THE SMOOTH WIRE.
- Cut the SPT to the desired length. REMOVE ANY STRAY STRANDS OF WIRE PAST THE END OF THE INSULATION. Make a small cut to separate the ends of the wire slightly. Identify the neutral wire (usually ridged). IMPORTANT: IT IS CRITICAL THAT YOU CONNECT THE CORRECT CORRECT TERMINAL TO THE CORRECT WIRE ON BOTH ENDS! ALL PLUGS AND SOCKETS ON THE WIRE SHOULD BE WIRED WITH THE NEUTRAL TERMINAL CONNECTED TO THE RIBBED WIRE AND THE HOT (LINE) WIRE CONNECTED TO THE SMOOTH WIRE.
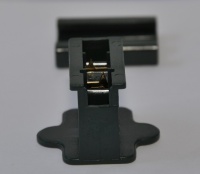
- Identify the wider socket side (Neutral) and turn over socket to identify the correct tooth for the Neutral socket hole.
- Identify the wider socket side (Neutral) and turn over socket to identify the correct tooth for the Neutral socket hole.
- With the Neutral Vampire tooth aligned to penetrate the Ribbed Neutral wire, insert the SPT into the hole at the end of the socket and gently press down so that the split wire ends are seated into the two pockets in the end of the socket.
- Firmly press the wire into the vampire teeth and seat the wire into the recess. Be careful to avoid pressing at an angle which may bend the vampire teeth over and not make a connection to the wire.
- Slide the back cover firmly onto the wire . Make sure that the sloped end slides on to the plug first. It may be helpful to use a Channel Lock Pliers to help seat the back cover firmly on.
- Inspect the assembled unit for cracks or poor connections.
- Inspect the assembled unit for cracks or poor connections.


Female Inline Vampire
- Inspect Plug for cracks, damage, bent teeth or "Evil Vampires" (both pins on the same side). Confirm that the vampire is made for the wire type (SPT-1 or SPT-2) that you are using.


Male Vampire
- Inspect Plug for cracks, damage, bent teeth or "Evil Vampires" (both pins on the same side). Inspect the end of the wire and remove any stray wires. Confirm that the vampire is made for the wire type (SPT-1 or SPT-2) that you are using.


C7 or C9 Vampire
- Inspect Plug for cracks, damage, bent teeth or "Evil Vampires" (both pins on the same side). Confirm that the vampire is made for the wire type (SPT-1 or SPT-2) that you are using.