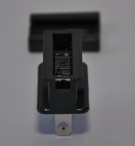
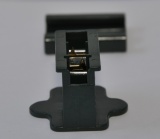
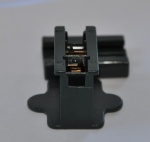
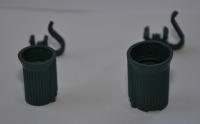
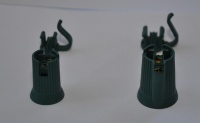
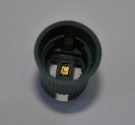
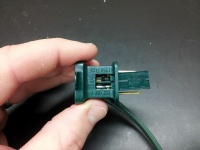
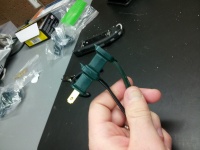
SPT Wire and Vampire Plugs
Disclaimers
The standard disclaimers pertaining to the information contained on this wiki page are listed here.
SPT Wire ( SPT-1 SPT-2 )
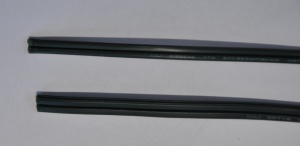
- SPT stands for Stranded, Parallel, Thermoplastic wire. SPT is frequently known as Zip cord or Lamp Cord. SPT IS NOT SPEAKER WIRE OR LOW VOLTAGE LANDSCAPE WIRE!! SPT wire is rated for 300V or 600v, low voltage wire and speaker wire are not!!!
- SPT is commonly used by Christmas lighting enthusiasts to create low cost custom length power cords utilizing Vampire Plugs and Sockets. SPT is commonly sold on spools of 250, 500 and 1000ft. SPT Wire comes in different wire gauges, 18awg is the most common. A common 18awg SPT-2 wire from one vendor has a rating of 10A.
- SPT comes with different insulation thicknesses, the higher the number the thicker the insulation. SPT-2 has thicker insulation then SPT-1. The SPT rating is related to the thickness of the insulation that surrounds the copper wires. SPT-1 wire has an insulation thickness of .030″ and SPT-2 has insulation that is .045″ thick.
- SPT wire is polarized and generally comes with two different wire textures on the wire pair to help identify the polarity when you hook it up. One wire is smooth, it is generally used for the Hot or Line wire. The other wire is usually ribbed, it is generally used for the neutral wire.
- IMPORTANT: IT IS CRITICAL THAT YOU CONNECT THE CORRECT CORRECT TERMINAL TO THE CORRECT WIRE ON BOTH ENDS! ALL PLUGS AND SOCKETS ON THE WIRE SHOULD BE WIRED WITH THE NEUTRAL TERMINAL CONNECTED TO THE RIBBED WIRE AND THE HOT (LINE) WIRE CONNECTED TO THE SMOOTH WIRE.
Vampire Plugs and Sockets
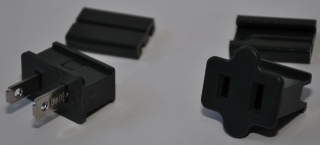
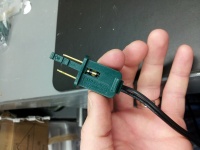
Vampire plugs get their name from the insulation piercing teeth that they have. They are designed to be used on SPT wire and allow a fast and easy way to terminate a wire. Vampire Plugs come in different shapes and functions. They come in three basic colors, Black, Green and White. The common Male Plug and Female Socket made by Zing Ear are rated for 8A @ 125VAC. Confirm the ratings and wire size by reading the printing on the item or asking your vendor.
IMPORTANT: IT IS CRITICAL THAT YOU USE THE CORRECT VAMPIRE PLUG OR SOCKET THAT MATCHES YOUR WIRE TYPE! PLUGS AND SOCKETS ARE MADE FOR SPECIFIC WIRES TYPES, THEY ARE NOT UNIVERSAL. SPT-1 SOCKETS AND PLUGS SHOULD NOT BE USED WITH SPT-2 WIRE AND SPT-2 SOCKETS AND PLUGS SHOULD NOT BE USED WITH SPT-1 WIRE.
Male Plug
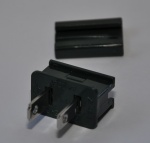
Male plugs are designed to go on the end of a SPT wire of the correct matching size. Male plugs are polarized and it is important that you install the wire correctly to match the polarity of the wire and plug. The two vampire teeth are designed to each pierce one wire when they are installed. You should look at the plug to identify which tooth is which.
- One plug blade is wider (and may be marked "White") this is the neutral blade. Generally it is attached to the ribbed wire on the SPT wire.
- The narrower blade is hot (or Line) blade. It is generally attached to the smooth wire on the SPT wire.
Female Socket
Female sockets are designed to go on the end of a SPT wire of the correct matching size. Female sockets are polarized and it is important that you install the wire correctly to match the polarity of the wire and plug. The two vampire teeth are designed to each pierce one wire when they are installed. You should look at the socket to identify which tooth is which.
- One Socket hole is wider this is the neutral hole. Generally it is attached to the ribbed wire on the SPT wire.
- The narrower socket hole is hot (or Line) hole. It is generally attached to the smooth wire on the SPT wire.
Female Inline Socket
Female inline sockets are designed to go in the middle of a SPT wire of the correct matching size. They look similar to regular Female Sockets but the end is missing on both sides so the wire can go thru both sides. Some people1, 2 modify regular Female Sockets to make them Inline. Female sockets are polarized and it is important that you install the wire correctly to match the polarity of the wire and plug. The two vampire teeth are designed to each pierce one wire when they are installed. You should look at the socket to identify which tooth is which.
- One Socket hole is wider this is the neutral hole. Generally it is attached to the ribbed wire on the SPT wire.
- The narrower socket hole is hot (or Line) hole. It is generally attached to the smooth wire on the SPT wire.
C7 Socket and C9 Socket
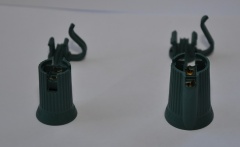
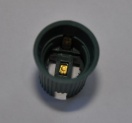
C7 or C9 sockets are designed to go in the middle of a SPT wire of the correct matching size. C7 or C9 sockets are polarized and it is important that you install the wire correctly to match the polarity of the wire and plug. The two vampire teeth are designed to each pierce one wire when they are installed. You should look at the socket to identify which tooth is which.
- One vampire tooth will connect to the terminal on the side wall of the socket, this is the neutral terminal. Generally it is attached to the ribbed wire on the SPT wire.
- One vampire tooth will connect to the bottom contact in the socket, this is the hot (or Line) terminal. It is generally attached to the smooth wire on the SPT wire.
Fused Male/Female Plug
One vendor sells Fused male plugs that can be added to SPT wire.
In 2013 a group buy took place that offered a Fused Male/Female Plug similar to what is found on traditional incandescent light strings. This new plug has built in fuses. These plugs do not have traditional Vampire teeth, but instead are attached to the wire by either crimping or soldering. They came in a Male/Female Plug with a 3A fuse and a Male Plug with a 5A fuse.
Installing Vampire Plugs / Sockets
NEVER INSTALL A VAMPIRE FITTING ON A LIVE WIRE THAT IS PLUGGED IN OR POWERED!
REMOVE ALL POWER BEFORE INSTALLING ANY VAMPIRE FITTING ON ANY WIRE!
Female Vampire
- Inspect socket for cracks, damage, bent teeth or "Evil Vampires" (both teeth on the same side). Confirm that the vampire is made for the wire type (SPT-1 or SPT-2) that you are using.
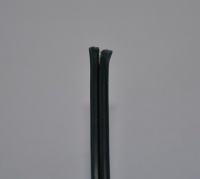
- Cut the SPT to the desired length. INSPECT THE END OF THE WIRE AND REMOVE ANY STRAY STRANDS OF WIRE PAST THE END OF THE INSULATION. Make a small cut to separate the ends of the wire slightly. Identify the neutral wire (usually ridged). IMPORTANT: IT IS CRITICAL THAT YOU CONNECT THE CORRECT CORRECT TERMINAL TO THE CORRECT WIRE ON BOTH ENDS! ALL PLUGS AND SOCKETS ON THE WIRE SHOULD BE WIRED WITH THE NEUTRAL TERMINAL CONNECTED TO THE RIBBED WIRE AND THE HOT (LINE) WIRE CONNECTED TO THE SMOOTH WIRE.
- Cut the SPT to the desired length. INSPECT THE END OF THE WIRE AND REMOVE ANY STRAY STRANDS OF WIRE PAST THE END OF THE INSULATION. Make a small cut to separate the ends of the wire slightly. Identify the neutral wire (usually ridged). IMPORTANT: IT IS CRITICAL THAT YOU CONNECT THE CORRECT CORRECT TERMINAL TO THE CORRECT WIRE ON BOTH ENDS! ALL PLUGS AND SOCKETS ON THE WIRE SHOULD BE WIRED WITH THE NEUTRAL TERMINAL CONNECTED TO THE RIBBED WIRE AND THE HOT (LINE) WIRE CONNECTED TO THE SMOOTH WIRE.
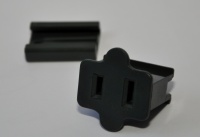
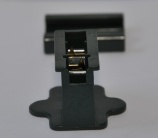
- Identify the wider socket side (Neutral) and turn over socket to identify the correct tooth for the Neutral socket hole.
- Identify the wider socket side (Neutral) and turn over socket to identify the correct tooth for the Neutral socket hole.
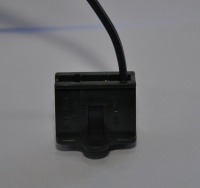
- With the Neutral Vampire tooth aligned to penetrate the Ribbed Neutral wire, insert the SPT into the hole at the end of the socket and gently press down so that the split wire ends are seated into the two pockets in the end of the socket.
- With the Neutral Vampire tooth aligned to penetrate the Ribbed Neutral wire, insert the SPT into the hole at the end of the socket and gently press down so that the split wire ends are seated into the two pockets in the end of the socket.
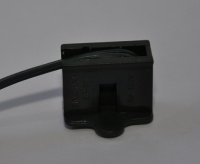
- Firmly press the wire into the vampire teeth and seat the wire into the recess. Be careful to avoid pressing at an angle which may bend the vampire teeth over and not make a connection to the wire.
- Firmly press the wire into the vampire teeth and seat the wire into the recess. Be careful to avoid pressing at an angle which may bend the vampire teeth over and not make a connection to the wire.
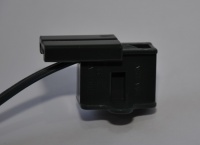
- Slide the back cover firmly onto the wire . Make sure that the sloped end slides on to the plug first. It may be helpful to use a Channel Lock Pliers to help seat the back cover firmly on.
- Slide the back cover firmly onto the wire . Make sure that the sloped end slides on to the plug first. It may be helpful to use a Channel Lock Pliers to help seat the back cover firmly on.
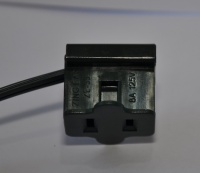
- Inspect the assembled unit for cracks or poor connections.
- Inspect the assembled unit for cracks or poor connections.
Female Inline Vampire
- Inspect socket for cracks, damage, bent teeth or "Evil Vampires" (both teeth on the same side). Confirm that the vampire is made for the wire type (SPT-1 or SPT-2) that you are using.

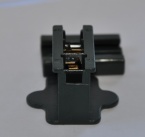
- Identify the wider socket side (Neutral) and turn over socket to identify the correct tooth for the Neutral socket hole.
- Identify the wider socket side (Neutral) and turn over socket to identify the correct tooth for the Neutral socket hole.
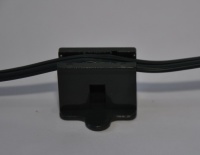
- Identify the neutral wire (usually ridged). IMPORTANT: IT IS CRITICAL THAT YOU CONNECT THE CORRECT CORRECT TERMINAL TO THE CORRECT WIRE ON BOTH ENDS! ALL PLUGS AND SOCKETS ON THE WIRE SHOULD BE WIRED WITH THE NEUTRAL TERMINAL CONNECTED TO THE RIBBED WIRE AND THE HOT (LINE) WIRE CONNECTED TO THE SMOOTH WIRE. With the Neutral Vampire tooth aligned to penetrate the Ribbed Neutral wire,firmly press the wire into the vampire teeth and seat the wire into the recess. Be careful to avoid pressing at an angle which may bend the vampire teeth over and not make a connection to the wire.
- Identify the neutral wire (usually ridged). IMPORTANT: IT IS CRITICAL THAT YOU CONNECT THE CORRECT CORRECT TERMINAL TO THE CORRECT WIRE ON BOTH ENDS! ALL PLUGS AND SOCKETS ON THE WIRE SHOULD BE WIRED WITH THE NEUTRAL TERMINAL CONNECTED TO THE RIBBED WIRE AND THE HOT (LINE) WIRE CONNECTED TO THE SMOOTH WIRE. With the Neutral Vampire tooth aligned to penetrate the Ribbed Neutral wire,firmly press the wire into the vampire teeth and seat the wire into the recess. Be careful to avoid pressing at an angle which may bend the vampire teeth over and not make a connection to the wire.
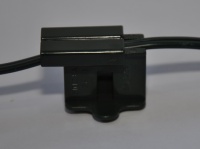
- Slide the back cover firmly onto the wire . Make sure that the sloped end slides on to the plug first. It may be helpful to use a Channel Lock Pliers to help seat the back cover firmly on.
- Slide the back cover firmly onto the wire . Make sure that the sloped end slides on to the plug first. It may be helpful to use a Channel Lock Pliers to help seat the back cover firmly on.
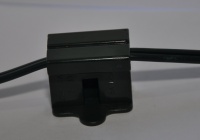
- Inspect the assembled unit for cracks or poor connections.
- Inspect the assembled unit for cracks or poor connections.
Male Vampire
- Inspect Plug for cracks, damage, bent teeth or "Evil Vampires" (both teeth on the same side). Confirm that the vampire is made for the wire type (SPT-1 or SPT-2) that you are using.

- Cut the SPT to the desired length. INSPECT THE END OF THE WIRE AND REMOVE ANY STRAY STRANDS OF WIRE PAST THE END OF THE INSULATION. Make a small cut to separate the ends of the wire slightly. Identify the neutral wire (usually ridged). IMPORTANT: IT IS CRITICAL THAT YOU CONNECT THE CORRECT CORRECT TERMINAL TO THE CORRECT WIRE ON BOTH ENDS! ALL PLUGS AND SOCKETS ON THE WIRE SHOULD BE WIRED WITH THE NEUTRAL TERMINAL CONNECTED TO THE RIBBED WIRE AND THE HOT (LINE) WIRE CONNECTED TO THE SMOOTH WIRE.
- Cut the SPT to the desired length. INSPECT THE END OF THE WIRE AND REMOVE ANY STRAY STRANDS OF WIRE PAST THE END OF THE INSULATION. Make a small cut to separate the ends of the wire slightly. Identify the neutral wire (usually ridged). IMPORTANT: IT IS CRITICAL THAT YOU CONNECT THE CORRECT CORRECT TERMINAL TO THE CORRECT WIRE ON BOTH ENDS! ALL PLUGS AND SOCKETS ON THE WIRE SHOULD BE WIRED WITH THE NEUTRAL TERMINAL CONNECTED TO THE RIBBED WIRE AND THE HOT (LINE) WIRE CONNECTED TO THE SMOOTH WIRE.
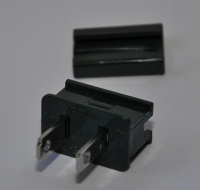
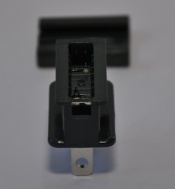
- Identify the wider blade side (Neutral) and turn over plug to identify the correct tooth for the Neutral blade.
- Identify the wider blade side (Neutral) and turn over plug to identify the correct tooth for the Neutral blade.
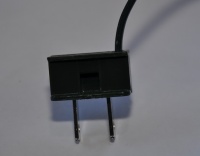
- With the Neutral Vampire tooth aligned to penetrate the Ribbed Neutral wire, insert the SPT into the hole at the end of the plug and gently press down so that the split wire ends are seated into the two pockets in the end of the plug.
- With the Neutral Vampire tooth aligned to penetrate the Ribbed Neutral wire, insert the SPT into the hole at the end of the plug and gently press down so that the split wire ends are seated into the two pockets in the end of the plug.
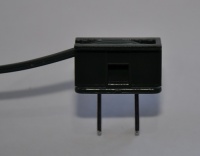
- Firmly press the wire into the vampire teeth and seat the wire into the recess. Be careful to avoid pressing at an angle which may bend the vampire teeth over and not make a connection to the wire.
- Firmly press the wire into the vampire teeth and seat the wire into the recess. Be careful to avoid pressing at an angle which may bend the vampire teeth over and not make a connection to the wire.
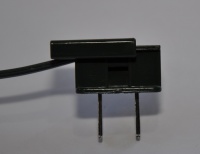
- Slide the back cover firmly onto the wire . Make sure that the sloped end slides on to the plug first. It may be helpful to use a Channel Lock Pliers to help seat the back cover firmly on.
- Slide the back cover firmly onto the wire . Make sure that the sloped end slides on to the plug first. It may be helpful to use a Channel Lock Pliers to help seat the back cover firmly on.
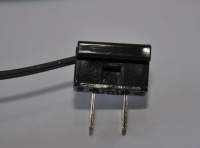
- Inspect the assembled unit for cracks or poor connections.
- Inspect the assembled unit for cracks or poor connections.
C7 or C9 Vampire
- Identify the Neutral socket terminal (on side wall, not bottom of socket hole) and turn over socket to identify the correct tooth for the Neutral socket terminal.
- Identify the Neutral socket terminal (on side wall, not bottom of socket hole) and turn over socket to identify the correct tooth for the Neutral socket terminal.
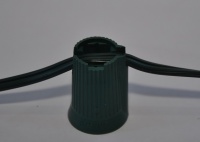
- Identify the neutral wire (usually ridged). IMPORTANT: IT IS CRITICAL THAT YOU CONNECT THE CORRECT CORRECT TERMINAL TO THE CORRECT WIRE ON BOTH ENDS! ALL PLUGS AND SOCKETS ON THE WIRE SHOULD BE WIRED WITH THE NEUTRAL TERMINAL CONNECTED TO THE RIBBED WIRE AND THE HOT (LINE) WIRE CONNECTED TO THE SMOOTH WIRE. With the Neutral Vampire tooth aligned to penetrate the Ribbed Neutral wire,firmly press the wire into the vampire teeth and seat the wire into the recess. Be careful to avoid pressing at an angle which may bend the vampire teeth over and not make a connection to the wire.
- Identify the neutral wire (usually ridged). IMPORTANT: IT IS CRITICAL THAT YOU CONNECT THE CORRECT CORRECT TERMINAL TO THE CORRECT WIRE ON BOTH ENDS! ALL PLUGS AND SOCKETS ON THE WIRE SHOULD BE WIRED WITH THE NEUTRAL TERMINAL CONNECTED TO THE RIBBED WIRE AND THE HOT (LINE) WIRE CONNECTED TO THE SMOOTH WIRE. With the Neutral Vampire tooth aligned to penetrate the Ribbed Neutral wire,firmly press the wire into the vampire teeth and seat the wire into the recess. Be careful to avoid pressing at an angle which may bend the vampire teeth over and not make a connection to the wire.
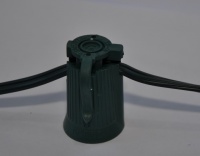
- The back cap is keyed to fit only one way, there is a wider tab and a narrower tab. Firmly press the back cap onto the wire. It may be helpful to use a Channel Lock Pliers to help seat the back cover firmly on. Be careful, the sockets are fragile and too much pressure may crack them.
- The back cap is keyed to fit only one way, there is a wider tab and a narrower tab. Firmly press the back cap onto the wire. It may be helpful to use a Channel Lock Pliers to help seat the back cover firmly on. Be careful, the sockets are fragile and too much pressure may crack them.
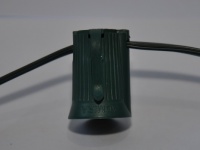
- Inspect the assembled unit for cracks or poor connections.
- Inspect the assembled unit for cracks or poor connections.
Vendors
These are selected wire and connectors from the various vendors with a mix of properties. Visit their sites for the latest information and to see their entire product catalog.
SPT Wire,Vampire Sockets and Plugs are frequently available at preseason discounts during January and February from most vendors.
PLEASE CONFIRM ALL DETAILS WITH VENDOR BEFORE ORDERING!! ALL OF THIS DATA IS SUBJECT TO CONSTANT CHANGE AND MAY BE WRONG!!!
Pricing is in US $. Pricing is as of 02-11-13.
PRICING DOES NOT INCLUDE SHIPPING, TAXES OR IMPORT DUTIES! COMPARE THE TOTAL SHIPPED COST!
Shipping from overseas can be expensive, check with your vendor. WIRE IS HEAVY
SPT Wire
SPT-1
| Vendor | Wire | Length | Link | Price | Price per ft | Note |
| 3G Light Creations | SPT1 | 1000ft | link | $159.95 | $0.16 | Green |
| ChristmasLightShow | SPT1 | 250ft | link | $34.95 | $0.14 | Green 18AWG |
| ChristmasLightShow | SPT1 | 500ft | link | $69.95 | $0.14 | Green 18AWG |
| ChristmasLightShow | SPT1 | 1000ft | link | $132.95 | $0.13 | Green 18AWG |
| Creative Displays | SPT1 | 1000ft | link | $200 | $0.20 | Green, White, uv resistant |
| Grand Brass | SPT1 | 250ft | link | $40 | $0.16 | Black, 18AWG |
| Home Depot | SPT1 | 250ft | link | $42.70 | $0.17 | Black, 18AWG |
| LightYear Cable | SPT1 | 1000ft | link | $86.70 | $0.09 | Black, 18AWG |
| Novelty Lights | SPT1 | 1000ft | link | $165 | $0.17 | Green 18AWG |
| Skycraft Surplus | SPT1 | 250ft | link | $45 | $0.18 | Black 18AWG |
| The Christmas Light Outlet | SPT1 | 1000ft | link | $159.95 | $0.16 | Green 18AWG |
| Radiant Holidays | SPT1 | 250ft | link | $42.99 | $0.17 | Green 18AWG |
| Radiant Holidays | SPT1 | 1000ft | link | $114.99 | $0.11 | Green 18AWG |
SPT-2
| Vendor | Wire | Length | Link | Price | Price per ft | Note |
| 3G Light Creations | SPT2 | 1000ft | link | $169.95 | $0.17 | Green |
| ChristmasLightShow | SPT2 | 250ft | link | $41.95 | $0.17 | Black 18AWG |
| ChristmasLightShow | SPT2 | 500ft | link | $79.95 | $0.16 | Green 18AWG |
| ChristmasLightShow | SPT2 | 1000ft | link | $144.95 | $0.15 | Green 18AWG |
| Grand Brass | SPT2 | 250ft | link | $55 | $0.22 | Black 18AWG |
| Home Depot | SPT2 | 250ft | link | $45.26 | $0.18 | Black 18AWG |
| LightYear Cable | SPT2 | 1000ft | link | $136.50 | $0.14 | Black, 16AWG |
| Novelty Lights | SPT2 | 1000ft | link | $180 | $0.18 | Green 18AWG |
| Radiant Holidays | SPT2 | 250ft | link | $44.99 | $0.18 | Green 18AWG |
| Radiant Holidays | SPT2 | 1000ft | link | $130 | $0.13 | Green 18AWG |
Vampire Plugs and Sockets
SPT-1
| Vendor | Size | Type | Link | Price | Price per Unit | Note |
| SPT-1 Male Plug | ||||||
| Ace Hardware | SPT-1 | Male | link | $26.99 | $1.08 | Package of 25 Green |
| Action Lighting | SPT-1 | Male | link | $5.93 | $0.49 | Package of 12 Green |
| Action Lighting | SPT-1 | Male | link | $5.93 | $0.49 | Package of 12 White |
| 3G Light Creations | SPT-1 | Male | link | $6.95 | $0.70 | Package of 10 Green |
| 3G Light Creations | SPT-1 | Male | link | $6.95 | $0.70 | Package of 10 White |
| ChristmasLightShow | SPT-1 | Male | link | $6.00 | $0.60 | Package of 10 Green |
| Creative Displays | SPT-1 | Male | link | $6.00 | $0.60 | Package of 10 (White, Black or Green) |
| Home Depot (online) | SPT-1 | Male | link | $ | $ | Only available in season Green |
| LEDGenLighting | SPT-1 | Male | link | $19.00 | $0.38 | Package of 50 Green |
| LEDGenLighting | SPT-1 | Male | link | $19.00 | $0.38 | Package of 50 White |
| Novelty Lights | SPT-1 | Male | link | $0.85 | $0.85 | Package of 1 Green (Discount for quantity 50-149 $0.65, 150+ $0.50) |
| Novelty Lights | SPT-1 | Male | link | $0.85 | $0.85 | Package of 1 White (Discount for quantity 50-149 $0.65, 150+ $0.50) |
| Radiant Holidays | SPT-1 | Male | link | $25.00 | $0.50 | Package of 50 or 10 in Green or White |
| Zipplugs | SPT-1 | Male | link | $ | $ | See site for pricing, includes shipping and small quantities |
| SPT-1 Female Socket | ||||||
| Ace Hardware | SPT-1 | Female | link | $26.99 | $1.089 | Package of 25 Green |
| Action Lighting | SPT-1 | Female | link | $5.93 | $0.49 | Package of 12 Green |
| Action Lighting | SPT-1 | Female | link | $5.93 | $0.49 | Package of 12 White |
| 3G Light Creations | SPT-1 | Female | link | $6.95 | $0.70 | Package of 10 Green |
| 3G Light Creations | SPT-1 | Female | link | $6.95 | $0.70 | Package of 10 White |
| ChristmasLightShow | SPT-1 | Female | link | $6.00 | $0.60 | Package of 10 Green |
| Creative Displays | SPT-1 | Female | link | $6.00 | $0.60 | Package of 10 (White, Black or Green) |
| Home Depot (online) | SPT-1 | Female | link | $ | $ | Only available in season Green |
| LEDGenLighting | SPT-1 | Female | link | $20.00 | $0.40 | Package of 50 Green |
| LEDGenLighting | SPT-1 | Female | link | $20.00 | $0.40 | Package of 50 White |
| Novelty Lights | SPT-1 | Female | link | $0.85 | $0.85 | Package of 1 Green (Discount for quantity 50-149 $0.65, 150+ $0.50) |
| Novelty Lights | SPT-1 | Female | link | $0.85 | $0.85 | Package of 1 White (Discount for quantity 50-149 $0.65, 150+ $0.50) |
| Radiant Holidays | SPT-1 | Female | link | $25.00 | $0.50 | Package of 50 or 10 in Green or White |
| Zipplugs | SPT-1 | Female | link | $ | $ | See site for pricing, includes shipping and small quantities |
| SPT-1 Female Inline Socket | ||||||
| Creative Displays | SPT-1 | Female Inline | link | $6.00 | $0.60 | Package of 10 (White, Black or Green) |
| Radiant Holidays | SPT-1 | Female Inline | link | $25.00 | $0.50 | Package of 50 or 10 in Green or White |
| Zipplugs | SPT-1 | Female Inline | link | $ | $ | See site for pricing, includes shipping and small quantities |
| SPT-1 C7 Socket | ||||||
| Action Lighting | SPT-1 | C7 | link | $11.41 | $0.11 | Package of 100 (Green or White) |
| ChristmasLightShow | SPT-1 | C7 | link | $2.95 | $0.30 | Package of 10 Green |
| Creative Displays | SPT-1 | C7 | link | $3.50 | $0.35 | Package of 10 (White, Black or Green) |
| LEDGenLighting | SPT-1 | C7 | link | $4.00 | $0.08 | Package of 50 Green (Check with vendor does not say SPT1 or SPT2?) |
| LEDGenLighting | SPT-1 | C7 | link | $4.00 | $0.08 | Package of 50 White (Check with vendor does not say SPT1 or SPT2?) |
| Novelty Lights | SPT-1 | C7 | link | $8.50 | $0.17 | Package of 50 Green |
| Novelty Lights | SPT-1 | C7 | link | $8.50 | $0.17 | Package of 50 White |
| Radiant Holidays | SPT-1 | C7 | link | $10.00 | $0.20 | Package of 50 Green (SPT1/SPT2) |
| SPT-1 C9 Socket | ||||||
| Action Lighting | SPT-1 | C9 | link | $11.41 | $0.11 | Package of 100 (Green or White) |
| ChristmasLightShow | SPT-1 | C9 | link | $3.95 | $0.40 | Package of 10 Green |
| Creative Displays | SP-T1 | C9 | link | $4.00 | $0.40 | Package of 10 (White, Black or Green) |
| LEDGenLighting | SPT-1 | C9 | link | $5.00 | $0.10 | Package of 50 Green (Check with vendor does not say SPT1 or SPT2?) |
| LEDGenLighting | SPT-1 | C9 | link | $5.00 | $0.10 | Package of 50 White (Check with vendor does not say SPT1 or SPT2?) |
| Novelty Lights | SPT-1 | C9 | link | $9.50 | $0.19 | Package of 50 Green |
| Novelty Lights | SPT-1 | C9 | link | $8.50 | $0.17 | Package of 50 White |
| Radiant Holidays | SPT-1 | C9 | link | $10.00 | $0.20 | Package of 50 Green (SPT1/SPT2) |
SPT-2
| Vendor | Size | Type | Link | Price | Price per Unit | Note |
| SPT-2 Male Plug | ||||||
| Action Lighting | SPT-2 | Male | link | $5.93 | $0.49 | Package of 12 Green |
| Action Lighting | SPT-2 | Male | link | $5.93 | $0.49 | Package of 12 White |
| 3G Light Creations | SPT-2 | Male | link | $6.95 | $0.70 | Package of 10 Green |
| 3G Light Creations | SPT-2 | Male | link | $6.95 | $0.70 | Package of 10 White |
| ChristmasLightShow | SPT-2 | Male | link | $6.00 | $0.60 | Package of 10 Green |
| LEDGenLighting | SPT-2 | Male | link | $19.00 | $0.38 | Package of 50 Green |
| Novelty Lights | SPT-2 | Male | link | $0.85 | $0.85 | Package of 1 Green (Discount for quantity 50-149 $0.65, 150+ $0.50) |
| Novelty Lights | SPT-2 | Male | link | $0.85 | $0.85 | Package of 1 White (Discount for quantity 50-149 $0.65, 150+ $0.50) |
| Radiant Holidays | SPT-2 | Male | link | $25.00 | $0.50 | Packages of 50, 10 Green |
| SPT-2 Female Socket | ||||||
| Action Lighting | SPT-2 | Female | link | $5.93 | $0.49 | Package of 12 Green |
| Action Lighting | SPT-2 | Female | link | $5.93 | $0.49 | Package of 12 White |
| 3G Light Creations | SPT-2 | Female | link | $6.95 | $0.70 | Package of 10 Green |
| 3G Light Creations | SPT-2 | Female | link | $6.95 | $0.70 | Package of 10 White |
| ChristmasLightShow | SPT-2 | Female | link | $6.00 | $0.60 | Package of 10 Green |
| LEDGenLighting | SPT-2 | Female | link | $20.00 | $0.40 | Package of 50 Green |
| Novelty Lights | SPT-2 | Female | link | $0.85 | $0.85 | Package of 1 Green (Discount for quantity 50-149 $0.65, 150+ $0.50) |
| Novelty Lights | SPT-2 | Female | link | $0.85 | $0.85 | Package of 1 White (Discount for quantity 50-149 $0.65, 150+ $0.50) |
| Radiant Holidays | SPT-2 | Female | link | $25.00 | $0.50 | Packages of 50, 10 Green |
| SPT-2 Female Inline Socket | ||||||
| Radiant Holidays | SPT-2 | Female Inline | link | $25.00 | $0.50 | Package of 50 Green |
| SPT-2 C7 Socket | ||||||
| Action Lighting | SPT-2 | C7 | link | $11.41 | $0.11 | Package of 100 (Green or White) |
| ChristmasLightShow | SPT-2 | C7 | link | $2.95 | $0.30 | Package of 10 Green |
| LEDGenLighting | SPT-2 | C7 | link | $4.00 | $0.08 | Package of 50 Green (Check with vendor does not say SPT1 or SPT2?) |
| LEDGenLighting | SPT-2 | C7 | link | $4.00 | $0.08 | Package of 50 White (Check with vendor does not say SPT1 or SPT2?) |
| Novelty Lights | SPT-2 | C7 | link | $8.50 | $0.17 | Package of 50 Green |
| Novelty Lights | SPT-2 | C7 | link | $8.50 | $0.17 | Package of 50 White |
| Radiant Holidays | SPT-2 | C7 | link | $10.00 | $0.20 | Package of 50 Green (SPT1/SPT2) |
| SPT-2 C9 Socket | ||||||
| Action Lighting | SPT-2 | C9 | link | $11.41 | $0.11 | Package of 100 (Green or White) |
| ChristmasLightShow | SPT-2 | C9 | link | $3.95 | $0.40 | Package of 10 Green |
| DIYLEDExpress | SPT-2 | C9 | link | $3.75 | $0.31 | Package of 12 Green |
| LEDGenLighting | SPT-2 | C9 | link | $5.00 | $0.10 | Package of 50 Green (Check with vendor does not say SPT1 or SPT2?) |
| LEDGenLighting | SPT-2 | C9 | link | $5.00 | $0.10 | Package of 50 White (Check with vendor does not say SPT1 or SPT2?) |
| Novelty Lights | SPT-2 | C9 | link | $9.50 | $0.19 | Package of 50 Green |
| Novelty Lights | SPT-2 | C9 | link | $8.50 | $0.17 | Package of 50 White |
| Radiant Holidays | SPT-2 | C9 | link | $10.00 | $0.20 | Package of 50 Green (SPT1/SPT2) |
