StarBurst: Difference between revisions
Derekbackus (talk | contribs) |
Derekbackus (talk | contribs) No edit summary |
||
| Line 32: | Line 32: | ||
- Soldering Iron | - Soldering Iron | ||
- Solder | - Solder | ||
== Build Notes == | |||
- I would suggesting making all of your wires at least 1" longer than mine. Better to be long than short. | |||
- Get high-quality zip-ties. The ones I used were brittle and I know at least a few will break every year till they are all replaced. | |||
- I used wire colors based on the waterproof leads I have. You can use whatever color you want. | |||
- The colors I used on the leads may or may not be "standard". I have standardized on blue for +V, brown for ground and yellow for data. | |||
== PVC Frame == | == PVC Frame == | ||
Revision as of 13:41, 2 March 2014

Introduction
A pixel StarBurst added to your display adds a lot of possibilities for effects. You can use any of the Nutcracker effects built in to xLights, Vixen 3 and soon other sequencing software to easily add exciting movement to this prop. With the addition of a lighted post, you can create an effect that looks like a firework being shot into the air and exploding.
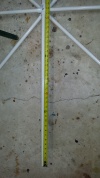
The pixel starburst we're going to make has 8 spokes that are 32" long. Each of the spokes has 22 pixels on it for a total of 176 individually controlled light points. This demonstration will show it connected to an E682 by SanDevices, but it could just as easily be controlled by any of the pixel controllers out there.
Check out a video of the StarBurst in action: StarBurst Video
Materials Required
Below are the parts required to make a StarBurst. If you're making more than one, just multiply the quantity by two. Where possible, I've linked the BOM to outside sources to help with understanding what all the pieces look.
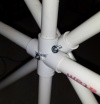
   - Qty. 2: 1/2" PVC Cross
   - Qty. 3: 1/2" 10' PVC Pipes
   - Qty. 1: 2.5" #10 Machine Screw
   - Qty. 1: #10 Nut
   - Qty. 1: 1.5" Screw (any screw will do)
   - Qty. 2: Pixel Strips (30 pcs/meter 30 ICs/meter)
   - Qty. 1: Waterproof Pixel Power Connector
   - Qty. 1: Tube Clear Silicon Caulk
   - PVC Glue (Clear Recommended)
   - 20ga Blue, Brown & White Wire (you can use whatever colors you want)
   - Zip-Ties
   - Blue Tape (not required, but helpful)
Tools Required:
   - Saw to cut PVC
   - Scissors
   - Wire Cutters/Strippers
   - Soldering Iron
   - Solder
Build Notes
   - I would suggesting making all of your wires at least 1" longer than mine. Better to be long than short.
   - Get high-quality zip-ties. The ones I used were brittle and I know at least a few will break every year till they are all replaced.
   - I used wire colors based on the waterproof leads I have. You can use whatever color you want.
   - The colors I used on the leads may or may not be "standard". I have standardized on blue for +V, brown for ground and yellow for data.
PVC Frame


