The PixelPlane Editor: MegaTree
Current as of Version 12K.
Spiral
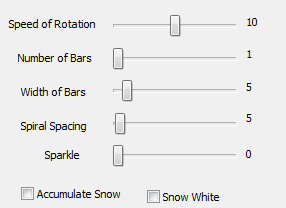
A Spiral effect creates the look of a spiral of lights twisting around the tree.
The Options to customize the Spiral Effect:
- Rotate Clockwise: change rotation direction.
- Speed of Rotation: How fast should the spirals rotate (lower numbers mean faster).
- Number of Bars: The number of bars to spiral. Each additional bar will add a new color (max 6). Additional bars after that will repeat the color additions.
- Width of Bars: How wide the bars should be.
- Spiral Spacing: How much space should there be between each spiral.
- Sparkle: Add random sparkling pixels to the effect.
Vertical Bars
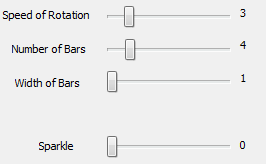
A Vertical Bar effect creates vertical bars that rotate around the tree.
Options to Customize a Vertical Bar Effect:
- Rotate Clockwise: change rotation direction.
- Speed of Rotation: How fast should the bars rotate (lower numbers mean faster).
- Number of Bars: The number of bars to rotate vertically. Each additional bar will add a new color (max 6). Additional bars after that will repeat the color additions.
- Width of Bars: How wide the bars should be.
- Sparkle: Add random sparkling pixels to the effect.
Horizontal Bars
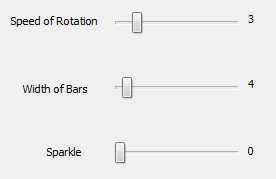
A Horizontal Bar effect creates horizontal bars that rotate up or down the tree.
Options to Customize a Horizontal Bar Effect:
- Motion Down: Move bars down instead of up.
- Speed of Rotation: How fast should the bars move up/down (lower numbers mean faster).
- Width of Bars: How wide the bars should be. This will also determine the number of bars that appear on the object.
- Sparkle: Add random sparkling pixels to the effect.
Snow
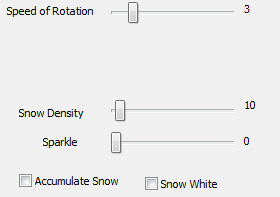
A Snow effect creates random "snowing" randomly-colored pixels that float down the tree.
Options to Customize a Snow Effect:
- Speed of Rotation: How fast should the snow fall (lower numbers mean faster).
- Snow Density: How dense the snowfall should be.
- Sparkle: Effects how many snowflakes are white. To have all white snow, turn it up very high.
- Accumulate Snow: As snow falls, have it accumulate at the bottom of the tree.
- Snow White: Sets all accumulated snow as white, no matter what color it was when falling.
Meteor
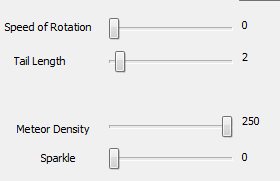
A Meteor effect creates random meteors that streak down the tree.
Options to Customize a Meteor Effect:
- Speed of Rotation: How fast should the meteors fall (lower numbers mean faster).
- Tail Length: Length of the tail on the meteor.
- Meteor Density: How dense the "meteor field" should be.
- Sparkle: Add random sparkling pixels to the head of the meteor. Only the head will sparkle.
Fireworks
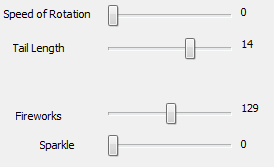
A Firework effect creates fireworks that streak down the tree. These are exactly the same as meteors, except when sparkle is applied. When it is applied, it will randomly "explode" the firework.
Options to Customize a Firework Effect:
- Speed of Rotation: How fast should fireworks come (lower numbers mean faster).
- Tail Length: Length of the tail of the firework.
- Fireworks: Firework density.
- Sparkle: Add random sparkling to the head of the firework. Unlike Meteor, Fireworks sparkles "explode" the head of the meteor.
Horizontal/Vertical Text
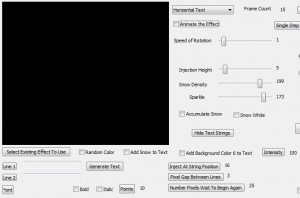
A Horizontal or Vertical text effect displays text that moves across the tree either horizontally or vertically.
Options to Customize a Horizontal or Vertical Text Effect:
- Click Line 1 to enter text to display.
- Click Line 2 if you wish to enter a second line of text.
- Click Font to assign a font and size to the text display.
- Special note on Text: Strings are oriented with string 1 in the 9 o'clock position. The numbering goes in a COUNTER-clockwise direction. Therefore, the FRONT of the tree will start at the 9 o'clock position and end at the 3 o'clock position. So, you want the "injection position" to be the END of the FRONT of the tree, and HIDE the back strings. Therefore, you will inject at your 3 o'clock position. So, for a 32 string tree, inject at string 16 and high 17-32. This will start text at the right end of the tree and run it "clockwise" towards the 9 o'clock position, String 1.
- Inject at String Position: This sets the first string for the text to begin drawing on.
- Pixel Gap between lines: This sets the amount of "dead pixels" between the two lines of text.
- Number Pixels Wait to Begin Again: Amount of "dead pixels" to scroll before the text appears again.
- Speed of rotation: How fast the text will rotate on the tree.
- Injection Height: This sets the height of where the text will display.
- Snow Density: This controls the amount of snow to appear with your text.
- Sparkle: This adds a sparkle effect to the text.
- Add background color 6 to text: This will add the 6th color as background behind the text. The intensity field controls how bright that color is displayed.
- Note: You must click the Generate Text button before it will display in the animation window. Any changes made to text REQUIRE the generate text button to be pressed again.
Hide Text Strings:
- This allows you to turn off the strings on the backside of the tree for text generation.
- Click the button and then check which channels are on the back of the tree. That will keep the text only showing on the front strings.
Horizontal/Vertical Bitmap
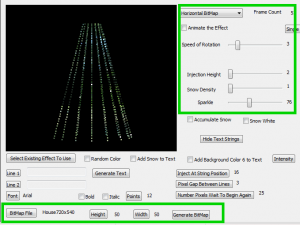
A Horizontal or Vertical Bitmap effect generates a bitmap file that scrolls across the tree horizontally or vertically.
Options to Customize a Bitmap Effect:
- Speed of Rotation: How fast the bitmap should rotate horizontally or slide vertically.
- Injection Height: What height (in pixels) to start the bitmap.
- Sparkle: Add random sparkling to the bitmap.
Selecting the Bitmap:
- Click the Bitmap File button and open your desired bitmap file.
- Click the Height and Width buttons to let HLS know the dimensions of your file.
- Click the Generate Bitmap file to complete setting up the file. Any changes to the file will require pressing the Generate Bitmap button again.
| HLS User Manual and Reference Guide | ||
|---|---|---|
| Previous Page | Current Chapter | Next Page |
| The PixelPlane Editor | Chapter 6: The PixelPlane | The PixelPlane Editor: Vertical Matrix |