Creating a PixelPlane
Current as of Version 12P.
What is a PixelPlane?
A PixelPlane is a grouping of pixels into a single channel that can be sequenced with complex effects on a macro level. By using PixelPlanes, HLS is able to completely remove the low-level complexity and allows the user to treat a large amount of channels as if they are one. Anyone sequencing with lots of pixels, using external programs like nutcracker, or looking for additional ways to "handle" pixels would benefit from this feature of HLS.
VIDEO: Joe describes a PixelPlane and creating a PixelPlane in his HLS 2013 Intro video
How to Create a PixelPlane
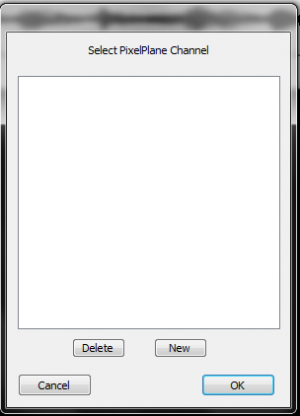
- First, open the PixelPlane Manager (Manage Channels -> Manage PixelPlane Channels).
- In the Select PixelPlane Channel window, press the NEW button to create a new PixelPlane (See Figure 6-1).
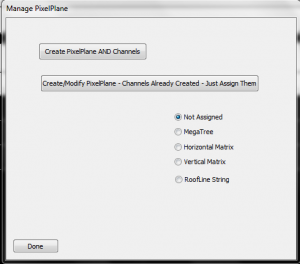
- The Manage PixelPlane window will open (See Figure 6-2). Click Create PixelPlane AND Channels.
- Note: In the past, PixelPlane Channels were first created in the regular Channel Manager. They are now created here. If you have already created channels (in the old way), or are importing from another file and want to convert channels to a pixel plane, select Create/Modify and select your channels manually and then save the changes.
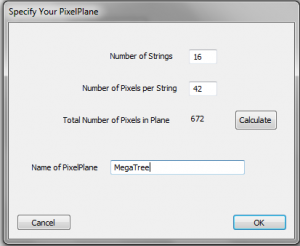
- The Specify Your PixelPlane window will open (See Figure 6-3).
- Enter the number of strings in your PixelPlane, the number of pixels per string, and then press the calculate button. (In the example used, 16 strings of 42 pixels were entered, which equals 16*42=672. Note that this is the number of PIXELS, not the number of CHANNELS.)
- Name your PixelPlane and click OK.
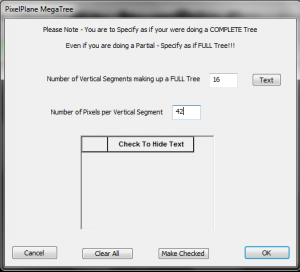
- Assign the type of PixelPlane that you have and then click "Assign Type of PixelPlane."
- Note:As of version 12P, only "Mega Tree" and "Vertical Matrix" are supported.
- Complete the fields to help HLS understand your PixelPlane object, then click OK (See Figure 6-4).
- Press Done to close the window. Your PixelPlane has now been created.
Assigning Channels/Universe to PixelPlane
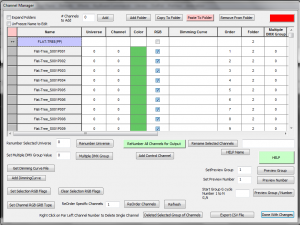
- To assign OUTPUT Universe and Channels to your PixelPlane object, go to the channel manager (Manage Channels -> Manage Raw Channels). (See Figure 6-5)
- When adding your PixelPlane, HLS will automatically create a Folder and place all of the related pixels into that folder. To open or collapse the folder contents, simply click on the folder name.
- Note: HLS PixelPlanes will already have an assigned "color," which is Green. This is just a representation color for PixelPlanes, and does not reflect an actual output color.
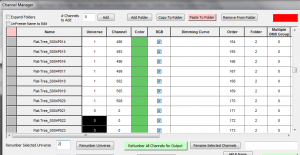
- By default, HLS will not assign DMX universes or output channels to your PixelPlane.
- FIRST, ensure your pixels are in the correct order.
- Highlight the first 170 HLS PixelPlane channels of your object and assign the DMX Universe Number by entering the number and selecting Renumber Selected Universe.
- Tip: Remember that Pixels contain 3 physical channels in each (R,G,B). A DMX universe can contain 512 channels. No single pixel can be split across a universe (unless using Multiple DMX), so only 510 can be used in a single universe. 510/3 = 170. Therefore, after every 170 pixels, you must use a new universe number.
- When done with Universe assignment, click Renumber Channels for Output to complete the channel assignment process.
- In the example of Figure 6-6, the first 170 HLS channels have been assigned to DMX Universe 1. For demonstration purposes, the Renumber all channels for output button was pressed, which then assigned that DMX Universe to physical channels. The next 170 pixels are now highlighted and ready to be assigned to DMX Universe 2.
Displaying a PixelPlane in the Sequencer Window
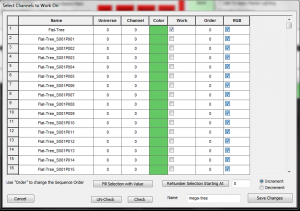

- Just like with any HLS channels, you must assign the PixelPlane to a Display Group to be able to work on it.
- Click Manage Channels -> Select Channels and Assign to Display Group. Click NEW to create a new group.
- Note: Do not add the actual pixel channels to the display group. ONLY add the one PixelPlane channel. (See Figure 6-7)
- Then, set the Display Group to the PixelPlane group to begin working on it (Manage Channels -> Select Display Group to Work on). It will show as a single channel. (See Figure 6-8)
- Note: Review Configuring Display Groups for more detailed instructions.
Sequencing Effects on a PixelPlane
Like any RGB channel, PixelPlane channels can have effects placed on them. You can do basic effects, such as Level, Ramp Up, and Ramp down. you can also do custom effects to the entire PixelPlane. These effects will globally change the entire pixel object.
As an example, you could add a ramp UP effect to a PixelPlane MegaTree. This would cause the entire tree to fade up from 0-100.
However, simple effects and even custom effects on an entire pixel object cannot fully utilize the power that can come with using the built-in PixelPlane Editor, which can generate a customizable library of effects. HLS also supports dropping in effects from third party applications, such as effects built with Nutcracker.
| HLS User Manual and Reference Guide | ||
|---|---|---|
| Previous Page | Current Chapter | Next Page |
| Chapter 5: Sequencing Channels and Adding Effect | Chapter 6: Creating and Using PixelPlanes | The PixelPlane Editor |