Configuring Display Groups
Jump to navigation
Jump to search
Introduction to Display Groups
Display Groups are one of the most powerful features of HLS. It is important to understand what they are and the purpose they serve. In basic terms, a Display Group is a group of channels that will be displayed in the main sequencing window so you can "work" with them (i.e., add effects, etc.). Channels can be contained in more than one Display Group. Groups make it possible to show and work with a subset of the channels.
- Note: Display Groups are NOT the same as Preview Groups. Display Groups DISPLAY channels in the sequencing window. Preview Groups are used with the PREVIEW window to help visualize how channels will be physically represented in the display.
Some examples of how Display Groups can be used:
- Global Grouping:
- All: A group containing every channel.
- Display Object Grouping:
- MegaTree: A group containing all of the MegaTree channels.
- Roofline: A group containing the roofline channels.
- Arches: A group containing the channels used in arches.
- Windows: Group containing windows.
- Physical Location Grouping:
- House: All channels on the house.
- Yard: All channels in the yard.
- Left, Middle, and Right: Three groups that could be setup to break the display into left, middle, and right sides.
- Color Grouping:
- Red, Green, Blue, and White: Groups could be setup to work with specific colors.
- These are just SOME examples of how groups could be used. Your imagination is the limit!
Assigning Channels to Display Groups
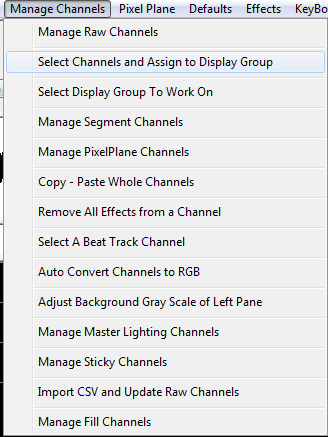
To begin working with groups, first, channels must be assigned to a Display Group.
- Click Manage Channels -> Select Channels and Assign to Display Group. (See Figure 3-30)
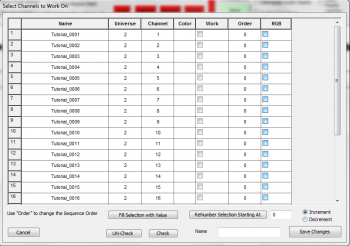
- The Select Channels to Work On screen will appear (See Figure 3-31).
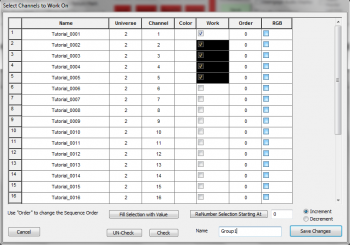
- Select the channels you wish to assign to your group by clicking and dragging to highlight the channels.
- Click on the Check button to place a checkmark in the Work column. You are telling HLS which channels you want to "work" on.
- Type in a Name for your new Display Group in the lower right-hand text field and select Save Changes. (See Figure 3-32)
- Note: You can also choose channels individually to include in a group by manually clicking the Work checkbox for each channel.
Select a Display Group to Work On
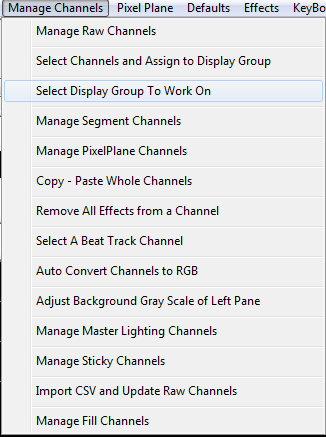
To display the newly created Display Group, HLS needs to know that you want to work on it.
- Select Manage Channels -> Select Display Group to Work On. (See Figure 3-33)
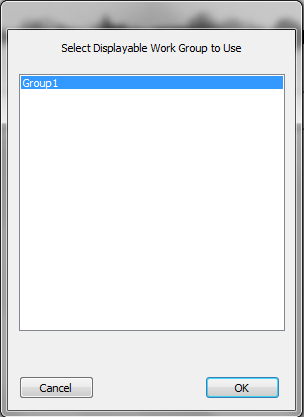
- Figure 3-34 will appear. Select the Display Group you wish to work with and click OK.
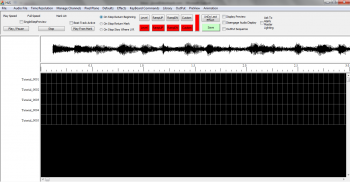
- The Sequence editor window will appear and the channels in your Display Group will now be ready for work (See Figure 3-35).
Managing Display Groups
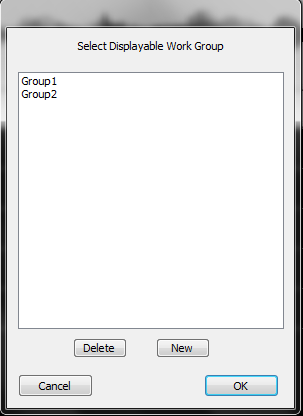
To add a new display group:
- Click Manage Channels -> Select Channels and Assign to Display Group.
- Figure 3-36 will appear. Click New to create a new display group.
- Follow directions above to select channels.
To remove a display group:
- Click Manage Channels -> Select Channels and Assign to Display Group.
- Figure 3-36 will appear.
- Highlight the Display Group you wish to remove and Press Delete.
To Modify a Display Group:
- Click Manage Channels -> Select Channels and Assign to Display Group.
- Figure 3-36 will appear.
- Highlight the Display Group you wish to modify and select OK.
- The Select Channels to Work On window will appear showing all channels in the group.
- Click Modify List to display all other channels.
- Check and Un-Check the Work column to add or remove channels from the Display Group.
- When done, click Save Changes.
| HLS User Manual and Reference Guide | ||
|---|---|---|
| Previous Page | Current Chapter | Next Page |
| RGB Channels | Chapter 3: Channel Management | Sticky Channels |