Channel Management:
Channel Management
Setting up HLS Channels
Introduction
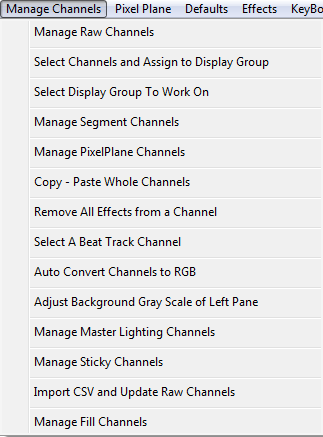
HLS Channels are controlled using the Manage Channels Menu at the top of the screen. See figure 3-1. While there are many functions on this menu, this document will mainly focus on the first option: Manage Raw Channels. Select this option to add and manipulate the raw channels associated with the sequence you are working with.
Important: If you plan to use a time resolution that is different than the default (50 msec), it MUST be set BEFORE you add any channels. Once you add channels, this time resolution CANNOT be changed.
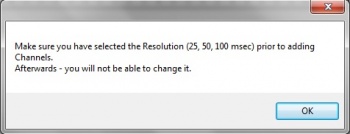
Next we will set up HLS Channels. Click on the Manage Channels tab at the top of the page and then click on Manage Raw Channels. At this point you will see a message reminding you to choose your time period resolution before you continue (see Figure 3-2). Next, click on the OK button.
Adding Basic HLS Channels
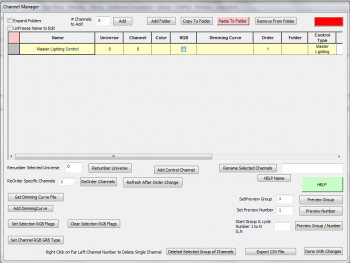
The Channel Manager screen will now as appear (see Figure 3-3). This is where we will add and configure HLS channels.
- HLS Channels are not the same as channels on a controller. HLS channels can represent a strand of incandescents or LED's, a "super string" of 3 light colors connected to the same object, a dumb RGB item, a single pixel, or a plane of pixels. This versatility is one of the features that sets HLS apart from some other sequencers.
- Output channel configuration is handled in the "Output" section of HLS and cannot be setup from the Raw Channel Manager.
To add channels:
- In the # of Channels to Add field, type the numeric value of number of channels to add.
- Click the Add button to create the channels.
Naming Channels
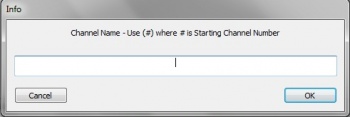
HLS will pop up a window asking for the common name for the channels (See Figure 3-4). You can enter anything in the blank and HLS will auto-number the channels, starting at 1. If you would rather NOT start at 1, you can input a different number in parenthesis. For example, to add channels starting with number 15, you could enter Chan(15) into the box. Hit Enter when complete.
Changing the Assigned Universe
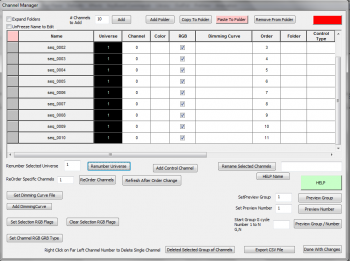
When adding channels, HLS automatically assigns them to Universe 0. Any channels assigned to Universe 0 will NOT output to controllers. If you'd like to, you can go ahead and assign channels to a universe. Or, if you prefer, you can do this when you are ready to set your channels up for output.
- In the example of Figure 3-5, 10 HLS channels have been added.
- To change them to Universe 1:
- Select all channels to change by clicking on the top channel (inside any box) and drag the mouse cursor down until all channels are selected.
- Enter the number one into the Renumber Selected Universe field.
- Click the Renumber Universe button.
- Note: Some channels will always be Universe 0. Channels like beat tracks, pixel planes, lighting channels, and segments are not designed for output. These types of channels will be discussed further in the guide.
Applying Colors to Channels
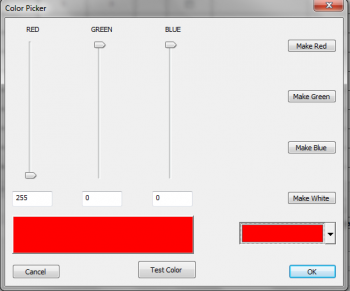
Setting a color for an HLS channel is important as it is the color that appears in the sequencer as you add effects and is also used in the Display Preview.
- In the top right corner, there is a color block. Click it to bring up the Color Picker (See figure 3-7).
- Once the Color Picker is open, you can easily set it to one of the more common lighting colors or you can click the drop down box in the bottom left to choose any color you like.
- Once you have selected a color, click OK to use it.
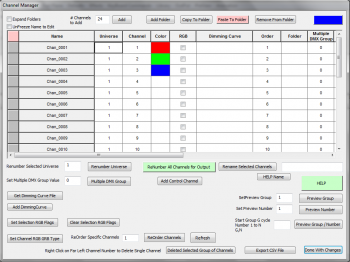
- Right-click in the Color column of any channels you want to be demonstrated with that color. (See figure 3-8.)
- Hint: To save time, choose one color at a time and set all same-colored channels at the same time before switching to another color.
Simple Renaming
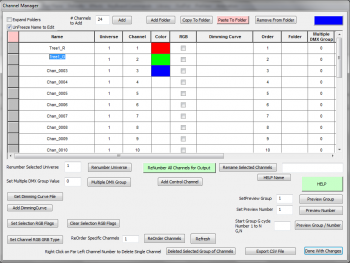
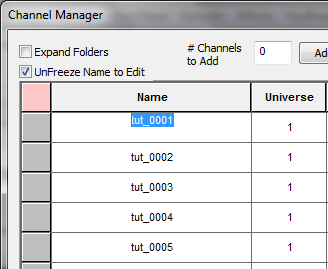
Generally, you won't want to keep a bunch of channels with the same name. Or you may want to make minor changes to names as you go along. In the example shown in Figure 3-9, the first channel has been renamed and the second channel is in process of being renamed.
- First, you MUST check the UnFreeze Name to Edit box in the top left.
- Once names are unlocked, click into the field and type a new name.
- Group renaming, using folders, moving items, and other complex tasks are in the Advanced Channel Management section.
Advanced Channel Management
Introduction
The Manage Raw Channels window is truly a powerful tool. In this document, we will explore some of the more advanced features of the channel manager. Something that everyone needs to know before doing anything with channels is, SAVE YOUR SEQUENCE BEFORE YOU MAKE CHANNEL CHANGES. When managing raw channels, there is no cancel or undo. What happens, happens. If you save your sequence right before working with channels, if something goes wrong, you can always restore to the previous backup.
Grid Columns and What They Mean

There are a number of columns in the Raw Channel window. Figure 3-10 shows a subset of those columns. (Some columns are out of view.)
- Left-most Gray Square: This is a selection box. You left-click in here and the square becomes green. That channel (and any others you left-click on) is selected and can be moved into a folder or deleted.
- Name: This field shows the name of the channels.
- Universe: A numerical value from 0-5000. Any channels in universe 0 will never be displayed.
- Color: This field is set to the color of the channel.
- RGB: This checkbox is checked when a channel is an RGB lighting element or pixel.
- Dimming Curve: This field is to set a dimming curve for the channel.
- Order: This field is used to adjust the DISPLAY order of the channels.
- Folder: The number of the folder that a channel is assigned to.
- Control Type: This is used with animation effects and trigger events.
- GRB: Used when the order of the RGB is different from Red-Green-Blue.
- Preview Group: This group number defines what Preview Group the channel belongs to.
- Preview Number: This is the channel number for the assigned display group.
Advanced Renaming Channels
When adding a bulk group of channels, HLS will ask for a base name to start with, but you most likely will want to customize the names for your purpose. You can rename individual channels, rename using the bulk renaming utility, and even create names in excel that you paste into the Channel Manager.
Rename Individual Channels:
To rename individual channels, you must first open the Channel Manager (Manage Channels -> Manage Raw Channels). See Figure 3-11.
- Check the box to Unfreeze Name to Edit.
- Click on the channel you wish to rename.
- Highlight the old name and type in the new name.
- When done, Click Done with Changes.

Bulk Channel Renaming:
There are two methods of bulk renaming built into HLS. There is a help file for this by clicking HELP Name in the Channel Manager.
Method One:
- This is the more straight-forward and basic method of bulk renaming.
- Highlight the cells you wish to rename
- Formula: Name_(StartingChannelNumber)
- This will rename channels with "Name" shown except replace (StartingChannelNumber) with a sequential number starting at the number specified.
- Examples:
- "MTString_(1)" will produce MTString_0001, MTString_0002, etc.
- "Yard_(15)" will produce Yard_0015, Yard_0016, etc.
Method Two:
- This method is likely to be used when renaming large groups of pixels or strings.
- Highlight the cells you wish to rename
- Formula: @NumberOfPixels, Name(*StartingStringNumber)_%
- This will rename channels with "Name" shown, followed by the value of "StartingStringNumber", and then counting UP until reaching the "NumberOfPixels" value.
- Once reaching the "NumberOfPixels" value, the value of "StartingStringNumber" will increment by 1, and the "NumberOfPixels" will start counting upwards from 1 again.
- Example: A pixel megaTree with 32 strings composed of 42 pixels each:
- @42,MTString(*1)_% will rename channels with values of MTString01_0001 to MTString32_0042
Relevant Video Tutorial: Pixel Based Mega Tree
Reordering Channels

The Order column is a numeric value ordering the channels from 1 to the last channel.
To ReOrder channels:
- Select the channels you wish to move.
- In the ReOrder Specific Channels field (See Figure 3-13), enter a number that does not conflict with existing channels and then click ReOrder Channels.
- Once the channels have been ReOrdered, click Refresh After Order Change to update the Order column.
- Example: To move 5 channels from the beginning to the end:
- Highlight the five channels to move.
- In the ReOrder Specific Channels field, enter a number that is higher than the last channel's Order number.
- Click ReOrder Channels.
- Click Refresh After Order Change.
- Example: To move 5 channels from the bottom to the top:
- Highlight all channels EXCEPT the five channels to move.
- In the ReOrder Specific Channels field, enter a number that is higher than the last channel's order number.
- Click ReOrder Channels.
- Click Refresh After Order Change.
Using Folders
Create a New Folder:
- Open the Channel Manager (Manage Channels -> Manage Raw Channels).
- Click the Add Folder button on the top toolbar. (See Figure 3-14).
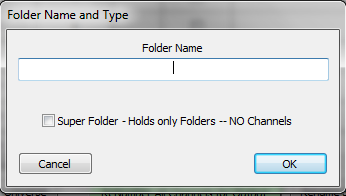
- A dialog box will open asking for a Folder name. Type name and press OK. (Se Figure 3-15).
- Note: A Super Folder contains only folders. Check this box if you wish to create a "folder of folders". This would be used for channel organization.
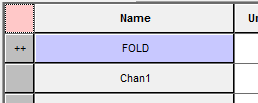
- Once entered, the folder will appear at the top of the list of channels and have ++ on the left-most square to identify it as a folder. (See Figure 3-16).
Moving Channels In/Out of Folders:


- Highlight the channels you want to add to a folder.
- Press the Copy to Folder button.
- This will turn the left-most square GREEN for selected channels.
- Tip: You can also select channels by left-clicking on the square to turn it green.
- Once all channels are selected (left-most square green), press the Paste to Folder button. This will turn from red-to-green. (See Figure 3-17, 3-18).
- Click on the left-most square of the folder you want to move the channels into. This will move the channels into the desired folder.
Remove channels from a folder:
- Click the folder name to expand the items.
- Select the channels to remove by clicking the left-most square and turning it green (or, highlighting rows to remove).
- Press the Remove from Folder button.
Opening and Closing Folders:
- To open a folder, simply click on the name of the folder.
- To close a folder, click on the name of the folder.
- To open ALL folders, click the Expand All Folders checkbox.
VIDEO: Joe describes folders and folder management
Copying Channels
Copying channels requires the use of both the main sequencing window and the channel manager. First, you must use the Channel Manager to add the new channel(s) you will be copying into.
Once that is done, you will have to add the new channels and the channels you will be copying from into the same Display Group.
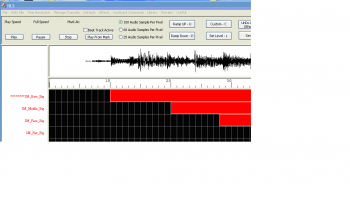
To copy one or more channels click on the channel and asterisks will appear to the left of the channel name (see Figure 3-19. The click again on the channel to select it. Then Select the Manage Channels tab and choose Copy - Paste Whole Channels. You will then be prompted to Click on the Channel to Paste To.
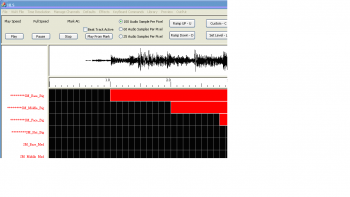
To copy multiple channels click on the first channel to be copied and asterisks will appear to the left of the channel name. The without clicking move your mouse down to include all of the channels you would like to copy (see Figure 3-20). Asterisks will appear to the left of the channel to be copied. Once you have selected all of the channels to be copied click again on the last channel to be copied to select all of them.
Then Select the Manage Channels tab and choose Copy - Paste Whole Channels. You will then be prompted to Click on the Channel to Paste To. Note that if you are copying a number of channels you will have to have that many to paste to.
Deleting Channels
- To remove channels, open the Channel Manager (Manage Channels -> Manage Raw Channels).
- Highlight the channels to delete by clicking and dragging into the data fields.

|
| Figure 3-21: Click the Delete Selected Channels button. |
|
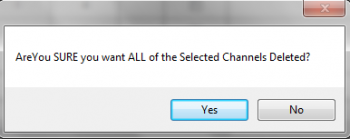
| Figure 3-22: Confirm you wish to delete by clicking yes. |
|
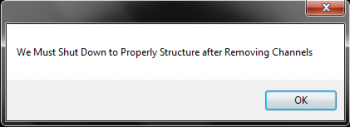
| Figure 3-23: HLS will prompt to shut down to
update its configuration. Click OK. Then OK again. |
Program Help File
HLS now comes with a detailed help file. This file is reproduced here to help so that you can have the channel manager open and look at the help file at the same time.
Expand Folders - Shows ALL Channels - Expands ALL Folders
Unfreeze Name to Edit - Clicking Names causes Folder Events to Occur - To Edit Name - Check This
Add Channels - This is the Number of Single Channels or Pixels (Pixels will be 3 Channels on Output)
Add Folder - Folders contain your Channels. A Super Folder can contain multiple Folders
Copy to Folder - High lite several rows of Channels to assign to a Folder - this will make Cell 0 Green - Ready to Assign
Clicking on the First cell of a Row (Expand Channels OFF) will also select Channel to be assigned to a Folder
Paste to Folder - When Channels have been selected - Press this button - Turning it Green indicating Left Mouse Click on ++ of Folder will assign Channels to that folder
Remove from Folder - High lite several rows of Channels to Remove from a Folder - Press button to perform operation
Colored Cell in Upper Right Corner - Color Selection Control
In Grid - L click in first column to select Channel for Folder Assignment or Removal from Folder
In Grid - R click first column to DELETE channel or Folder
In Grid - R click dimming curve to assign
Renumber Select Universe - Used to assign Output Universe - High Lite Channels and assign number specified
Set Multiple DMX Group - used with 4096 channels DMX Devices - Enables Universe of 4096 instead of 512
Get Dimming Curve - Select Dimming Curve to Bulk Assign
Add Dimming Curve - High lite channels then Assign Dimming Curve Selected by 'Get Dimming Curve'
Set/Clear RGB - High lite Channels and Set/Clear RGB Flag
ReOrder Channels - High lite Channels - Assignment starts at Number specified. ReOrders Channels in List
Renumber All Channels for Output - This will Assign the correct Channel Numbers based on Order and RGB - Universe must be Non-Zero
Add Control Channel - Assign Triggers, Animation Mouth, Words, etc
Rename Selected Channels - Press HELP to see Macros that can help Create Unique Names
Preview Group - High lite Channels and Assign Preview Group to selection
Preview Number - High lite Channels - State Starting Chan Number - Each Channel is Incremented
Start Group G cycle Number 1 to N - G,N .... Enter Group Number followed by Number High Lite Channels - Groups starts at G with Chan Number starting at 1. When Chan Number hits N - G is Incremented and Chan Number starts at 1
Delete Selected Group of Channels - High Lite channels and Delete with this button
Export CSV - Creates a CSV file containing all of your Channel Information
RGB Channels
Introduction to RGB
RGB lighting, both dumb and smart pixels, have added a large amount of complexity and channel counts in displays. HLS is very advanced in handling RGB channels. This section of the wiki will discuss setting up channels, converting multiple channels into one, and how to use the RGB features for other display items.
Adding RGB Channels

To add RGB channels, first, open the Channel Manager (Manage Channels -> Manage Raw Channels).
- Add the number of RGB channels that you will need.
- Note: Add the number of RGB "whole" channels you need, not the individual channel numbers. HLS will recognize that RGB channels contain 3 real channels automatically. So, if you have 50 pixels, add 50 channels, NOT 150 channels.
- Select the channels that will be RGB by clicking and highlighting them.
- Click the Set Selection RGB Flags to convert the channels to RGB. (See Figure 3-24)
- Assign the channels to a universe that is greater than zero.
- Click Renumber All Channels for Output to reconfigure the channel usage (i.e., 3 channels per RGB channel).
- If your channels have a GRB order, click the Set Channel RGB GRB Type button.
Converting 3 Red, Green, and Blue Channels to one RGB Channel
Even when you don't have actual RGB strings, but are using "Mega Strings", or, strings composed of multiple strands of lights, you can make use of the RGB Channel abilities in HLS to reduce your channel count. For example, a tree with red, green, and blue strands of lights could be classified as ONE RGB channel rather than three individual channels.
Another example when this may come in handy is when you have imported a sequence from Vixen or LOR which contains three separate RGB channels that you now want to combine into one.

To convert three R, G, B channels into one:
- Open the Channel Manager (Manage Channels -> Manage Raw Channels)
- Verify that the three channels you wish to convert are setup properly. (See Figure 3-25)
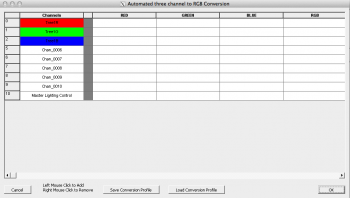
- Open the Converter for RGB (Click Manage Channels -> Auto Convert Channels to RGB. (See Figure 3-26)
- Locate the three channels you wish to convert.
- To move channels, Left-Click in the channel list, then Left-Click in the RGB section you want to move the channel. It will become "grayed out" when it has been moved and cannot be selected.
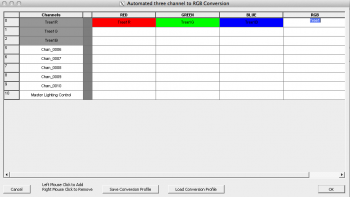
- Place the Red Channel in Red, Green Channel in Green, and Blue Channel in Blue. (See Figure 3-27)
- Click into the RGB column to name your newly created RGB Channel.
- Note: If you make a mistake, right-click the channel to move it back to the Channel list.
- Once all channels have been converted, click OK.

- A dialog will open with information about how many channels have been converted. (See Figure 3-28)
- HLS will then shutdown to update channel configuration.

- Open HLS and open the Channel Manager to see the newly converted channel(s). (See Figure 3-29)
To Make the RGB Conversion Automatic:
- When you import multiple sequences from another program which have the same channel setup, you can automate the conversion process of R, G, B into one RGB.
- Open the first sequence and follow the conversion steps above.
- Once the conversion is complete, click Save Conversion Profile.
- Type a name for your saved Conversion Profile and click Save.
- Click OK.
- Open the next sequence to convert.
- Click Load Conversion Profile
- Select the file to load and click Open.
- Once conversion is complete, click OK.
Using RGB Channels to Reduce Multi-Color Channels by 2/3
Red, Green, and Blue "mega strings" aren't the only grouped strings that can benefit from the RGB single channel conversion. If your colors are different from those, you can still use the RGB channel to reduce channel count by 2/3. As an example, imagine a Mega tree with 16 strings of red, white, and blue lights (48 strings total). If those mega strings were converted to single RGB channels, the channel count would go from 48 to 16.
- Follow the conversion steps above to convert the multiple channels into RGB channels. Except this time, Red goes to red, WHITE goes to green, and Blue goes to blue.
- When programming, use red effects for the red lights, blue effects for blue lights, and GREEN effects to control the white lights.
- If you program white in the RGB channel, then all three colors (red, white, and blue) would be on.
- Think of the RGB string as three channel control rather than only red, green, and blue control.
Configuring Display Groups
Introduction to Display Groups
Display Groups are one of the most powerful features of HLS. It is important to understand what they are and the purpose they serve. In basic terms, a Display Group is a group of channels that will be displayed in the main sequencing window so you can "work" with them (i.e., add effects, etc.). Channels can be contained in more than one Display Group. Groups make it possible to show and work with a subset of the channels.
- Note: Display Groups are NOT the same as Preview Groups. Display Groups DISPLAY channels in the sequencing window. Preview Groups are used with the PREVIEW window to help visualize how channels will be physically represented in the display.
Some examples of how Display Groups can be used:
- Global Grouping:
- All: A group containing every channel.
- Display Object Grouping:
- MegaTree: A group containing all of the MegaTree channels.
- Roofline: A group containing the roofline channels.
- Arches: A group containing the channels used in arches.
- Windows: Group containing windows.
- Physical Location Grouping:
- House: All channels on the house.
- Yard: All channels in the yard.
- Left, Middle, and Right: Three groups that could be setup to break the display into left, middle, and right sides.
- Color Grouping:
- Red, Green, Blue, and White: Groups could be setup to work with specific colors.
- These are just SOME examples of how groups could be used. Your imagination is the limit!
Assigning Channels to Display Groups
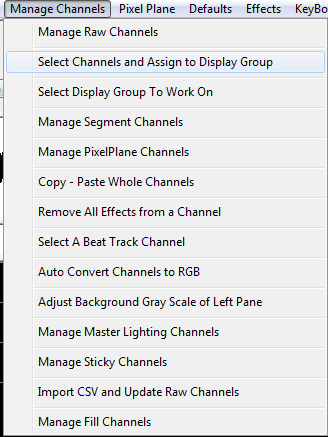
To begin working with groups, first, channels must be assigned to a Display Group.
- Click Manage Channels -> Select Channels and Assign to Display Group. (See Figure 3-30)
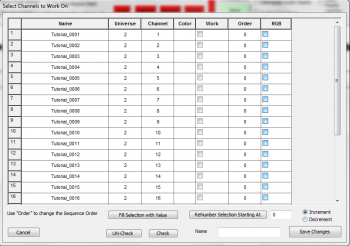
- The Select Channels to Work On screen will appear (See Figure 3-31).
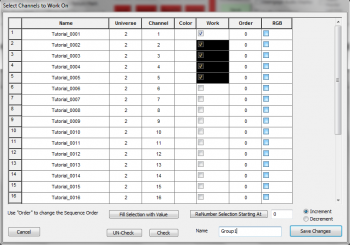
- Select the channels you wish to assign to your group by clicking and dragging to highlight the channels.
- Click on the Check button to place a checkmark in the Work column. You are telling HLS which channels you want to "work" on.
- Type in a Name for your new Display Group in the lower right-hand text field and select Save Changes. (See Figure 3-32)
- Note: You can also choose channels individually to include in a group by manually clicking the Work checkbox for each channel.
Select a Display Group to Work On
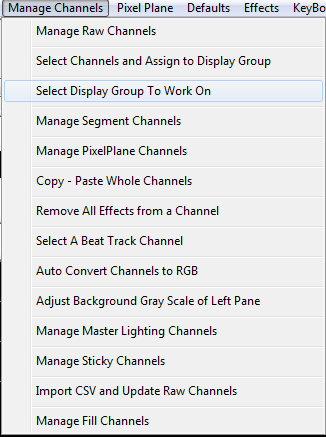
To display the newly created Display Group, HLS needs to know that you want to work on it.
- Select Manage Channels -> Select Display Group to Work On. (See Figure 3-33)
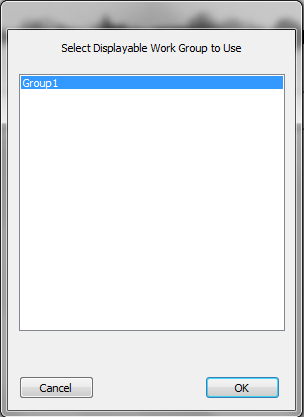
- Figure 3-34 will appear. Select the Display Group you wish to work with and click OK.
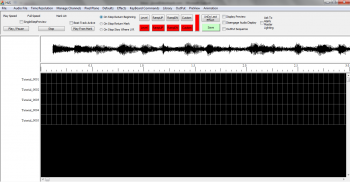
- The Sequence editor window will appear and the channels in your Display Group will now be ready for work (See Figure 3-35).
Managing Display Groups
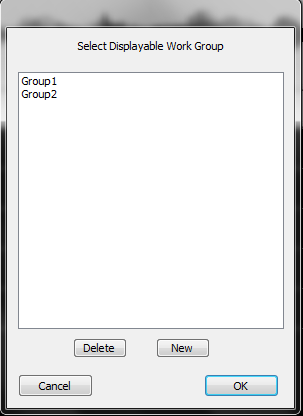
To add a new display group:
- Click Manage Channels -> Select Channels and Assign to Display Group.
- Figure 3-36 will appear. Click New to create a new display group.
- Follow directions above to select channels.
To remove a display group:
- Click Manage Channels -> Select Channels and Assign to Display Group.
- Figure 3-36 will appear.
- Highlight the Display Group you wish to remove and Press Delete.
To Modify a Display Group:
- Click Manage Channels -> Select Channels and Assign to Display Group.
- Figure 3-36 will appear.
- Highlight the Display Group you wish to modify and select OK.
- The Select Channels to Work On window will appear showing all channels in the group.
- Click Modify List to display all other channels.
- Check and Un-Check the Work column to add or remove channels from the Display Group.
- When done, click Save Changes.
Sticky Channels
HLS allows the user to set up to three "Sticky Channels". These are channels that can be displayed at the top of the sequencing window (in place of the Audio Oscilloscope). They maintain their position when scrolling through channels in your sequence. This can be useful in setting beat tracks that are always at the top or for lining up sequencing effects with another channel.
VIDEO: Joe describes sticky channels in his 2013 Intro video
To Set Sticky Channels:
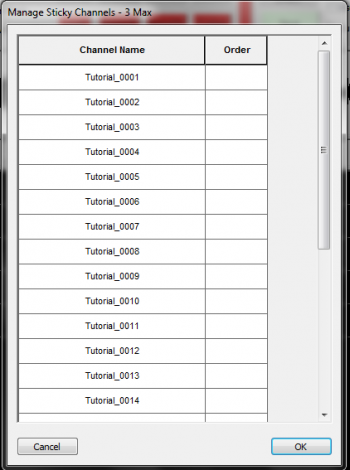
- Click Manage Channels -> Manage Sticky Channels.
- This will open the Manage Sticky Channels window which will show all of your channels (See Figure 3-37).
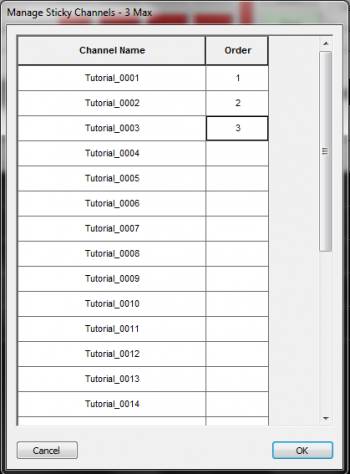
- To set a channel as a Sticky Channel, Click in the Order column next to the channel name and enter a number (1-3). (See Figure 3-38)
- Once you have numbered the Sticky Channels, Select OK.
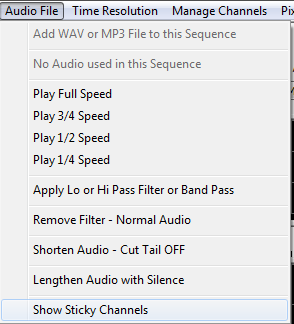
- To toggle between Sticky Channels and the Audio Oscilloscope, click Audio File -> Show Sticky Channels (See Figure 3-39).

- The Sticky Channels will now be at the top of the screen (See Figure 3-40).
Segment Channels
Segment channels allow you to assign multiple channels to a single HLS Channel. As you add effects, modify them, or delete them on the segment channel, all the channels in that segment are affected. Segments add some macro control of your display elements and are especially useful for pixels or face animations.
VIDEO: Joe describes Segment Channels and gives examples of their use in his 2013 Intro video
Examples:
- Multiple pixels or channels assigned to mouth movements.
- An arch of pixels, with groups of pixels assigned to segments.
- Assigning a specific color of channels that are on mini-trees to one segment.
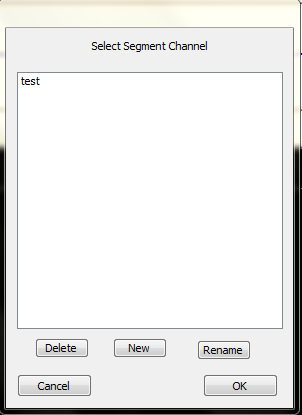
Creating Segments for Existing Channels:
- Open the Segment Channel Manager (Manage Channels -> Manage Segment Channels).
- Figure 3-41 will appear. Click New to create a new Segment.
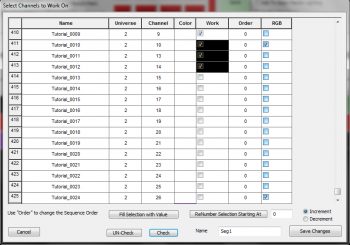
- Figure 3-42 will appear. Select the channels you wish to assign to a segment, click "check", name the segment, and click OK.
- Continue to add segments as needed.
- Tip: You can also rename segments through the Segment Channel Manager (as of 16K).
Assign Segments to a Display Group:
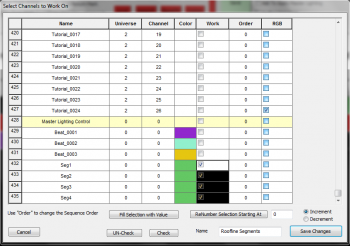
- Create a new Display group, but only add the newly created segments to the group.
- Note: The Segment Channels will appear with a green color. See Figure 3-43.
- Name the group.
- Set the group to Display in the sequencing window.
- Add effects to the segments, which will show up in all channels contained in the segment.
Out of Sync Effects:
- If a channel composed in a segment already has effects in cells, those points will be "grayed out" in the Segment view.
- You will be unable to modify those effects in the Segment view. This protects those effects from being damaged while editing a full segment.
- To be able to adjust the entire segment area, you must set the display group to view the channel(s) that contain effects at that point in time and remove them.
- Once you have applied effects in segments, you can go back in to the individual channels and adjust them if needed.
Video:
