HLS User Manual and Reference Guide - PDF 2013-02-06: Difference between revisions
No edit summary |
No edit summary |
||
| Line 1: | Line 1: | ||
__TOC__ | |||
=== | ====Getting HLS==== | ||
---- | ---- | ||
===Download and Installation=== | |||
==={{:Download and Installation}} (12K)=== | |||
===Upgrading HLS=== | |||
=== | ==={{:Upgrading HLS}} (12K)=== | ||
<br /> | <br /> | ||
=== | ====Creating a Sequence==== | ||
---- | ---- | ||
An HLS Sequence consists of an audio file (generally) with lighting and other effects synchronized with the music. | |||
==={{:HLS Sequence Creation Wizard}} (12K)=== | |||
==={{:Starting a new HLS Sequence}} (12K)=== | |||
==={{:Time Resolution}} (12K)=== | |||
<br /> | <br /> | ||
Revision as of 22:19, 9 February 2013
Getting HLS
Download and Installation
===
Download HLS
Download the software HLS_Install_**.zip from [1] and save it to your computer.
- Tip: One way to organize the downloaded versions is to create a folder named "HLS Versions" and save downloads there.
- Unzip the HLS_Install_**.zip and four files will be created in a folder named the same as the zip file. These four files are:
- DBGHELP.DLL
- ftd2xx.dll
- HLS.exe
- ipworks8.dll
Folder Hierarchy
Unlike a lot of software, HLS doesn't change your registry and isn't installed in a typical way. All that's necessary to get HLS up and running is to place the four files listed above into a folder and you are off and running. A little time spent on creating a foundation of folders to hold your copy of HLS will go a long way in keeping your computer organized and the files you will be creating logical and easy to find.
Note: Prior to version 16K, the HLS Program and Data all were contained within the HLS Application folder. Starting in version 16K, data can be set to any place you want. Your Documents folder, an external hard drive, etc. Follow the Moving HLS Data Directories page to separate data from application.
Wherever you decide to save HLS data, the following structure is suggested:
HLS
HLS\Backgrounds
HLS\Library
HLS\Music
When you create an HLS sequence, HLS will create a folder under your HLS folder with the sequence name.
HLS Installation
- Now that you have the foundation of folders created, copy the four files from the HLS_Install_**.zip version into your "HLS" folder.
- Now you are ready to run HLS.
- Note: If you are using Windows 7 you need to change the properties of the HLS.exe file to run as Administrator.
- Open HLS.exe and begin to sequence.
OS Specific Installation
Windows 7/Vista HLS Installation
(12K)===
Upgrading HLS
===
Standard Upgrade
When you start up HLS, it automatically checks for the most recent version. If there is a new version, a window will open asking if you want to upgrade. If you choose yes, you will be redirected to the website to download the newest version.
- Simply download the latest version, unzip the files, and overwrite the old files with the new ones.
Upgrade Path for Skipped Updates
Due to the high rate of development of HLS, if a user is not monitoring the updates frequently, it is easy to fall several versions behind. If someone upgrades to the latest version from an older version, there is risk of data loss from the sequence files no longer being able to be opened.
To address this concern, there is an upgrade path that can be taken to move from older version to the newest version. Each time an upgrade step is made, any sequences that you want to keep should be opened in that step and saved before moving to the next step.
- Upgrading from a version less than 11E: Install version 11H [2]
- Open any sequence you wish to keep in version 11H and Save Sequences.
- Upgrade from 11H to the most current version. [3]
- Open and Save sequences again to have them fully updated.
(12K)===
Creating a Sequence
An HLS Sequence consists of an audio file (generally) with lighting and other effects synchronized with the music.
=== HLS has a built in New Sequence Wizard which will walk you through the steps of creating a sequence. If you are attempting to create a new sequence but want to base it's setup on a previously created HLS sequence, follow the instructions on Using HLS Sequence Images.
Setting up the Sequence File:
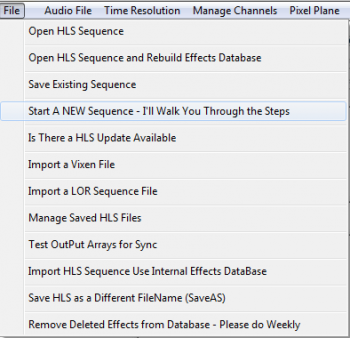
- To begin, open HLS and select the FILE menu, then choose Start a NEW Sequence - I'll Walk You Through The Steps (See Figure 0-1).
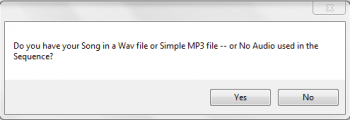
- HLS will ask if your sequence will use audio (Yes), or no audio (no) (See Figure 0-2).
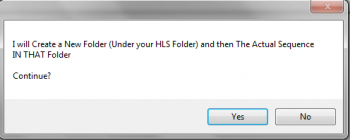
- HLS will ask for permission to create a folder for your new sequence under your HLS folder (YES) (See Figure 0-3).
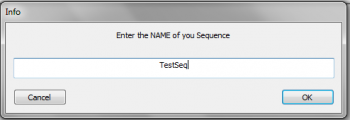
- You will then be prompted to provide a name for your new sequence (See Figure 0-4).
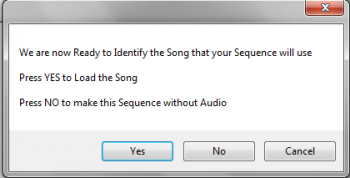
- HLS will then alert you that it is ready for your audio. (See Figure 0-5).
Setting up the Audio File:
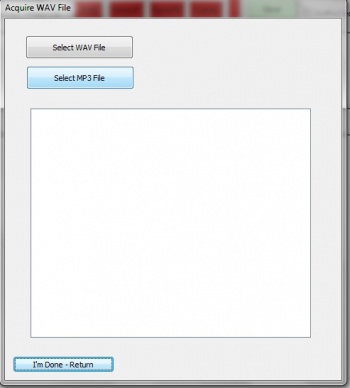
- A prompt will open asking you to select a WAV or MP3 file (See Figure 0-6).
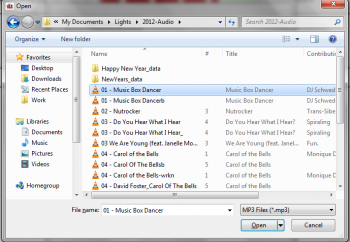
- Navigate to your music file and select it. In this example Music Box Dancer MP3 will be chosen (see Figure 0-7).
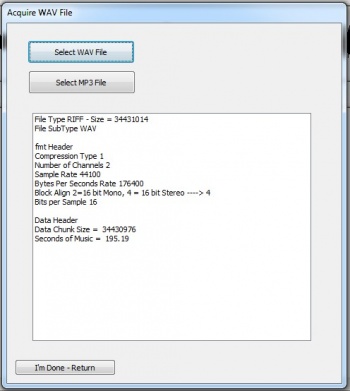
- After your music file has been chosen and processed, Figure 0-8 will appear.
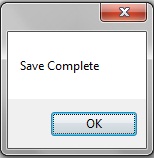
- Click on the "I'm Done - Return" button. You should get a save confirmation message (See Figure 0-9).
(12K)===
=== HLS has a built in New Sequence Wizard which will walk you through the steps of creating a sequence. If you are attempting to create a new sequence but want to base it's setup on a previously created HLS sequence, follow the instructions on Using HLS Sequence Images.
Setting up the Sequence File:

- To begin, open HLS and select the FILE menu, then choose Start a NEW Sequence - I'll Walk You Through The Steps (See Figure 0-1).

- HLS will ask if your sequence will use audio (Yes), or no audio (no) (See Figure 0-2).

- HLS will ask for permission to create a folder for your new sequence under your HLS folder (YES) (See Figure 0-3).

- You will then be prompted to provide a name for your new sequence (See Figure 0-4).

- HLS will then alert you that it is ready for your audio. (See Figure 0-5).
Setting up the Audio File:

- A prompt will open asking you to select a WAV or MP3 file (See Figure 0-6).

- Navigate to your music file and select it. In this example Music Box Dancer MP3 will be chosen (see Figure 0-7).

- After your music file has been chosen and processed, Figure 0-8 will appear.

- Click on the "I'm Done - Return" button. You should get a save confirmation message (See Figure 0-9).
(12K)===
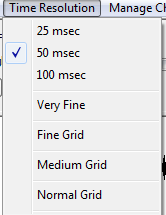
The Time Resolution must be set before you setup any channels. Once it has been set, you cannot change it again. The default time resolution is set for 50 milliseconds. You can also choose a 25 millisecond or 100 millisecond time resolution. The time resolution sets how frequently effect changes can occur on a channel.
- 25 msec: This provides 40 timing grid spaces for every second.
- 50 msec: This provides 20 timing grid spaces for every second.
- 100 msec: This provides 10 timing grid spaces for every second.
Simply click to select the time resolution you would like for your sequence.
The grid options on the menu adjust how "fine" the grid spaces are. This only affects what you see as you sequence and does not affect anything with the sequence itself. This can be adjusted at any time while sequencing.
- A higher grid resolution will result in more channels displayed on the screen at one time and more timing marks on display at one time, but the disadvantage is that the grid squares are smaller.
- A lower grid resolution will result in larger squares which are easier to see, but the disadvantage is fewer channels and timing marks on the screen at one time.
(12K)===
