Happy Holidays Sign
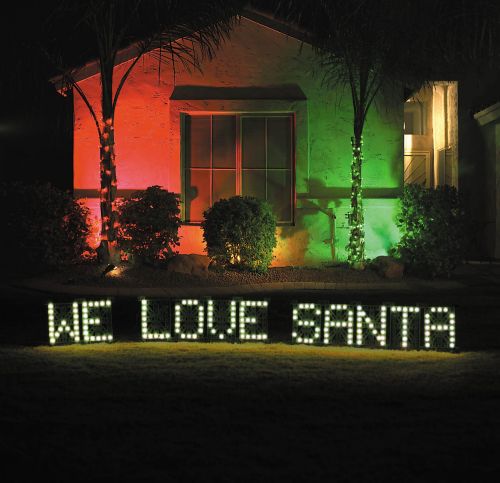
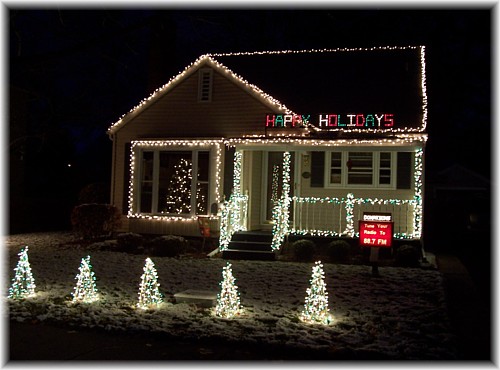
This How To has been put together to assist you in making a Happy Holidays sign. The sign that I am creating will be just large enough to display the words Happy Holidays. It will be a total of 10 feet long and aprox 24 inches tall. This is also designed to be self supporting. I will be putting this sign on the roof of my house and each letter will be a seperate channel.
Materials list
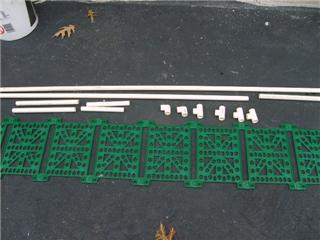
3 sections of 10' 3/4" PVC pipe to make the following:
1 3/4" x 10' section (for top of sign)
2 pieces - 3/4" x 11" PVC (for sides of sign)
2 pieces - 3/4" x 59" PVC (for bottom of sing
2 pieces - 3/4" x 15" PVC (for legs)
4 pieces - 3/4" x 24" PVC for base stabilizers
You will also need to purchase:
Zip ties
2 - 3/4" 90 degree PVC fittings
5 - 3/4" "T" connectors ( all openeing are 3/4")
2 cans of black spray paint
Snap-N-Glow plastic letter/light molds found online at
http://www.christmaslightshow.com/xcart/product.php?productid=24
Assembly
This is assuming you have already cut the pieces to lenght that are outlined above.
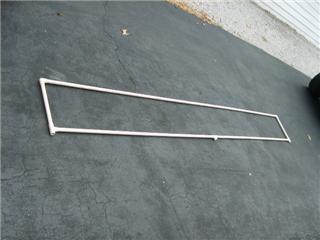
take a 10' section of PVC pipe and put a 90 degree connector on each end. continue by inserting the precut piece of 3/4" x 11" PVC in to the other end of each of the 90 degree connectors. Please a "T" connector on the other end of the 11" piece. Take the 2 pre-cut 59" pieces and connect then together using a "T" connector. Place this piece and insert it in to the "T"s placed on the other portion of the frame.
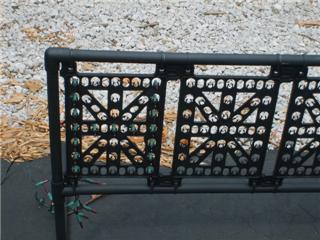
Take and connect 14 of your Snap-N-Glows together (13 for letters and 1 for the space between words)and note that the plastic has labeled front and back. Lay the Snap-N-Glow section inside the PVC Frame that we made and ensure that the BACK is facing up (This is so we do not see the Zip Ties). Using zip ties, tie the Snap0N-Glow pieces to the PVC pipe. Each section of Snap-N-Glow will use 4 Zip Ties.
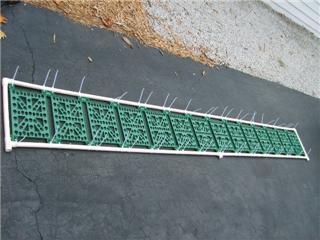
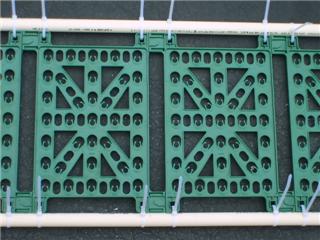
You can now proceed to create the base of the display. Connect the 2 pre-cut pieces of 3/4" x 24" PVC for base stabilizers with a "T" connector. Now do this again for the other side. In the "T", connect the 3/4" x 15" PVC (for legs). Do this again on the other side. Now connect these pieces to the top frame and stand the unit up.
For the center "T" that is on the top frame, cut a piece to length so it will touch the ground.
I used 2 cans of stray paint on this to make it black. The white pipe will be visible at night so we colored it black. I also painted the plastic molds to make make it all black.
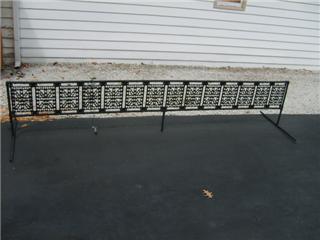
Here is the sign with 2 letters done. The "H" has light caps over the extra lights and the "P" does not. This picture was taken about 12 to 15 feet away. Basic mini lights were used as the instructions that came with the Snap-N-Glow panels described.
Completed pictures can be viewed at www.woodmerechristmas.com
