How to make a Program in Vixen
Overview
This tutorial explains how to create a program in Vixen. Instructions in this section assume you have already created several sequences and are ready to pull them together to create your show.
Opening the Program Manger
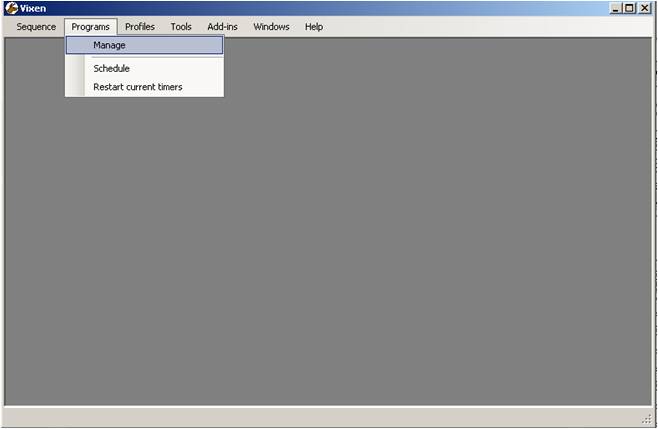
If Vixen is not already open, go ahead and open it now. Select Programs from the menu bar and then Manage (see Figure 1).
Figure 1: Creating a Program in Vixen
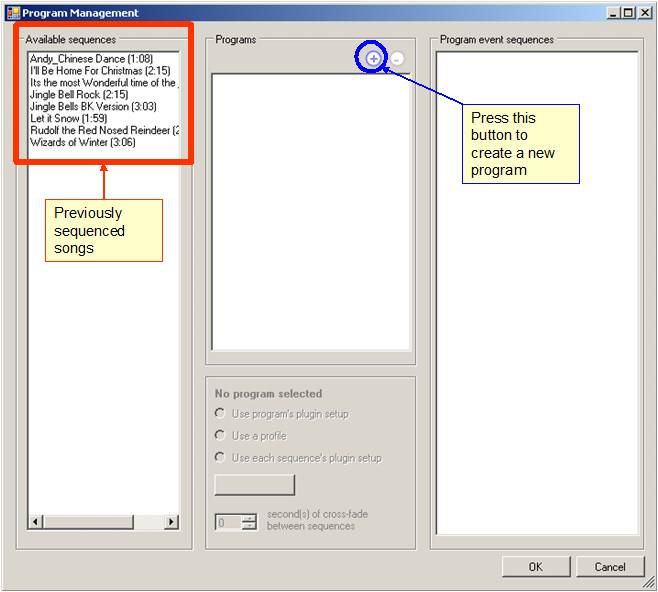
You should end up with the Program Management dialog box that looks like Figure 2. For this tutorial, I have already sequenced 8 songs (red highlighted area in Figure 2).
Figure 2: The Program Management dialog box
Creating the program
You need to create a new program before you can add songs to it, click on the small circle with a “plus sign” in it under the Programs grouping in the dialog box (blue highlighted area in Figure 2). The New Programs dialog box should appear (see Figure 3). For this tutorial, I have elected to call this program “Demo Program”. Enter the name of your program in the text box and select OK.
Figure 3: The New Program dialog box
Adding songs to the program
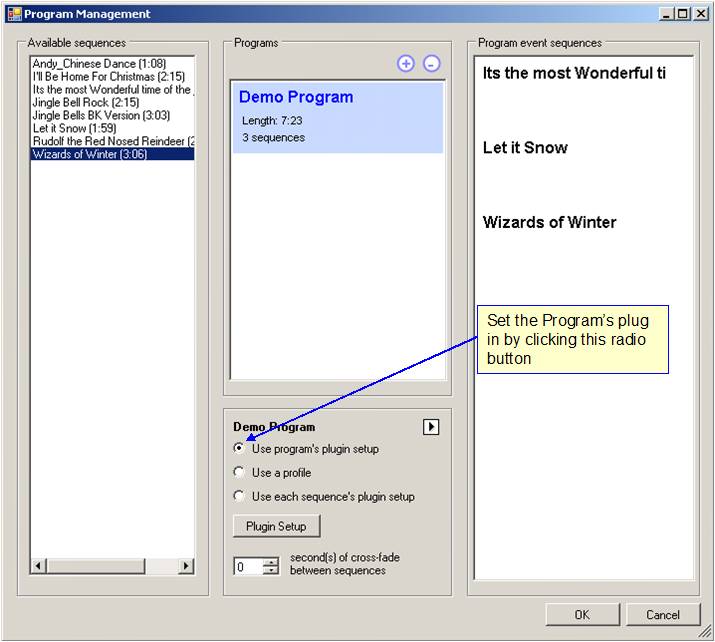
The Program Management dialog box should now look similar to Figure 4. You are ready to add songs to the program. You can add all of your songs or just a subset. For this tutorial, I have elected to add only three songs, “I’ll be home for Christmas”, “Let it Snow”, and “Wizards in Winter” (yeah I know I incorrectly titled it). Select each song with the mouse and drag it from the “Available Sequences” list box to the “Program Event Sequences” list box. You will notice that as each song is added to the program, the information for the program is updated in the “Programs” list box (specifically how long the program is and how many sequences are in the program). Add your songs in the sequence you wish to play them.
Figure 4: Program Management Dialog box with program already created
Setting the plugin
If each of your sequences has a profile already assigned and you do not want to assign a universal plugin for the program, select the “Use each sequences plugin setup” radio button instead of making a master plugin as discussed in this section. If you have created a profile and wish to use a profile instead of the standard plugins discussed in this section, select the “Use a profile” radio button. Profiles are discussed in a different tutorial.
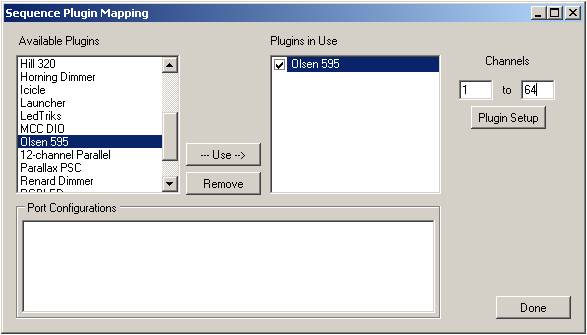
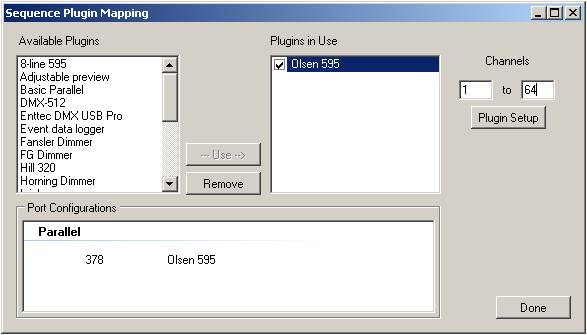
If you have not set up a plugin for each of your sequences, now is the time to set up the necessary plugins. All sequences will use the plugins defined in the program (this means if you have a plugin assigned to the sequence, the program plugin overrides the sequence plugin). Select the “Plugin Setup” button. You should now see the Sequence Plugin Mapping dialog box (Figure 5).
Figure 5: Setting up the Plugins for your Program
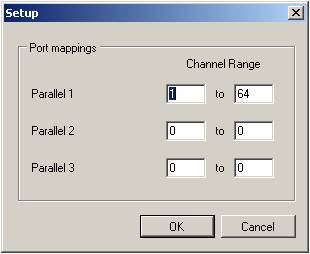
This demo assumes an Olsen 595 as the control board. Scroll through the “Available Plugins” list box, select Olsen (or your controller), select the “Use” button (or double click the plugin). The selected plugin should now appear in the “Plugins in Use” list box. Select the device in the “Plugins in Use” list box and update your channels (in this example I updated the two textboxes to show the starting channel is 1 and the ending channel is 64). Select the “Plugin Setup” button and you should get the Parallel Port Setup dialog box, Figure 6 (each controller has a different dialog box so if you use something other than a Grinch or a 595, yours will look different).
Figure 6: Assigning channels to parallel ports
Assign the channels to the correct parallel port and select the “OK” button. Your Sequence Mapping Plugin dialog box should now look like Figure 7.
Figure 7: Plugins assigned to the program and the correct port
If you have multiple controllers, add each of them one at a time by adding them from the “Available Plugins” list box to the “Plugins in Use” list box, update the channel count, and set up the plugin. Repeat the process until you have all channels and controller types set up.
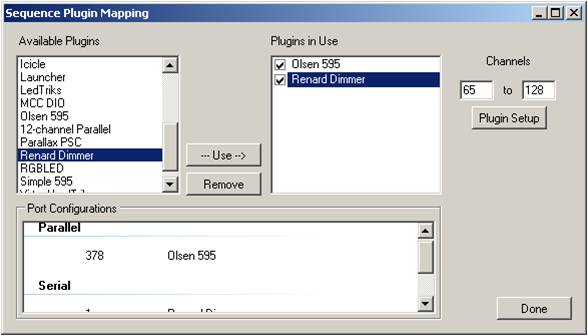
For tutorial purposes, assume we have channels 1 through 64 on an Olsen and channels 65 through 128 on a Renard64. After completing the Olsen plugin as shown in Figure 7, select the Renard plugin and set the channels to start at 65 and end at 128. Set up the plugin similar to what we did for the Olsen (Renards are different from the Olsens and fixing up the plugin for the Renard is covered in a different tutorial). When done properly, the Sequence Plugin Mapping dialog box will look similar to Figure 8 (note the Olsen port assignment is on top and the Renard port assignment is below it).
Figure 8: Assigned plugins for multiple controllers
Select the Done button. You should now be looking at the Program Management dialog box.
Setting Cross-fade
There is an option available in managing your program and that is to cross-fade your sequences. You DO NOT need cross-fading to run a program. This is an advanced feature that you can use after you are comfortable with standard sequences. If you choose to not use cross-fading, leave the parameter set to 0 (zero) seconds.
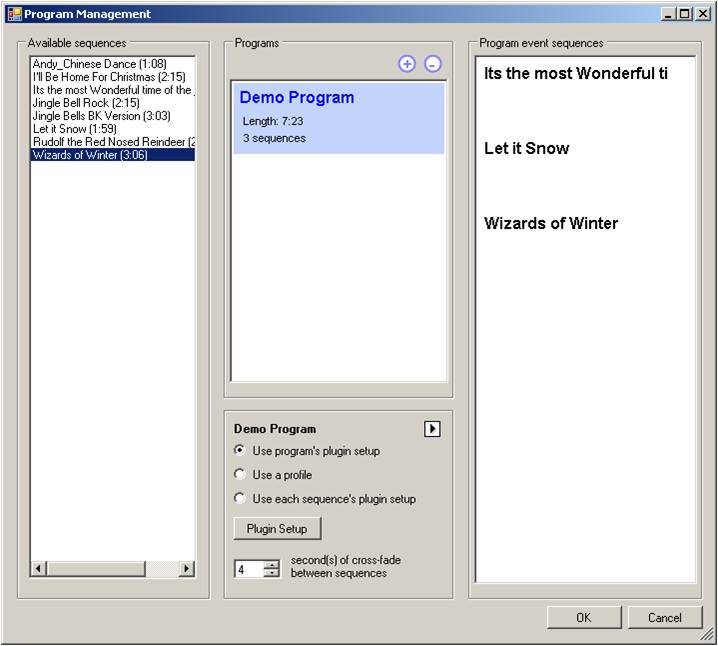
Using the cross-fade creates a transition between songs in your program. Specifically, it fades-out the ending song concurrently with fading-in the next song. So if you wanted a 3 second transition from each ending song to the next song, both lights and music, you would set cross-fade to "3".
For this tutorial, assume we wanted a four second, simply set up the Cross-fade text box to "4". Remember, this is a universal setting; therefore you cannot assign it to individual songs, it applies to all songs in the program. After setting the cross-fade, your dialog box should look like Figure 9.
Figure 9: Completed program to include cross-fading
Saving the Program
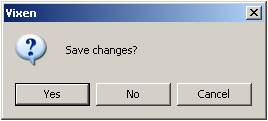
You are now ready to close and save the program. Select the OK button. You should get the save changes dialog box shown in Figure 10. Select Yes. You have now created and saved your program.
Figure 10: Close and save the Program
