Importing a Sequence from LOR: Difference between revisions
Jump to navigation
Jump to search
No edit summary |
No edit summary |
||
| Line 9: | Line 9: | ||
<br clear=all> | <br clear=all> | ||
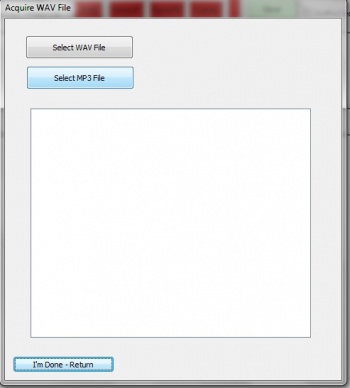
[[File:Acquire-Wav-File-HLS.jpg|thumb|Figure 11-9]] | [[File:Acquire-Wav-File-HLS.jpg|350px|thumb|Figure 11-9]] | ||
*Select the Wav or MP3 file and then select "I'm Done, Return." Once it has processed, a notification window will appear stating the save is complete (see Figure 11-9). Click OK to return to the main HLS window. | *Select the Wav or MP3 file and then select "I'm Done, Return." Once it has processed, a notification window will appear stating the save is complete (see Figure 11-9). Click OK to return to the main HLS window. | ||
<br clear=all> | <br clear=all> | ||
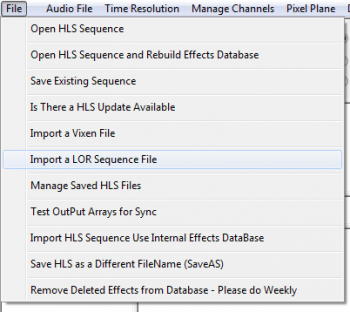
[[File:File-import-LOR-HLS.png|thumb|Figure 11-10]] | [[File:File-import-LOR-HLS.png|350px|thumb|Figure 11-10]] | ||
*Click File, Import a LOR Sequence File. Then navigate and select the appropriate LOR sequence for the audio just added to the HLS sequence. Also select the HLS sequence that was created. It will ask to overwrite. Select Yes. Once OK has been clicked, the conversion will begin (see Figure 11-10). | *Click File, Import a LOR Sequence File. Then navigate and select the appropriate LOR sequence for the audio just added to the HLS sequence. Also select the HLS sequence that was created. It will ask to overwrite. Select Yes. Once OK has been clicked, the conversion will begin (see Figure 11-10). | ||
<br clear=all> | <br clear=all> | ||
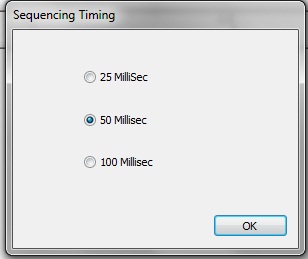
[[File:Sequencing-Timing-HLS.jpg|thumb|Figure 11-11]] | [[File:Sequencing-Timing-HLS.jpg|350px|thumb|Figure 11-11]] | ||
*Next will be a prompt to select a sequence timing interval (see Figure 11-11). It may be helpful to match the timing interval of the sequence being imported. | *Next will be a prompt to select a sequence timing interval (see Figure 11-11). It may be helpful to match the timing interval of the sequence being imported. | ||
<br clear=all> | <br clear=all> | ||
Revision as of 04:47, 24 March 2013

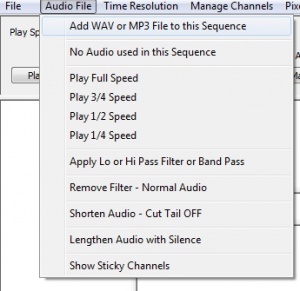
- As with any sequence, first, an audio file must be loaded in either wav or mp3 format (see Figure 11-8).
- Next the sequence name must be identified. Click OK. Then save the sequence in the suggested folder hierarchy:
- Each sequence created will create additional files, therefore, it is an excellent practice to make a sub-folder under the "HLS\Sequences" folder for each new sequence created. For example:
- HLS\Sequences\MyLorSequence
- Each sequence created will create additional files, therefore, it is an excellent practice to make a sub-folder under the "HLS\Sequences" folder for each new sequence created. For example:

- Select the Wav or MP3 file and then select "I'm Done, Return." Once it has processed, a notification window will appear stating the save is complete (see Figure 11-9). Click OK to return to the main HLS window.

- Click File, Import a LOR Sequence File. Then navigate and select the appropriate LOR sequence for the audio just added to the HLS sequence. Also select the HLS sequence that was created. It will ask to overwrite. Select Yes. Once OK has been clicked, the conversion will begin (see Figure 11-10).

- Next will be a prompt to select a sequence timing interval (see Figure 11-11). It may be helpful to match the timing interval of the sequence being imported.
- A counter will show the status of the channel import process. Once complete, notification will be provided of the channels successfully converted into HLS. A prompt will appear to shutdown HLS to convert RGB channels (if any are present).
- Restart HLS (if needed) and open the sequence.
- Use channel manager to set up channels, configure groups, or add or delete channels.
| HLS User Manual and Reference Guide | ||
|---|---|---|
| Previous Page | Current Chapter | Next Page |
| Importing a Sequence from Vixen | Chapter 11: Importing and Exporting Data and Sequences | Sharing HLS Sequences |