Setting up HLS Channels
Introduction
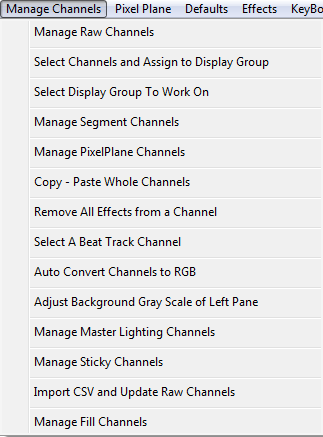
HLS Channels are controlled using the Manage Channels Menu at the top of the screen. See figure 3-1. While there are many functions on this menu, this document will mainly focus on the first option: Manage Raw Channels. Select this option to add and manipulate the raw channels associated with the sequence you are working with.
Important: If you plan to use a time resolution that is different than the default (50 msec), it MUST be set BEFORE you add any channels. Once you add channels, this time resolution CANNOT be changed.
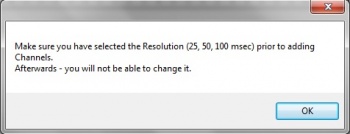
Next we will set up HLS Channels. Click on the Manage Channels tab at the top of the page and then click on Manage Raw Channels. At this point you will see a message reminding you to choose your time period resolution before you continue (see Figure 3-2). Next, click on the OK button.
Adding Basic HLS Channels
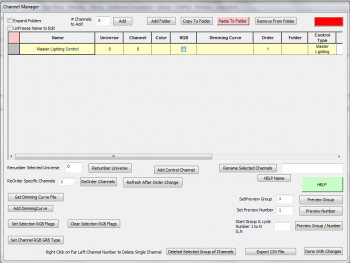
The Channel Manager screen will now as appear (see Figure 3-3). This is where we will add and configure HLS channels.
- HLS Channels are not the same as channels on a controller. HLS channels can represent a strand of incandescents or LED's, a "super string" of 3 light colors connected to the same object, a dumb RGB item, a single pixel, or a plane of pixels. This versatility is one of the features that sets HLS apart from some other sequencers.
- Output channel configuration is handled in the "Output" section of HLS and cannot be setup from the Raw Channel Manager.
To add channels:
- In the # of Channels to Add field, type the numeric value of number of channels to add.
- Click the Add button to create the channels.
Naming Channels
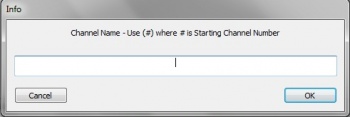
HLS will pop up a window asking for the common name for the channels (See Figure 3-4). You can enter anything in the blank and HLS will auto-number the channels, starting at 1. If you would rather NOT start at 1, you can input a different number in parenthesis. For example, to add channels starting with number 15, you could enter Chan(15) into the box. Hit Enter when complete.
Changing the Assigned Universe
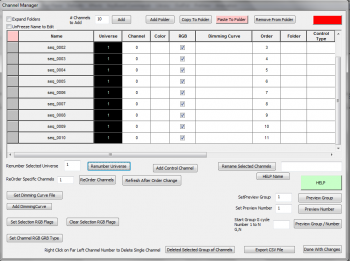
When adding channels, HLS automatically assigns them to Universe 0. Any channels assigned to Universe 0 will NOT output to controllers. If you'd like to, you can go ahead and assign channels to a universe. Or, if you prefer, you can do this when you are ready to set your channels up for output.
- In the example of Figure 3-5, 10 HLS channels have been added.
- To change them to Universe 1:
- Select all channels to change by clicking on the top channel (inside any box) and drag the mouse cursor down until all channels are selected.
- Enter the number one into the Renumber Selected Universe field.
- Click the Renumber Universe button.
- Note: Some channels will always be Universe 0. Channels like beat tracks, pixel planes, lighting channels, and segments are not designed for output. These types of channels will be discussed further in the guide.
Applying Colors to Channels
Setting a color for an HLS channel is important as it is the color that appears in the sequencer as you add effects and is also used in the Display Preview.
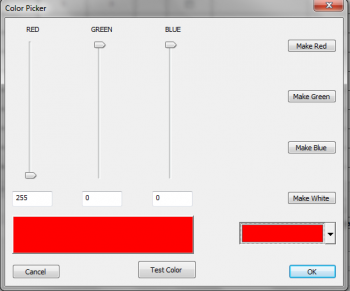
- In the top right corner, there is a color block. Click it to bring up the Color Picker (See figure 3-7).
- Once the Color Picker is open, you can easily set it to one of the more common lighting colors or you can click the drop down box in the bottom left to choose any color you like.
- Once you have selected a color, click OK to use it.
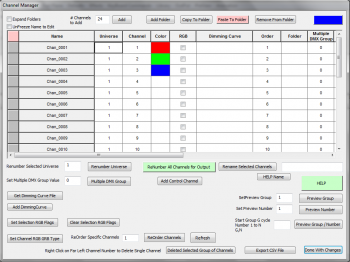
- Right-click in the Color column of any channels you want to be demonstrated with that color. (See figure 3-8.)
- Hint: To save time, choose one color at a time and set all same-colored channels at the same time before switching to another color.
Simple Renaming
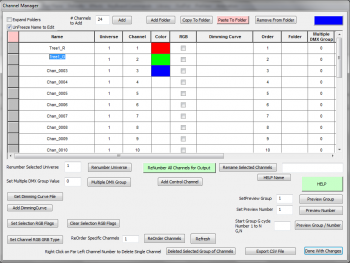
Generally, you won't want to keep a bunch of channels with the same name. Or you may want to make minor changes to names as you go along. In the example shown in Figure 3-9, the first channel has been renamed and the second channel is in process of being renamed.
- First, you MUST check the UnFreeze Name to Edit box in the top left.
- Once names are unlocked, click into the field and type a new name.
- Group renaming, using folders, moving items, and other complex tasks are in the Advanced Channel Management section.
| HLS User Manual and Reference Guide | ||
|---|---|---|
| Previous Page | Current Chapter | Next Page |
| Chapter 2: Creating a Sequence | Chapter 3: Channel Management | Advanced Channel Management |