Lets see your DIY Cutouts

Braveit1

Supporting Member
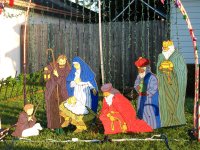
I noticed that noone has posted any pictures of cutouts. I though I should post some of mine. This is the Nativity sceen I created last year from OSB and acrylic poster paint. Held up good all year. This year I will be changing the display to something different so I will not be using them. I'll post pictures of this years cutouts when they are complete, until then lets see yours!

Videos at http://www.youtube.com/mdkelly1
 

Attachments

  • Nativity.jpg
    Nativity.jpg
    303.3 KB · Views: 700
Last edited:
Braveit1,
You made those yourself? Holy Smokes. WOW. That is some fine work. Great Job. Maybe after the display season you could write up a How To for cutouts?

Mike,
Some fine work there as well. Get your pencil sharpened for next year also!
 
Those certainly beat the only plywood cut-out template in the wiki (not that it would take much to do that). Very nice work!!!
 
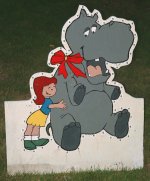
This my Hippo For Christmas plywood cutout.

album.php


Currently it uses a couple of mini-strings to light it,
but that didn't work so this year it will be spot lighted during it's song.
 

Attachments

  • hippo-pic1am.jpg
    hippo-pic1am.jpg
    139 KB · Views: 208
Braveit1,
You made those yourself? Holy Smokes. WOW. That is some fine work. Great Job. Maybe after the display season you could write up a How To for cutouts?


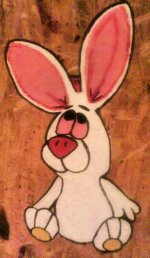
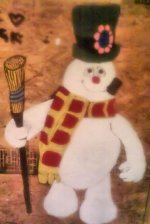
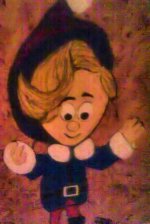
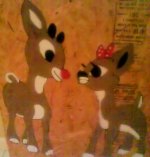
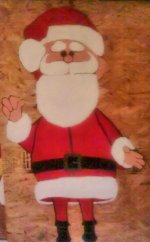
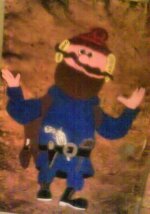
Thanks. This year I have made cutouts from the Rankin/Bass Christmas specials. It's funny because I did alot of the same charactors that Mike (oldcqr) did. They are almost complete. Most are fully painted and just need to be outlined and cut. Last year I did the outline first, cutout next and then painted. This year I tried to outline and paint first and cut last. I think this will help me avoid cutting mistakes. I know I'll still have to "touch up" some areas.

Mike, Great work. Glade to see someone else puts effort into non store bought decorations. Years ago when I was a kid my family did cutout from Charlie Brown's Christmas and yours brought back fond memories. That's what Christmas is all about!

I have attached the 'uncomplete' crappy cell phone pics from some of this years display.
 

Attachments

  • HocusPocus.jpg
    HocusPocus.jpg
    89.9 KB · Views: 653
  • Frosty.jpg
    Frosty.jpg
    64.1 KB · Views: 185
  • Hermy.jpg
    Hermy.jpg
    96.6 KB · Views: 154
  • Rudolph.jpg
    Rudolph.jpg
    82.6 KB · Views: 153
  • Santa.jpg
    Santa.jpg
    63.7 KB · Views: 144
Last edited:
All awesome cutouts!

I had planned on doing a bunch of cutouts this year but I just didn't have the time to put into it because I have been trying to get my first year of blinky flashy going instead. Maybe next year.

I have very little artistic ability. Just curious...are these original designs? Did you do them freehand or use some sort of template or projector?
 
Last edited:
Braveit1,
Maybe after the display season you could write up a How To for cutouts?

Mike,
Get your pencil sharpened for next year also!

My DIY Section on cutouts. There are 2 articles in there:

Make your own Wooden Luminaries
Making Wooden Cut-Outs

On tap for next year is an article on how to make your own full-sized patterns.

Also on tap for next year: The other 18 or so cutouts I didn't have the wood to complete ;)


These are great cut-outs!! My sleigh is looking pretty sad compaired to these:)

They do sound like great ideas for the newsletter:) Do You mind if I borrow the how-tos off your site for the newsletter?
 
All awesome cutouts!

I had planned on doing a bunch of cutouts this year but I just didn't have the time to put into it because I have been trying to get my first year of blinky flashy going instead. Maybe next year.

I have very little artistic ability. Just curious...are these original designs? Did you do them freehand or use some sort of template or projector?

The images I used were off of a google image search. Just printed them out as a reference. I don't have a projector and didn't want to spend the time with tracing paper. I have since read oldcqr's post and relized I could have primed the OSB before drawing and painting. WDITOT! duh! Oh well maybe next year.
 
These are great cut-outs!! My sleigh is looking pretty sad compaired to these:)

They do sound like great ideas for the newsletter:) Do You mind if I borrow the how-tos off your site for the newsletter?

I prefer if they come to the website to read the actual article, but you are free to excerpt/summarize/whatever and link back.
 
The images I used were off of a google image search. Just printed them out as a reference. I don't have a projector and didn't want to spend the time with tracing paper. I have since read oldcqr's post and relized I could have primed the OSB before drawing and painting. WDITOT! duh! Oh well maybe next year.

If I make another set from OSB (if these weather well), I am going to try priming the top side of the whole sheet with one coat of paint before I even do my first trace.

The different colors & roughness of the OSB made it very hard to see the 'outer' lines I traced to do my cutting. I found myself taking 20-30 minuets going over a whole sheet filling in the lines with a marker that didn't trace very well.

Once I get them cut out, then I'll give em the other 3 coats (2 on the back 1 on the front), before tracing the inner 'paint' lines.

I don't have any artistic ability either, that's why I use full-sized templates :). One of my tasks for next year is to write up the DIY article on my methods to create one. I promise you'll be amazed how easy it is.
 
After doing two different methods I think the best way to go about it is:
1) Prime your boards. It doesn't matter if you use OSB or plywood you will be able to see your lines better if you prime and it will also cover up the stamping on the wood.
2) Draw your outlines. Use a projector, tracing paper, or free hand. What ever skill you choose.
3) Darken your lines. It'll make it easier to cut.
4) Cut. You can use a jig saw, rotor saw, etc. Cutting will sometimes cause splinters on OSB so it is better to cut first and paint second. Otherwise you will have to re-touch your image.
5) Paint. Two coats may be needed for lighter colors but priming should have helped. Don't worry about making lines straight. You can fix it later when outlining.
6) Outling. You can use paint but I perfer a paint marker. I use the 'Tester' brand found at a craft store. I have also used those black mega sharpies with some success. The sharpies work better on painted portions than plain wood. Use a well vented room because of the fumes. :)
7) Finish. You can choose to finish your cutout by painting the edges or covering with a clear finish. I like to change my theme each year so I skip this step. The paint holds up just fine for the two months it is on display in FL but other states may very depending on rain/snow fall and sun.
8) Step back, have a beer and enjoy your hard work. Some may just want to skip to this step right away.

Have fun.
 
Back
Top