10' Megatree
Introduction
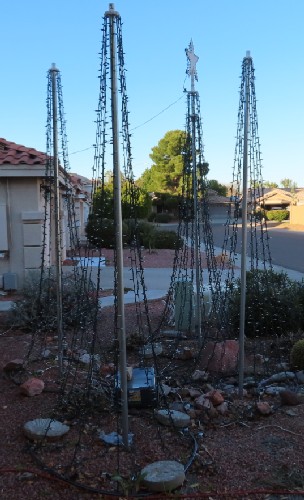
Here's an economical 10 foot Megatree that's simple to build and produces a nice result. My design is for 8 strands/circuits around the circumference, but you could easily add more. You could also easily build a taller Megatree by linking pipes together to make a longer "trunk". Finally, I recommend installing Megatrees with Sleeves.
Materials and Tools
- 10 foot long 1½ inch EMT pipe
- T-post
- T-post driver, or better yet, use Sleeves for installation
- 12½ feet of ½ inch polyethylene drip irrigation distribution tubing
- Polyethylene drip irrigation coupling
- 4 inch x 4 inch piece of scrap wood or plywood, about ¾ inch thick
- Good quality outdoor penetrating paint
- Two 12 inch pieces of 1 inch PVC pipe
- Two 1 inch PVC pipe couplings* (cheaper) or PVC caps
- Eight hard wall plastic hooks
- Sharpie® permanent marker
- Eight strings of 100-count Christmas lights, 20+ feet lighted length
- A booklet of Ideal® or Klein® Tools adhesive wire markers
- Three pieces of 12 inch long back-to-back Velcro® strips
- rocks, pavers, stepping stones, or other suitable weights
I chose the EMT pipe because it is lightweight, economical, and a T-post fits nicely inside it. Check your pipe/T-post fit before buying to make sure the brands available to you give you the same slip-fit result.
- = You may want to put something such as a star on the top of the Megatree. If so, choose a coupling that slip fits onto the 1 inch PVC pipe on one end, and is threaded on the other end for attaching the decoration.
Construction
Form the irrigation tubing into a circle, joining the ends with the coupling. The circle will be about 4 feet in diameter. Set aside.
Cut the wood into a 4 inch diameter circle, then drill a 1¼ inch hole in the center. Paint the wood with a good quality exterior penetrating paint, to provide a good weather seal that will last for years. Set aside to dry.
Nail the hard wall plastic hooks evenly spaced around the outside perimeter of the wooden circle. The hook portion will hang slightly below the bottom of the wood. Use a Sharpie® to color one of the hooks differently from the rest of the hooks. You will use the marked hook to help orient the Megatree in the same direction each year.
Place a coupling/cap on one end of each of the 1 inch PVC pipes. You may cement the parts if desired, but it's not necessary. If you are making multiple Megatrees, use a Sharpie® to write a large number 1, 2, 3 etc. on the coupling/cap for easy identification. Insert the PVC pipe through the center hole of the wood, leaving the coupling/cap flush with the top of the wood, then place the 1 inch PVC pipe into the top end of the EMT pipe.
Label each light string by placing a Wire Marker on the plug, then insert the plug into the receptacle of the string. This helps sort out the tangle of wires later.
Find the center of each light string, 50 lights on each half. This will be easy to spot, as most lights will have three wires going from bulb-to-bulb; the center two lights will have only two wires going between them.
Hang one light string on each hook, the center two wires looped over the hook, 50 lights on each side of the hook.
Hook assembly with wires attached
Tie the light strings to the EMT pipe with Velcro® strips in about three places, to contain the tangle of wires.
Installation
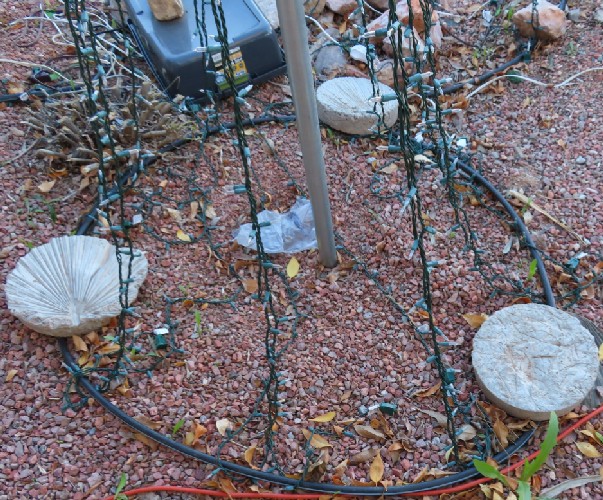
Place the circle of irrigation tubing on the ground, centered where the EMT pipe "trunk" of the Megatree will be.
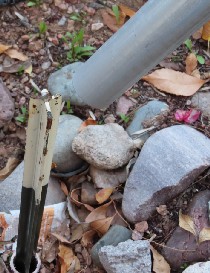
You can drive a T-post into the ground to hold your Megatree. However, I recommend you install the Megatree as described in the Sleeves article.
If you have a decoration to put on the top of your Megatree, attach it to the top of the Megatree before you place the Megatree onto the T-post.
Place the EMT pipe (with light strings attached) over the T-post; the Megatree should remain comfortably self-standing.
Find the plastic hook that you marked with the Sharpie® and orient it in the direction (e.g., North) you planned. Remove the Velcro® straps.
Sorting out each of the light strings, run both the plug and receptacle end of the light string under the irrigation tubing, proceeding around the circumference. Place weights on the irrigation tubing at intervals as you go to secure it in place. Surprisingly little securing is needed for the strings to stay in place for the season, usually about 3-4 weights should do it.
Your Megatree is now ready to plug in and display.
Taking it down
Now your season has ended, and you're ready to store your Megatree. Unplug each light strand and insert the plug into its receptacle. This helps reduce tangling of the strands. Pull the strings out from under the irrigation tubing and cluster them around the EMT pipe.
Being careful not to step on light bulbs on the ground, tie the light strings to the EMT pipe with Velcro® strips in 3-4 places, to contain the tangle of wires.
Lift the EMT pipe with light strings attached off of the T-post, remove the decoration from the top of the display if applicable/desired.
Remove the T-post, and if you used the Sleeve option, place the Debris Protector into the PVC pipe.
Storage
Store your T-post and irrigation tubing ring as you have planned.


