Using Nutcracker with a PixelPlane
Jump to navigation
Jump to search
Introduction
Nutcracker is a pixel effect building system developed by Sean Meighan which is cross-platform with a number of sequencers, including HLS. In February 2013, Nutcracker 3.0 was released, which moved from a web-based application to a software-based version in conjunction with xLights. The use of nutcracker is beyond the scope of this document, but you can read more at the following links:
- Download Nutcracker, view tutorials, etc.
- DIYC Wiki Documentation on Nutcracker
- DIYC Subforum on Nutcracker
Nutcracker Setup for HLS

- When you configure Nutcracker, you should consider setting up the Pixel objects with the same configuration as your physical objects (ie, pixel count, strands, etc). HLS will utilize Nutcracker effects built for objects with different characteristics, but you will get more desired results from matching up configurations.
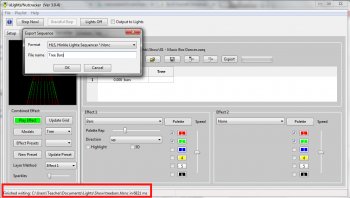
- Nutcracker exports to hlsnc files. Basically, once you have created your effect, click Export in nutcracker, choose HLS, name your effect, and click OK.
- Tip: Notice where Nutcracker is saving the export file by looking at the bottom of the window (see Figure 6-28 red highlight).
- This folder is set by clicking File -> Select Show Folder in Nutcracker/xLights.
Dropping a Nutcracker Effect Onto a PixelPlane
- Set the active display group to the one containing the PixelPlane you wish to drop the Nutcracker effect onto.
- Right click on the cell you wish to start the external effect, then select Add External PixelPlane Effect.
- A file dialog box will open. Navigate to the file exported by Nutcracker, select it, and click Open.
- The effect will be inserted into your sequence with the length that was created in the Nutcracker program.
- Note: If there are any previously created effects that occur before the nutcracker insert would end, HLS will stop the nutcracker effect early and butt it up to the next effect.
Using Start/Stop Markers for Adding Nutcracker Effects


- This method is used to add nutcracker effects to pixels or RGB channels that may not be in a formalized PixelPlane object.
- First, set the display group to be the channels you wish to add the effect to.
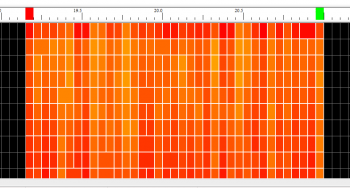
- Set start and end marks, which tell HLS how many cells to fill with the effect (see Figure 6-29).
- Right-click to set the start mark (red), and CTRL-Right-Click to set the end mark (green).
- Click Pixel Plane -> Drop External Pixel Plane Effect Onto RGB Channels.
- HLS will give a couple prompts about making sure your settings are correct. Then, select your Nutcracker export file and click Open.
- You will be prompted to make sure Start and Stop marks are set properly. Since you have already done this, click Yes.
- The effect will now be dropped onto the active channels within the start and stop marks (see Figure 6-30).
Adjusting the Size of a Nutcracker Effect
- Use good planning when creating your effects in nutcracker so that they are as long as you may need. It is easy to shorten the effect, but not lengthen it (without adjusting speed).
- Make your pixelplane channel with the nutcracker effect active.
- Just like any other effect, click the last cell in the effect and moving it in or out to shorten/lengthen.
Note: Once you reach the length of the effect data, it will no longer stretch.
- Just like any other effect, you can move its starting point by clicking the first cell and moving it.
Adjusting Speed of a Nutcracker Effect

- Sometimes, the nutcracker effect may move at a speed that may be too fast or slow for your sequence.
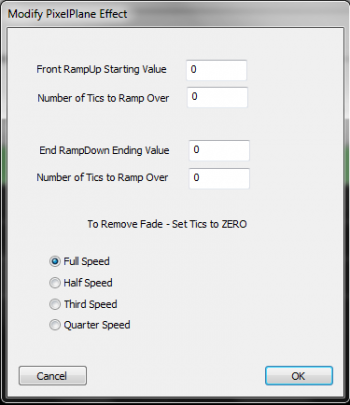
- To adjust the speed, right-click on the effect and select Modify this Effect (see Figure 6-31).
- You can add ramp values if you wish to start from one intensity level, bring the effect up, then bring the effect down.
- Ex.: To ramp up from 10% to 100% over a 5 cell time, set ramp up to 10, and tics to 5.
- Speed can be adjusted by selecting one of the speed choices.
- Tip: A slower speed means that the effect can now be lengthened to last a longer period of time.
- Once done, click OK.
| HLS User Manual and Reference Guide | ||
|---|---|---|
| Previous Page | Current Chapter | Next Page |
| The PixelPlane Editor: Creating Effects | Chapter 6: Creating and Using PixelPlanes | Fill Channels |