Ren-W Controller Heater
- In some very cold climates (well below 0 degrees F), you may encounter a problem whereby a controller may function fine above freezing, but when the temperature drops below freezing, or even below zero, the controller ceases to respond. The problem is that either the Ren-W cannot "lock in" and capture a signal, which of course creates a communication problem or the temperature is outside the manufacturer's specs for proper operation. For example, the XBee radio is rated to -40C, which is pretty cold. But the MAX232 chip that Ren-W uses comes in multiple kinds, and the operating temperature specifications can vary widely. If the MAX232 ceases to function, communication to the controller cannot occur.
- Likewise, it's possible that components on the controller itself may cease to function when the environment is outside the operating temperatures of the components. The chips that control RS-485 communication, the H11AA1 optocoupler, the 18.432mhz oscillator, or perhaps even a PIC might not like very cold temperatures.
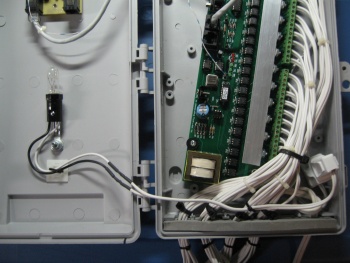
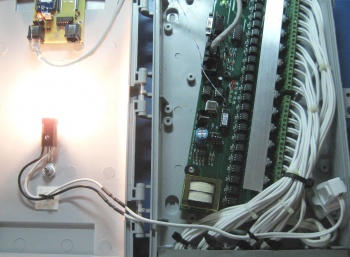
- The solution is simple: install a small heater bulb inside the controller box. The steps below outline one solution that is proven to work. In these examples, the heater was added to a Renard SS24 that was mounted inside a CG2000 case.
- Parts and Tools Needed
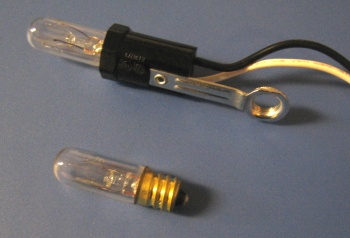
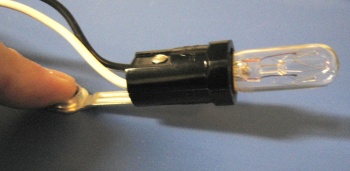
- Candelabra socket with a mounting bracket. Example: Servalite CS-10014-52U or CS-10014-5U. (Lowe's SKU# 75605 or SKU# 75602, about $2.50). This socket does not have any electrical connection to the mounting bracket.
- 15watt, 120vac tubular light bulb with candelabra mount. Example: Feit electric # BP15T4C/2. (Lowe's SKU# 111424, 2 for approx $4.00) These are quite small, about 2" long and 1/2 inch across.
- Length of SPT-1 or SPT-2 cord - see below for the length you need.
- A/C plug
- Zip ties, possibly heat shrink tubing or wire nuts
- 1/4-20 x 1/2" or similarly long screw, nut and 3 appropriately sized washers (Other screw sizes are okay such as 8-32 x 1/2", just keep them short so they don't contact anything when the cover is closed.)
- TOOLS: drill, screwdriver, pliers
- Instructions
- Step 1 - Flatten the bracket on the candelabra socket with a pliers. Leave it slightly bent so that when mounted, the bulb will be raised away from the case.
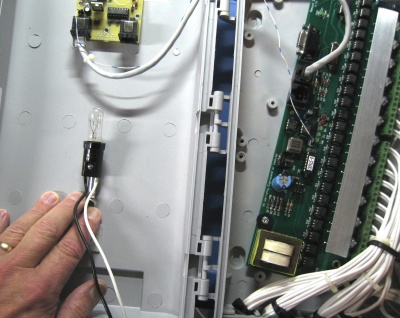
- Step 2 - Position the bulb in such place so that the bulb will provide the most benefit to the most components, yet away from any wiring. You want the bulb to be in free air and not physically touching anything. Mark the drill hole.
- Step 3 - Drill a hole the appropriate size for the screw chosen.
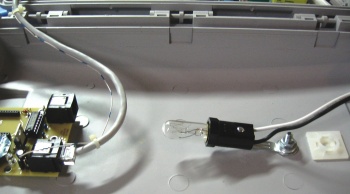
- Step 4 - Put a washer on the screw and insert the screw through the hole. Place another washer over the screw on the inside, then apply the candelabra bracket, followed by another washer and finally the nut. Tighten very snugly.
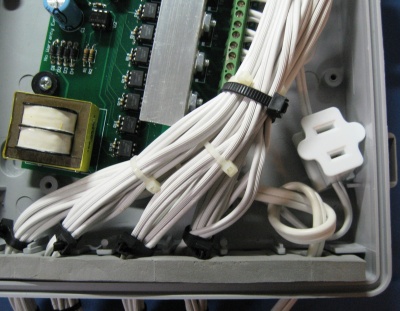
- Step 5 - Screw in the bulb, connect a piece of SPT-1 wire (without a plug attached) using either wire nuts or solder to the candelabra socket's leads, covering with shrink-wrap. The length of the wire you need is dependent on where you intend to plug the bulb into A/C power. In this example, an A/C pirate plug was attached to the connecting wire between the two 12-channels halves of the SS24 board. If you choose to plug the heater into an external plug outside the controller, then use a longer piece of SPT wire and fish it out of one of the holes in the bottom of the case.
- Step 6 - Apply the plug to the SPT wire, and plug it in.
- Other Helpful Ideas
- Heat rises, of course, so you might consider placing the controller on a 45-degree angle to the ground. In this example, doing so would help flow heat up to the Ren-W mounted near the top of the case.
- The candelabra base is also used for common 7watt night-lights, and you may find that these inexpensive lights are better for your installation. Of course, they're slighly larger (about 7/8" across) but their lower power may provide just enough heat. Night lights are also available in 4watt versions, too.
- Additional benefit: the availability of 15watts of light at the controller has also proven quite handy in the event you need to service the controller and/or display at night, replug in cables, etc.
Additional Ren-W Links
